Making a Game Part 2: Models for the Location
2014-06-11
In this article we will describe the process of creating the models for the location - geometry, textures and materials. This article is aimed at experienced Blender users that would like to familiarize themselves with creating game content for the Blend4Web engine.
Graphical content style
In order to create a game atmosphere a non-photoreal cartoon setting has been chosen. The character and environment proportions have been deliberately hypertrophied in order to give the gaming process something a comic and unserious feel.
Location elements
This location consists of the following elements:
- the character's action area: 5 platforms on which the main game action takes place;
- the background environment, the role of which will be performed by less detailed ash-colored rocks;
- lava covering most of the scene surface.
At this stage the source blend files of models and scenes are organized as follows:
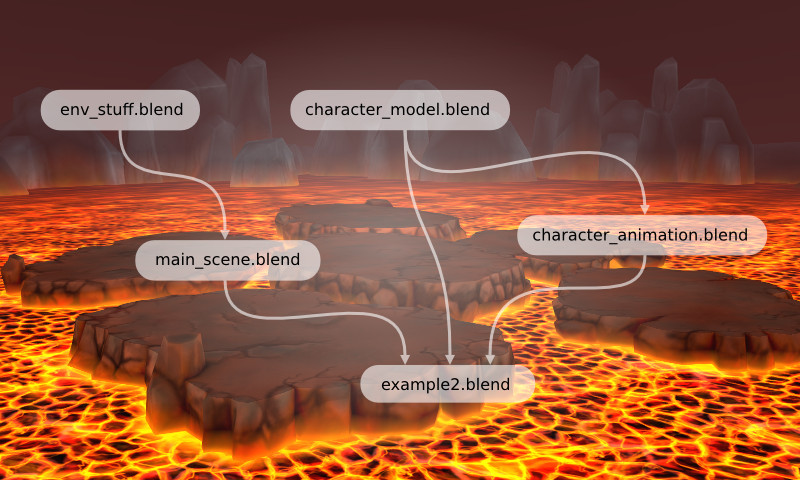
env_stuff.blend - the file with the scene's environment elements which the character is going to move on;
character_model.blend - the file containing the character's geometry, materials and armature;
character_animation.blend - the file which has the character's group of objects and animation (including the baked one) linked to it;
main_scene.blend - the scene which has the environment elements from other files linked to it. It also contains the lava model, collision geometry and the lighting seеtings;
example2.blend - the main file, which has the scene elements and the character linked to it (in the future more game elements will be added here).
In this article we will describe the creation of simple low-poly geometry for the environment elements and the 5 central islands. As the game is intended for mobile devices we decided to manage without normal maps and use only the diffuse and specular maps.
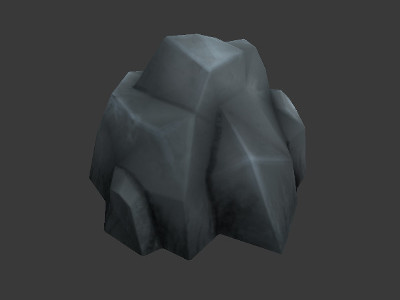
Making the geometry of the central islands
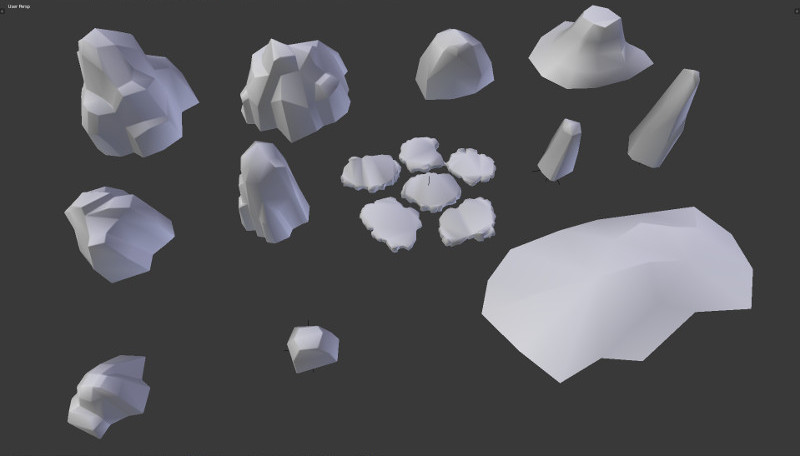
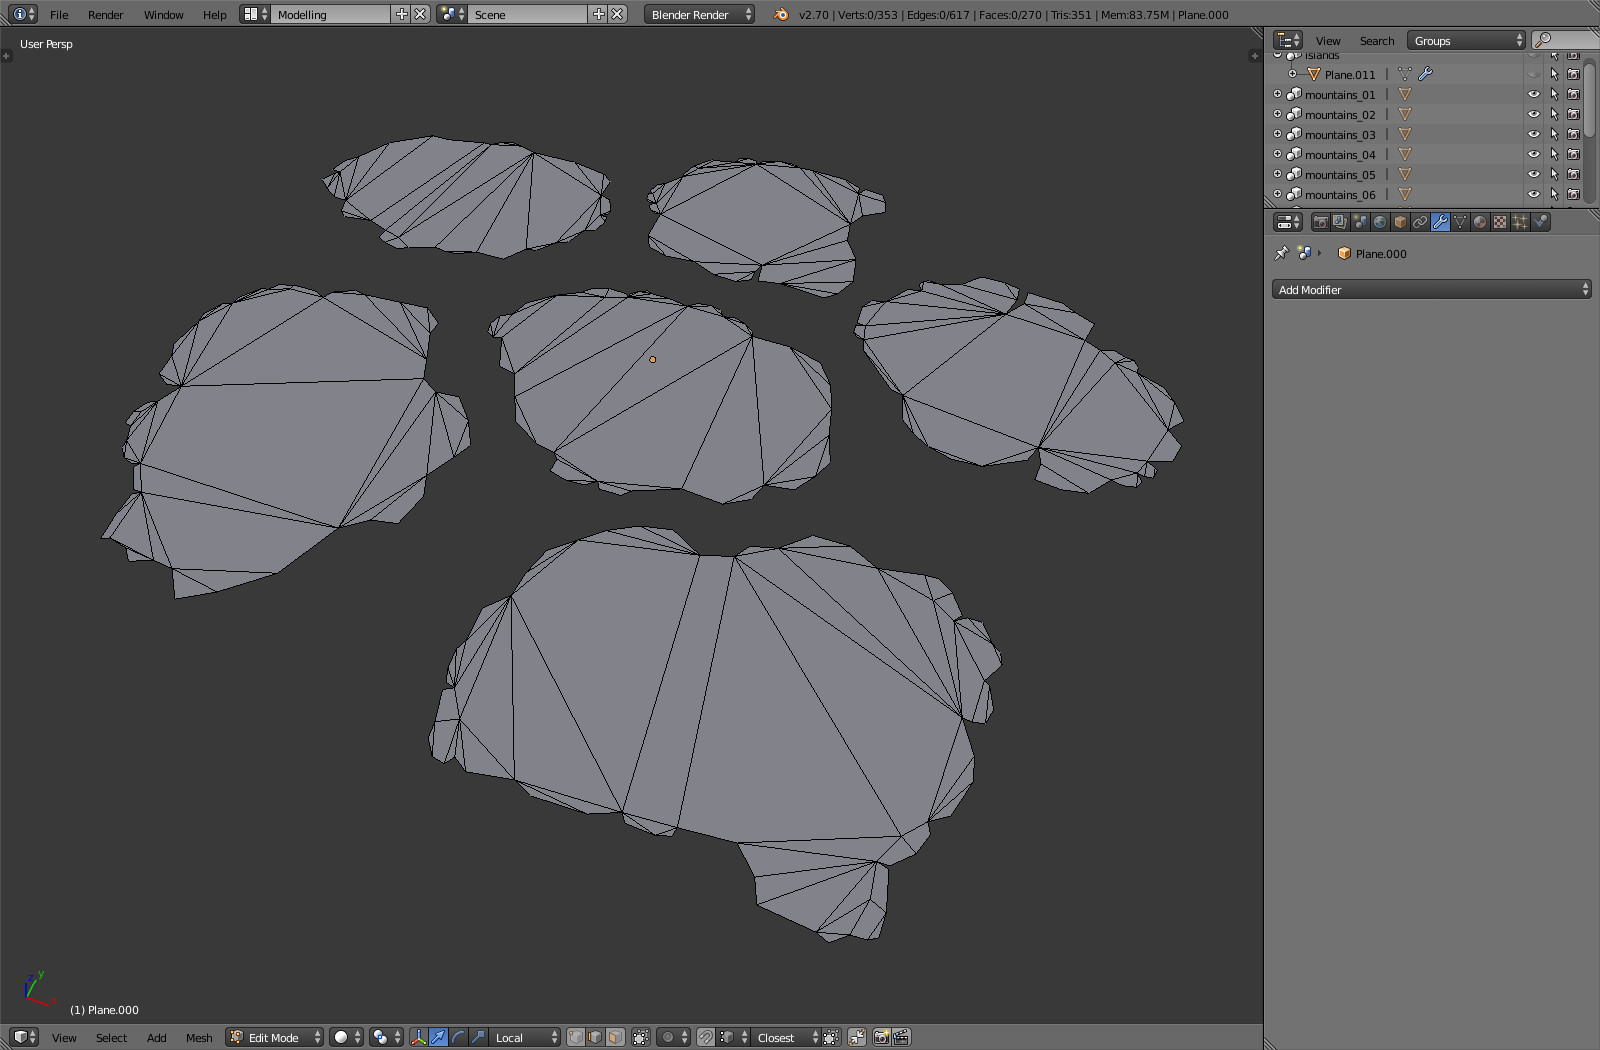
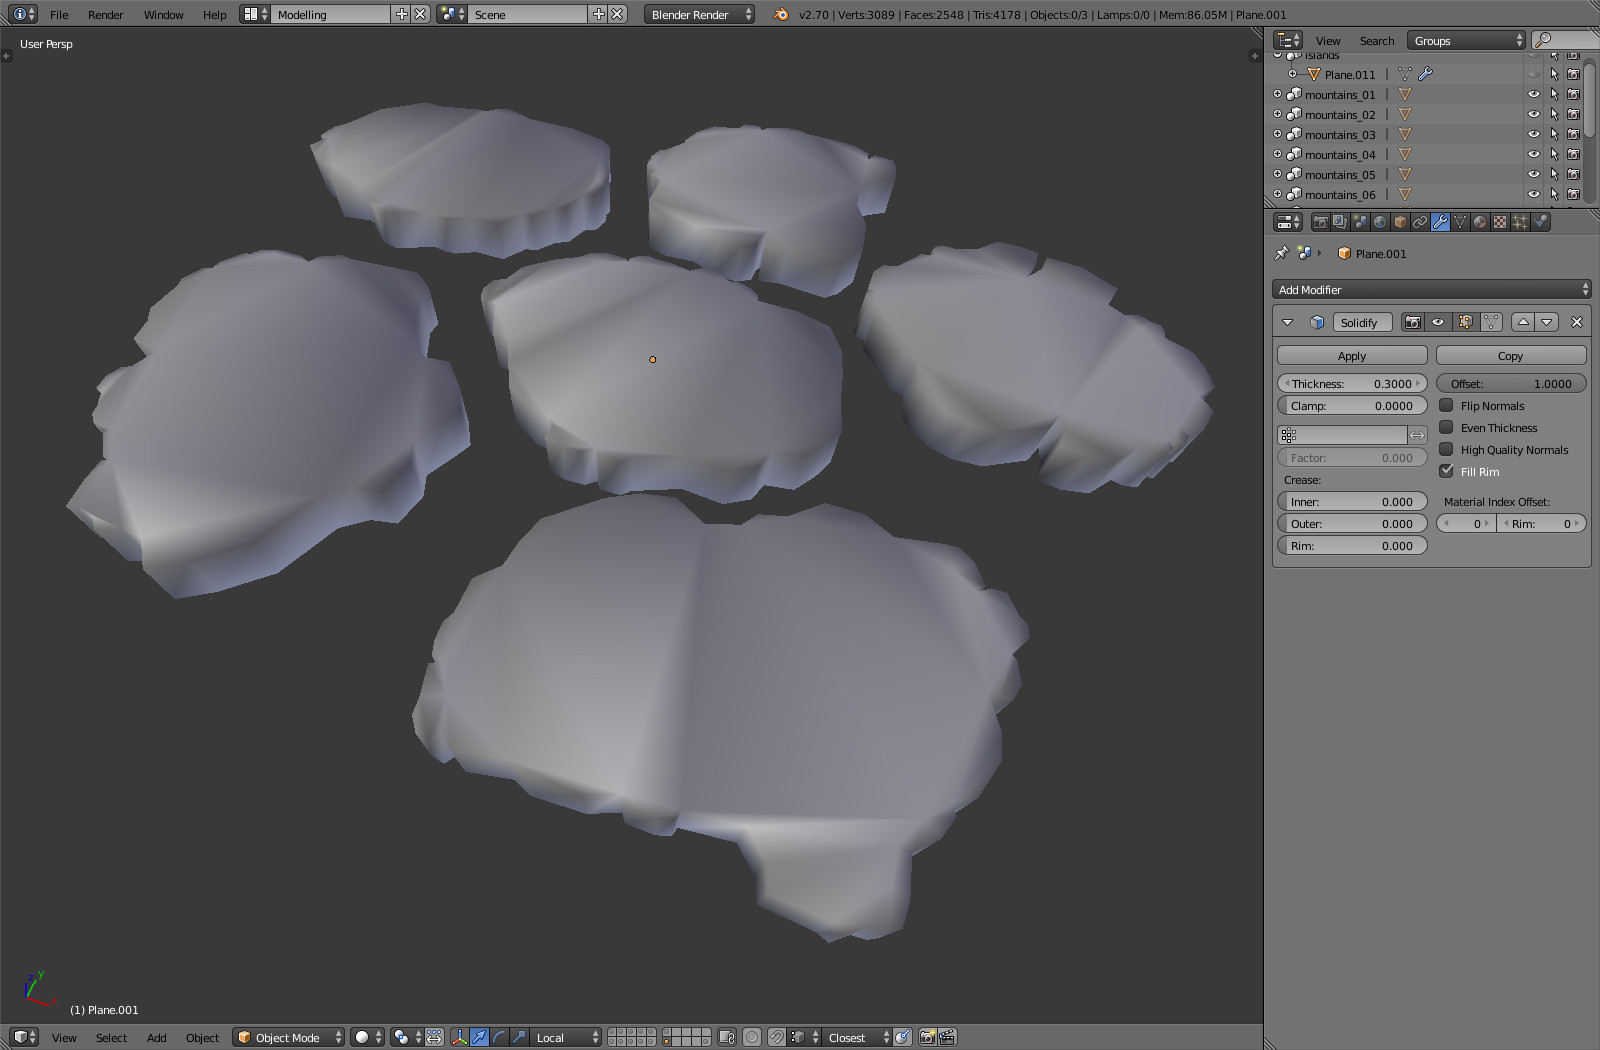
First of all we will make the central islands in order to get settled with the scene scale. This process can be divided into 3 steps:
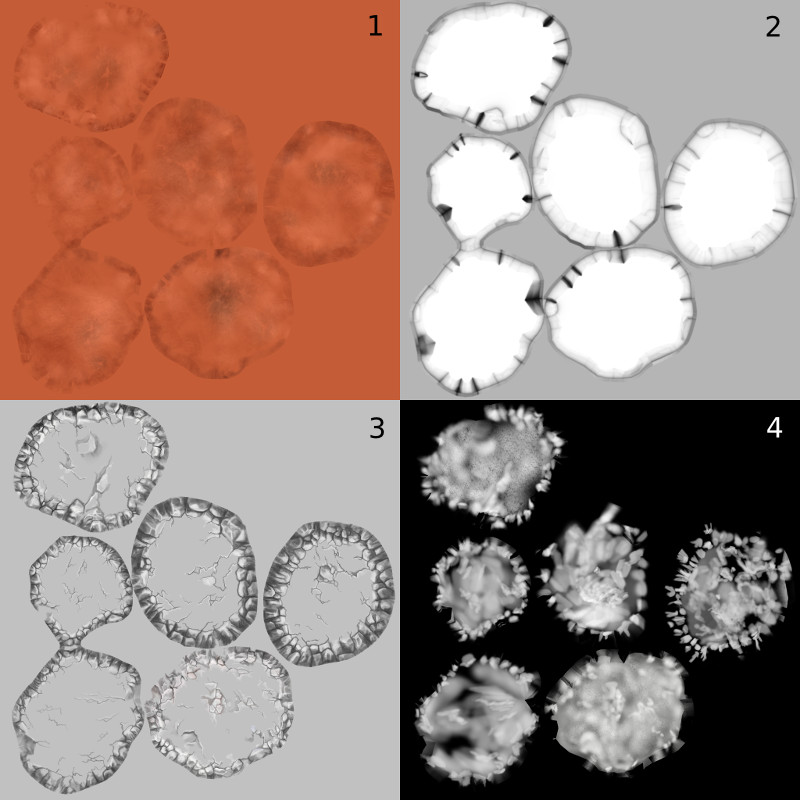
1) A flat outline of the future islands using single vertices, which were later joined into polygons and triangulated for convenient editing when needed.
2) The Solidify modifier was used for the flat outline with the parameter equal 0.3, which pushes the geometry volume up.
3) At the last stage the Solidify modifier was applied to get the mesh for hand editing. The mesh was subdivided where needed at the islands' edges. According to the final vision cavities were added and the mesh was changed to create the illusion of rock fragments with hollows and projections. The edges were sharped (using Edge Sharp), after which the Edge Split modifier was added with the Sharp Edges option enabled. As the result a well outlined shadow has appeared around the islands.
Note
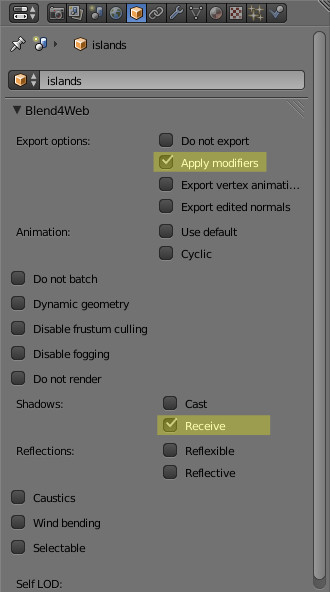
It's not recommended to apply modifiers (using the Apply button). Enable the Apply Modifiers checkbox in the object settings on the Blend4Web panel instead; as a result the modifiers will be applied to the geometry automatically on export.

Texturing the central islands
After the geometry for the main islands has been created, lets move on to texturing and setting up the material for baking. The textures were created using a combination of baking and hand-drawing techniques.
Four textures were prepared altogether.
At the first stage lets define the color with the addition of small spots and cracks to create the effect of a rough stony and dusty rock. To paint these bumps texture brushes were used, which can be downloaded from the Internet or drawn by youself if necessary.
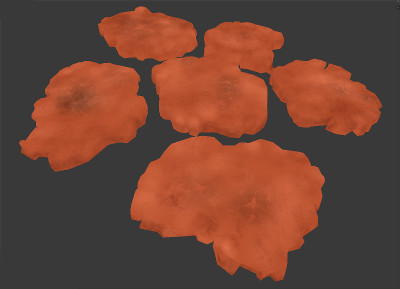
At the second stage the ambient occlusion effect was baked. Because the geometry is low-poly, relatively sharp transitions between light and shadow appeared as a result. These can be slightly blurred with Gaussian Blur filter in a graphical editor.

The third stage is the most work consuming - painting the black and white texture by hand in the Texture Painting mode. It was layed over the other two, lightening and darkening certain areas. Its necessary to keep in mind the model's geometry so that the darker areas would be mostly in cracks, while the brighter ones - on the sharp geometry angles. A generic brush was used with stylus pressure sensitivity turned on.
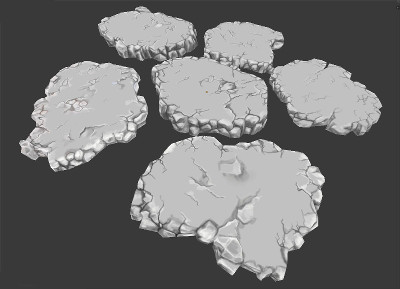
The color turned out to be monotonous so a couple of withered places imitating volcanic dust and stone scratches have been added. In order to get more flexibility in the process of texturing and not to use the original color texture, yet another texture was introduced. On this texture the light spots are decolorizing the previous three textures, and the dark spots don't change the color.
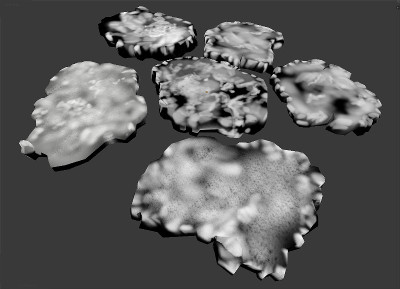
You can see how the created textures were combined on the auxiliary node material scheme below.
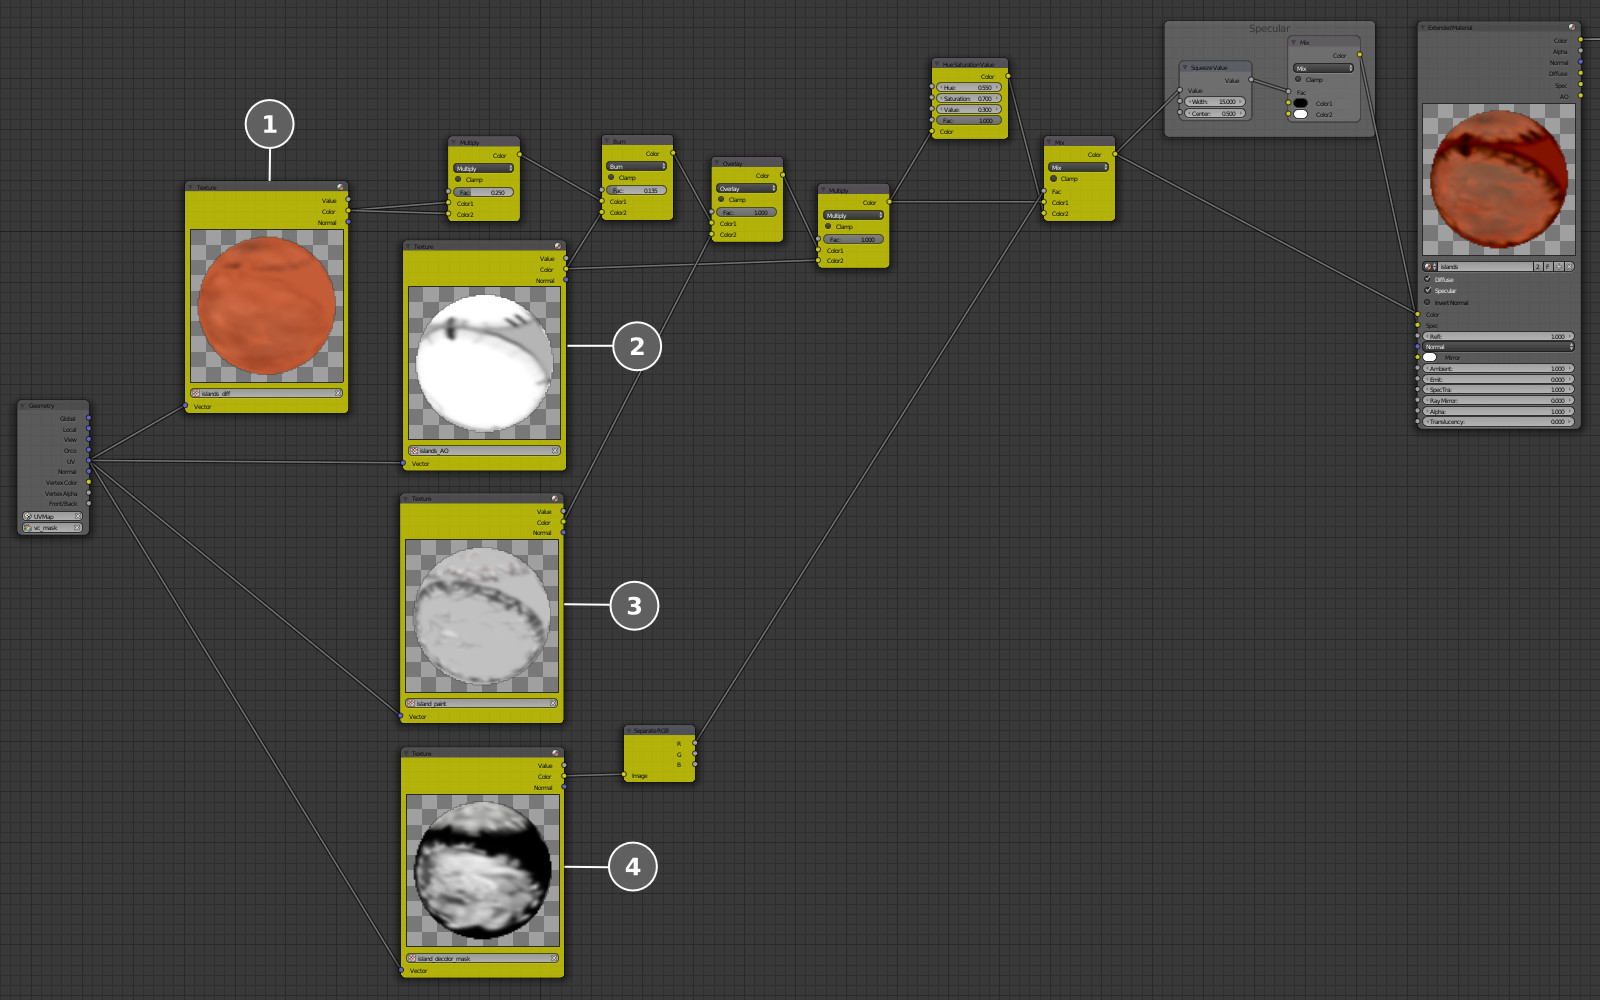
The color of the diffuse texture (1) was multiplied by itself to increase contrast in dark places.
After that the color was burned a bit in the darker places using baked ambient occlusion (2), and the hand-painted texture (3) was layered on top - the Overlay node gave the best result.
At the next stage the texture with baked ambient occlusion (2) was layered again - this time with the Multiply node - in order to darken the textures in certain places.
Finally the fourth texture (4) was used as a mask, using which the result of the texture decolorizing (using Hue/Saturation) and the original color texture (1) were mixed together.
The specular map was made from applying the Squeeze Value node to the overall result.
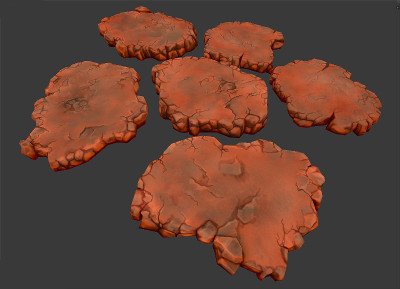
As a result we received the following picture.
Creating the background rocks
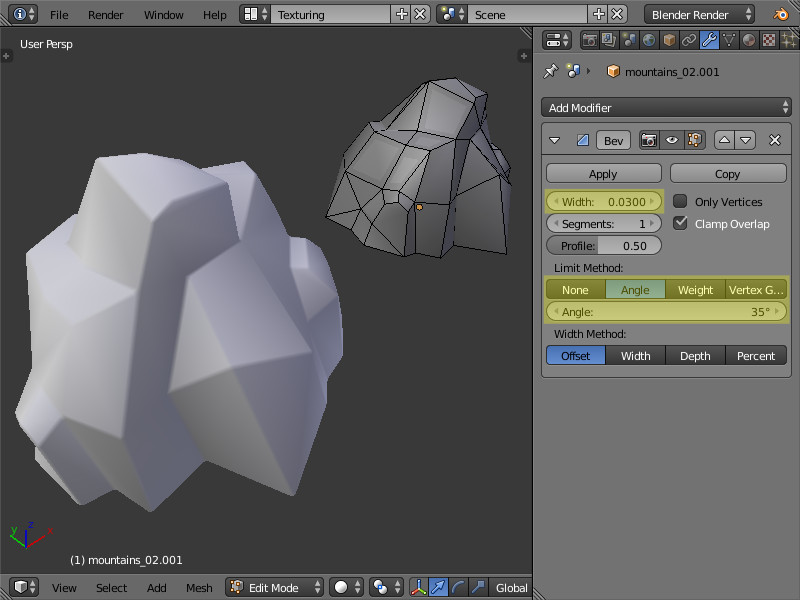
The geometry of rocks was made according to a similar technology although some differences are present. First of all we created a low-poly geometry of the required form. On top of it we added the Bevel modifier with an angle threshold, which added some beveling to the sharpest geometry places, softening the lighting at these places.
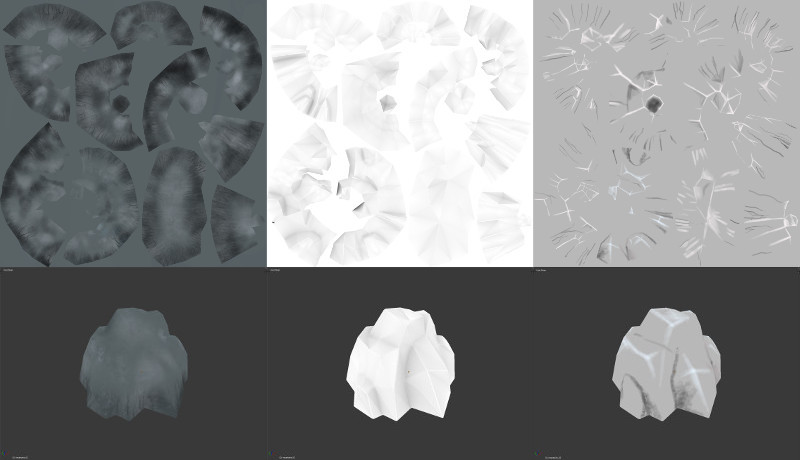
The rock textures were created approximately in the same way as the island textures. This time a texture with decolorizing was not used because such a level of detail is excessive for the background. Also the texture created with the texture painting method is less detailed. Below you can see the final three textures and the results of laying them on top of the geometry.
The texture combination scheme was also simplified.

First comes the color map (1), over which goes the baked ambient occlusion (2), and finally - the hand-painted texture (3).
The specular map was created from the color texture. To do this a single texture channel (Separate RGB) was used, which was corrected (Squeeze Value) and given into the material as the specular color.
There is another special feature in this scheme which makes it different from the previous one - the dirty map baked into the vertex color, overlayed (Overlay node) in order to create contrast between the cavities and elevations of the geometry.

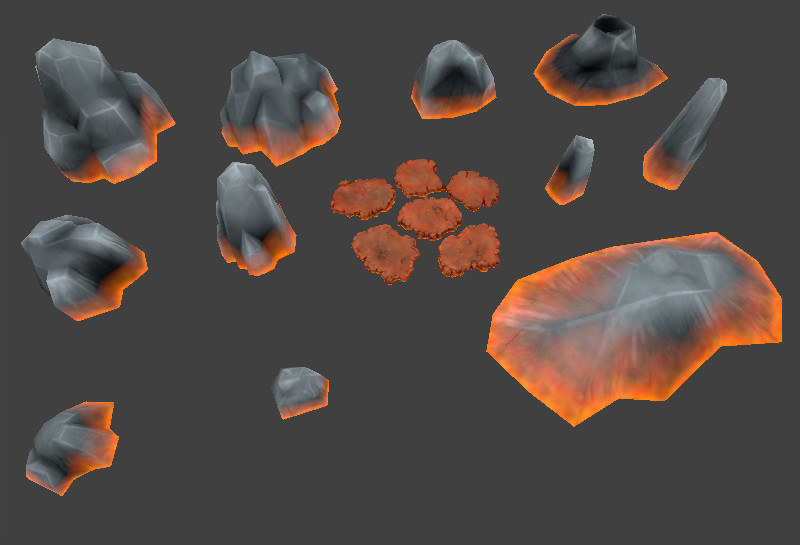
The final result of texturing the background rocks:
Optimizing the location elements
Lets start optimizing the elements we have and preparing them for displaying in Blend4Web.
First of all we need to combine all the textures of the above-mentioned elements (background rocks and the islands) into a single texture atlas and then re-bake them into a single texture map. To do this lets combine UV maps of all geometry into a single UV map using the Texture Atlas addon.
Note
The Texture Atlas addon can be activated in Blender's settings under the Addons tab (UV category).
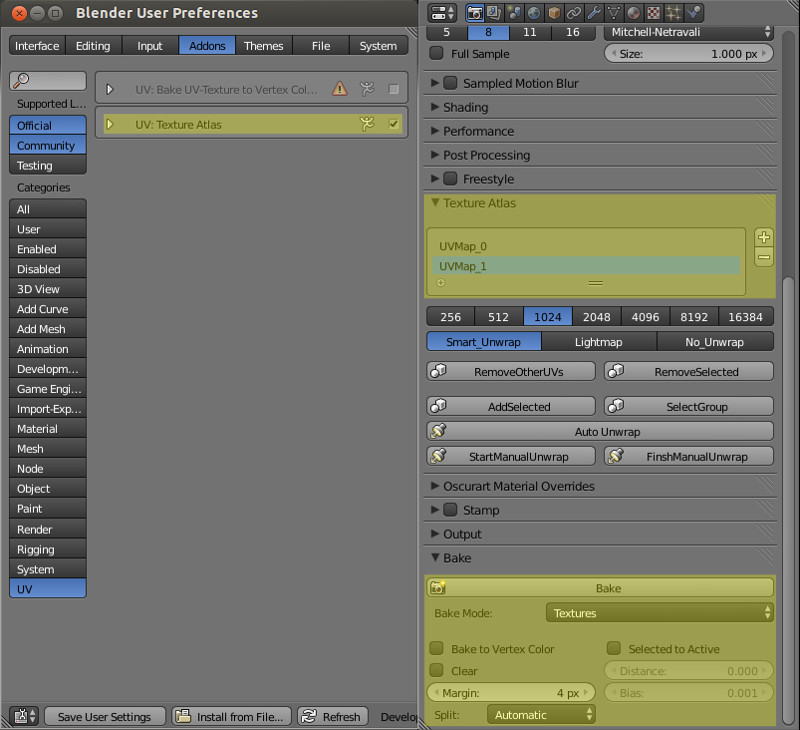
In the texture atlas mode lets place the UV maps of every mesh so that they would fill up all the future texture area evenly.
Note
It's not necessary to follow the same scale for all elements. It's recommended to allow more space for foreground elements (the islands).

After that lets bake the diffuse texture and the specular map from the materials of rocks and islands.
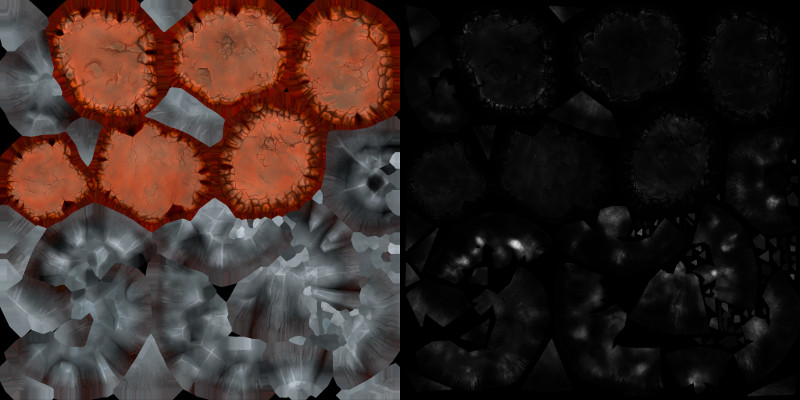
Note
In order to save video memory, the specular map was packed into the alpha channel of the diffuse texture. As a result we got only one file.
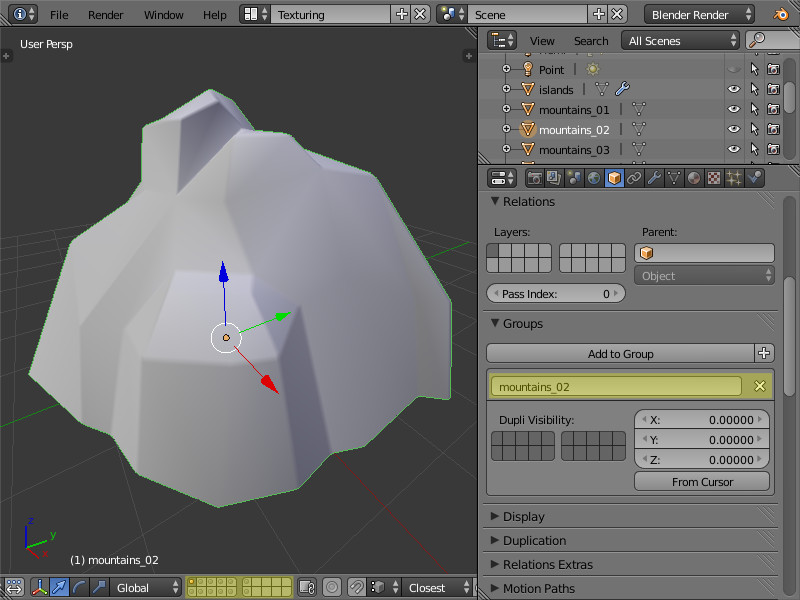
Lets place all the environment elements into a separate file (i.e. library): env_stuff.blend. For convenience we will put them on different layers. Lets place the mesh bottom for every element into the center of coordinates. For every separate element we'll need a separate group with the same name.
After the elements were gathered in the library, we can start creating the material. The material for all the library elements - both for the islands and the background rocks - is the same. This will let the engine automatically merge the geometry of all these elements into a single object which increases the performance significantly through decreasing the number of draw calls.
Setting up the material
The previously baked diffuse texture (1), into the alpha channel of which the specular map is packed, serves as the basis for the node material.
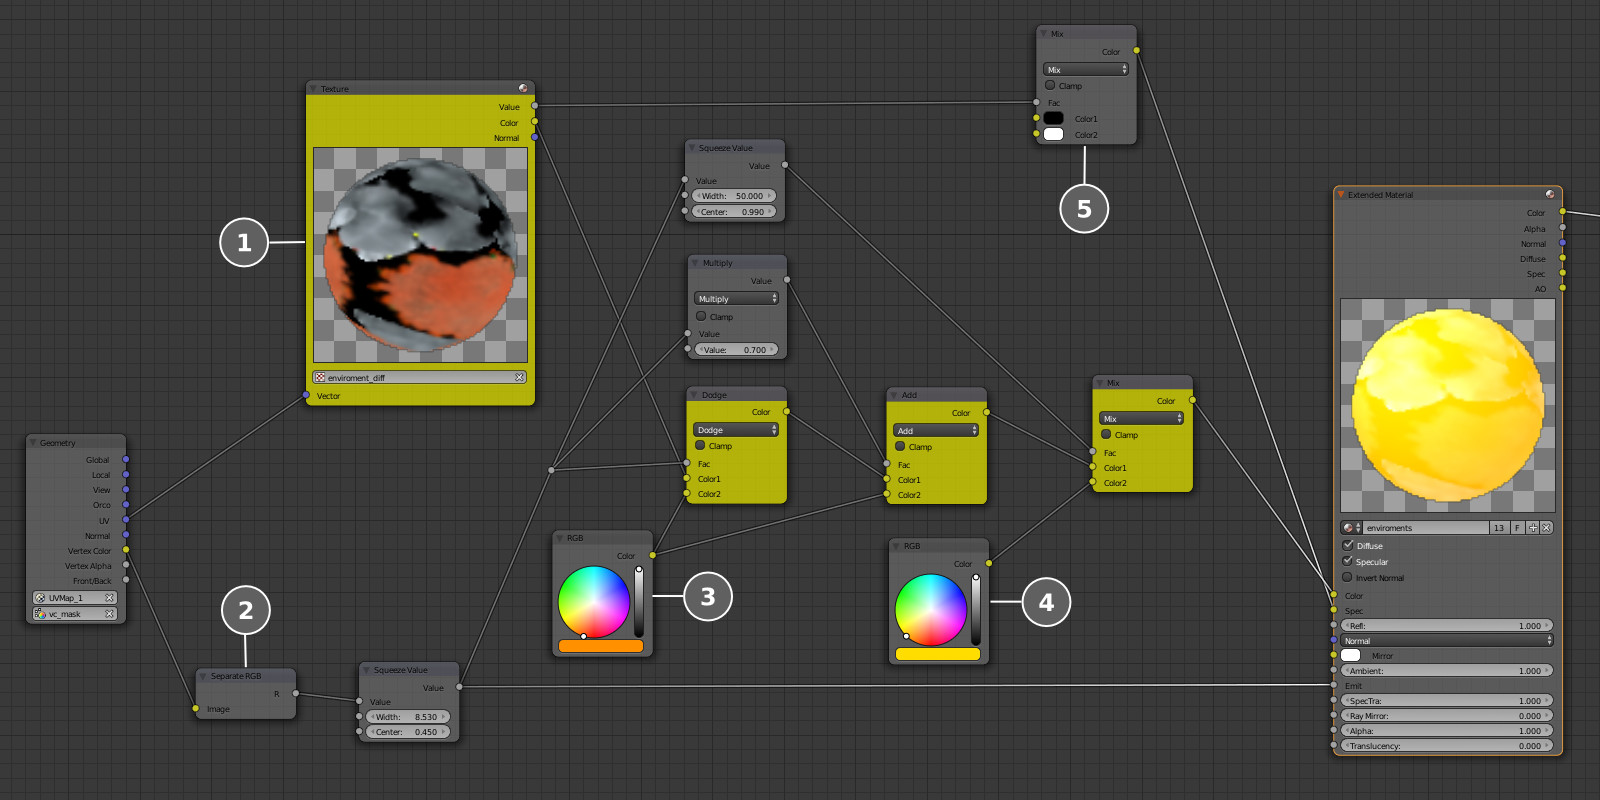
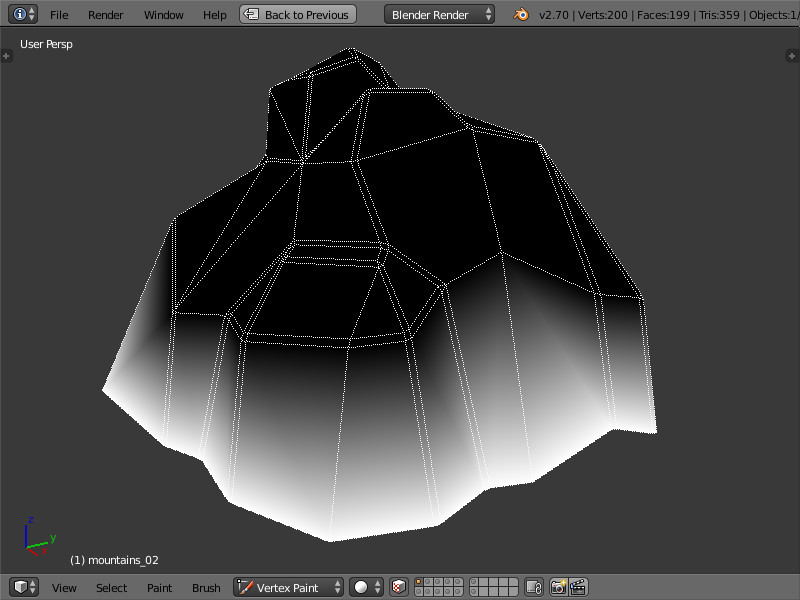
Our scene includes lava with which the environment elements will be contacting. Lets create the effect of the rock glowing and being heated in the contact places. To do this we will use a vertex mask (2), which we will apply to all library elements - and paint the vertices along the bottom geometry line.
The vertex mask was modified several times by the Squeeze Value node. First of all the less hot color of the lava glow (3) is placed on top of the texture using a more blurred mask. Then a brighter yellow color (4) is added near the contact places using a slightly tightened mask - in order to imitate a fritted rock.
Lava should illuminate the rock from below. So in order to avoid shadowing in lava-contacting places we'll pass the same vertex mask into the Emit material's socket.
We have one last thing to do - pass (5) the specular value from the diffuse texture's alpha channel to the Spec material's socket.
Object settings
Lets enable the "Apply Modifiers" checkbox (as mentioned above) and also the "Shadows: Receive" checkbox in the islands' object settings.
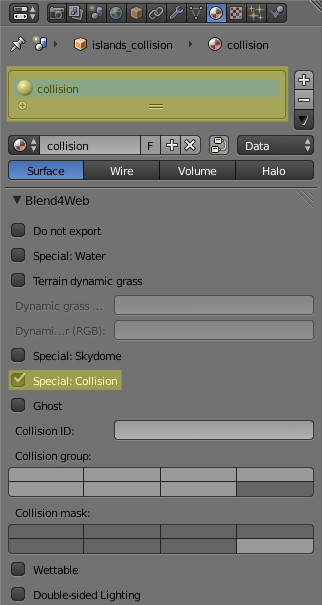
Physics
Lets create exact copies of the islands' geometry (named _collision for convenience). For these meshes we'll replace the material by a new material (named collision), and enable the "Special: Collision" checkbox in its settings (Blend4Web panel). This material will be used by the physics engine for collisions.
Lets add the resulting objects into the same groups as the islands themselves.
Conclusion
We've finished creating the library of the environment models. In one of the upcoming articles we'll demonstrate how the final game location was assembled and also describe making the lava effect.
Link to the standalone application
The source files of the application and the scene are part of the free Blend4Web SDK distribution.
Changelog
[2014-06-11] Initial release.