Animation
Table of Content
In general animation is changing the object’s parameters in time. The engine supports the following types of animation:
- Object animation means the transformation of an object as a whole.
- Skeletal Animation, i.e. object deformation using bones. Animation of a standalone armature object is also supported (for parenting to bones).
- Vertex animation. An object’s deformations can be recorded as frames and then reproduced in the engine.
- Audio sources parametrization. Speaker’s
VolumeandPitchcan be animated. - Animation of the
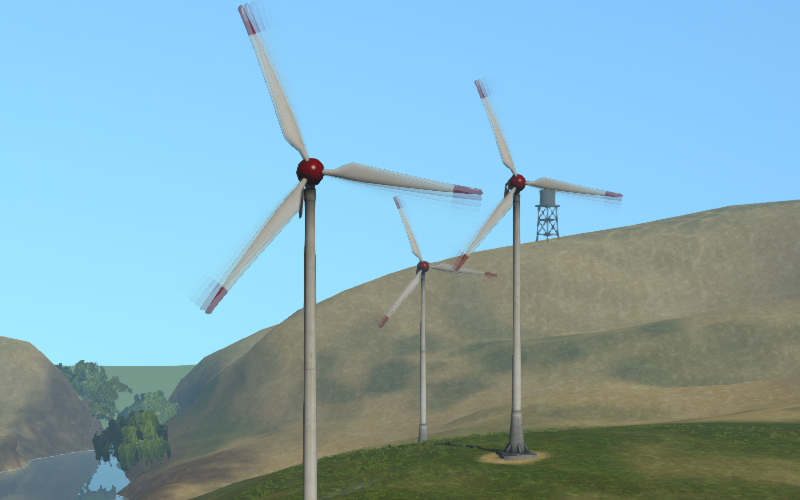
Valuenode output in node materials. - Wind bending - a procedural animation. Described separately.
- Particle emission. Described in the corresponding section.
Animation Control
There are two ways to control animation in the engine:
- Automatically, activating the
Animationpanel and choosing theBehaviorparameter in the object’s properties. In this case an appropriate animation method will be chosen by the engine and the object’s animation playback will start just after a scene is loaded. In case of skeletal animation the action which is assigned to the object in theAction Editorwindow is played by default. - In an application via API using the
animationmodule methods.
It’s useful to use the Animation interface for tweaking animation.
This is covered in the corresponding section.
Object Animation
The parameters that can be animated are the center coordinates (Location), Rotation and Scale.
Animation keyframes can be added for an object motion in Blender and then reproduced in the engine.
The following keyframe types are supported:
- Location
- Rotation – the
Quaternion(WXYZ)orXYZ Eulermode is required. - Scale – for correct results the scale factor should be the same along all 3 axes.
- LocRot – a combination of Location and Rotation.
- LocScale – a combination of Location and Scale.
- LocRotScale – a combination of Location, Rotation and Scale.
- RotScale – a combination of Rotation and Scale.
If a mesh object is animated it is required to activate the Force Dynamic Object option on the Rendering Properties panel under the object properties tab.
Skinning and Skeletal Animation
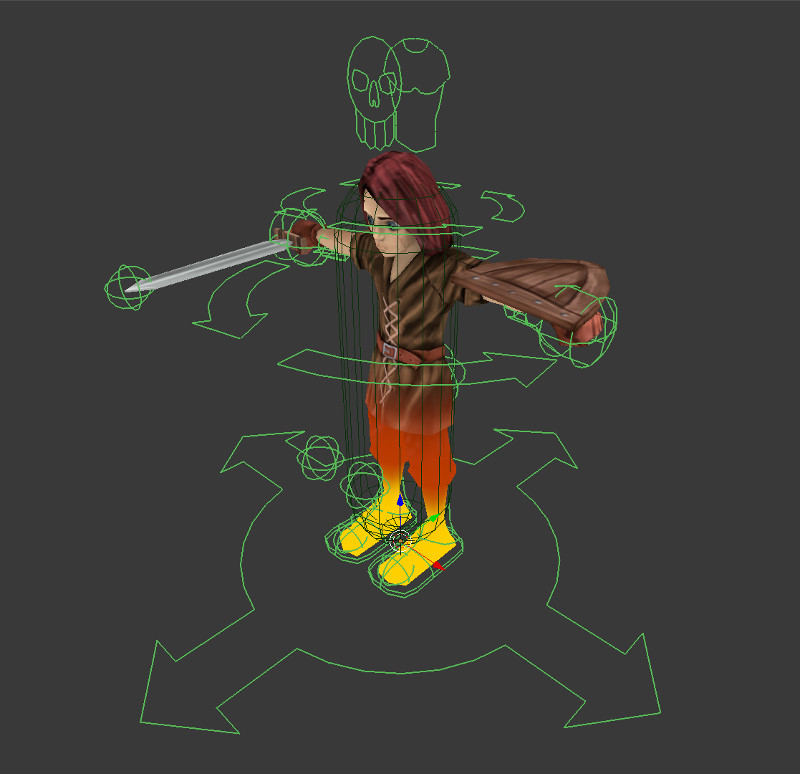
For skeletal animation both a mesh object and an armature object are needed. The four steps should be carried out:
- Create the object’s “skeleton” in the armature object.
- Assign vertex groups in the mesh object and link them to the bones. This can be performed by weight painting f or example.
- Animate the bones in the pose mode of the armature object. The same keyframe types can be used as for the object animation.
- When inverse kinematics (IK) or other nontrivial structures are used, an additional
step is required to bake the animations (
Actiondatablocks in Blender). Baking can be performed using theBake Skeletal Animationinterface located on theBlend4Web:
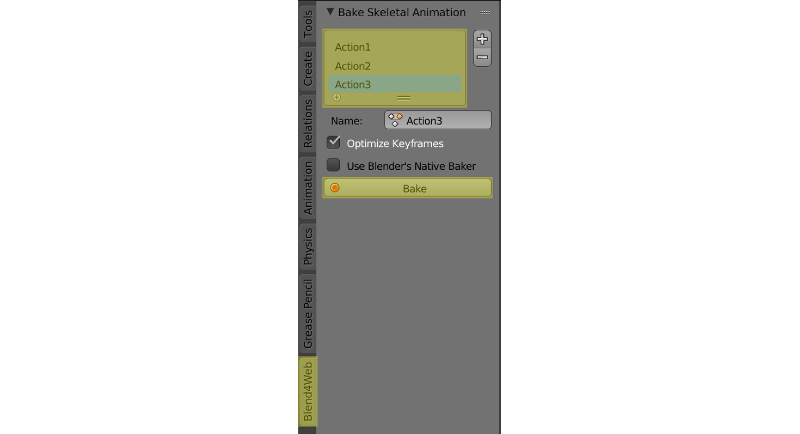
Baking parameters
Baking is performed with the armature object selected.
The actors that will be baked are listed in the window with the list of actors. If the list is empty, all available actors will be baked.
- Name
- The current action name from the list of actions being baked.
- Optimize Keyframes
- Optimize the animation keyframes after baking. In case of incorrect results it’s recommended to turn this option off.
- Use Blender’s Native Baker
- Use Blender’s animation baker (the
Bake Actionoption) instead of Blend4Web’s. Blender animation baker’s settings differ from Blend4Web’s. - Bake
- Perform baking. If the process is completed successfully, actions with names of B4W_BAKED_ACTOR_NAME type appear in the scene. These actions can be assigned to the armature object and played back in the engine. It’s worth noting that appropriate functioning of such actions in Blender is not guaranteed.
Note
The engine supports up to 4 vertex groups per vertex. If the number of vertex groups exceeds 4, the vertex groups with the most influence are selected. When the scene is loaded, the vertex weights are normalized i.e. their sum is reduced to 1.
To remove vertex groups which are not used by armature, use button Remove Clean Unused Vertex Groups.

Blend4Web also has initial support of the armature constraints. For now, only several types of constraints are supported, including Copy Transforms, which can be used to attach an armature to an object, producing effects such as ragdoll. Support of the other types of constraints will be added in further releases.
The full list of supported constraints and their descriptions can be found in a dedicated section.
Animation Blending
The engine also supports animation blending. To use this feature, the Animation Blending (located on the Animation panel of the Object tab) property should be enabled.
Warning
No more than two animations can be blended simultaneously.
To blend animations, you have to allow two animation slots to blend first:
var m_animation = require("animation");

var m_scenes = require("scenes");

...

var armobj = m_scenes.get_object_by_name("My_Armature");

...

m_animation.set_skeletal_slots(armobj, slot_1, slot_2, 0.5);
Vertex Animation
Allows to record any geometry changes of a mesh object. Note that every vertex animation frame counts as a mesh. It’s not recommended to make a long animation for a high-poly mesh, as it can increase the size of the source and exported files significantly and can also slow down the work of the engine.
A special tool is used for baking vertex animation - Bake Vertex Animation - located on the Blend4Web tools panel.
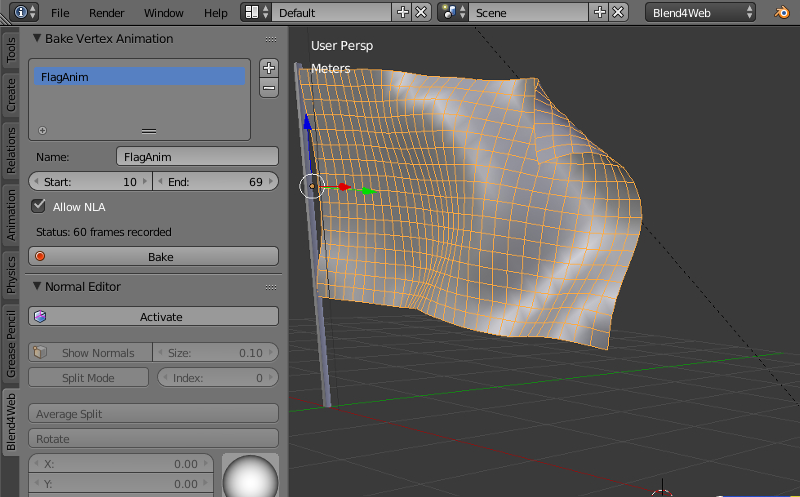
Baking parameters
- Name
- The name that will be assigned to the baked animation.
- Start
- The baking will start from this frame.
- End
- The baking will end at this frame.
- Allow NLA
- Allows using NLA to control the baked animation.
- Status
- In this string, the number of frames of the baked animation is shown.
If the baking hasn’t been performed yet, the word
Emptyis shown instead. - Bake
- The animation baking is performed by pressing this button.
Note
For vertex animation to work correctly, the Export Vertex Animation parameter (Export Options section of the Object panel) of the selected object should be enabled.
Default Animation
Blend4Web also has an option to automatically play object’s animation. To do it, you need to enable the Apply Default Animation parameter in the Animation section of the Object panel of an object you want to animate. Skeletal and object animation types are supported.

Animation starts to play right after the application startup and plays very similar to the Play Timeline node, only without an option to set up the start and end markers (instead, it always starts from the first frame of the timeline and ends with the last). You can also set up animation behavior, like in the Play Animation node.
- Animation Blending
This option is only available for
Armaturetype objects. It should be enabled if you want to blend skeletal animations.Blending animations is described in a dedicated section.
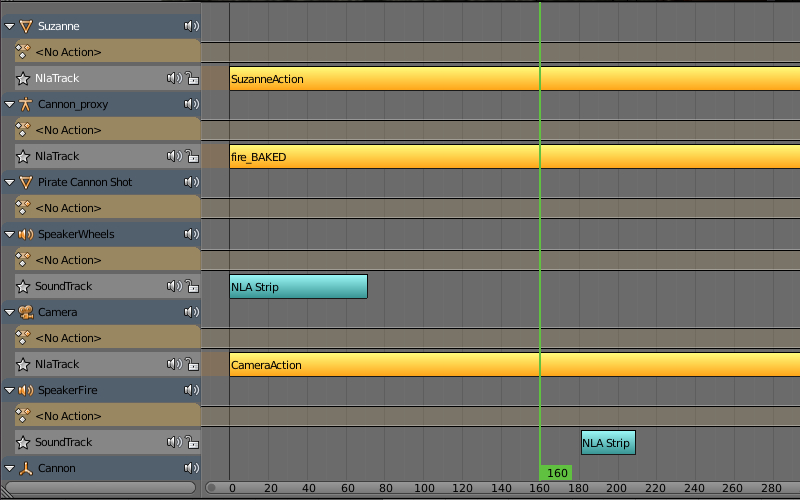
Non-Linear Animation
NLA Editor
The Blender’s non-linear editor lets us set the scene’s behavior in a comfortable way. With its help we can implement simple scenarios. This way coding is not needed for simple scenes and applications.
The engine supports controlling the following entities:
- Any animation the parameters of which can be presented with Actions
- Audio playback
- Particles emission (in the form of a connection with the global timeline)
Usage
- Activate the
NLApanel under theScenetab. - In the
NLA Editorset up the required behavior for the scene. - Choose the animation time interval on the
Timelinepanel.
Additional settings
The NLA > Cyclic NLA scene setting activates the cyclic NLA animation mode.
Note
In order to use vertex animation, enable “Allow NLA” option on the vertex animation panel.
Limitations
- A simultaneous playback of different types of animation for the same object is not supported.
Controlling via API
Non-linear animation playback can be controlled via API methods of the nla.js module.
// ...
var m_nla = require("nla");
// ...
m_nla.set_frame(150);
// ...
var frame = m_nla.get_frame();
// ...
m_nla.play();
// ...
m_nla.stop();
// ...
Please note, that if the Logic Editor is used, the set_frame, play, stop methods are not available.
Audio Source Parametrization
In addition the following animation key types are supported for the speaker objects:
- Volume
- Pitch
Audio sources parametrization in essence follows object animation.
Animation of Value and RGB Nodes
Playback of keyframes inserted on Value and RGB nodes is supported in node materials.
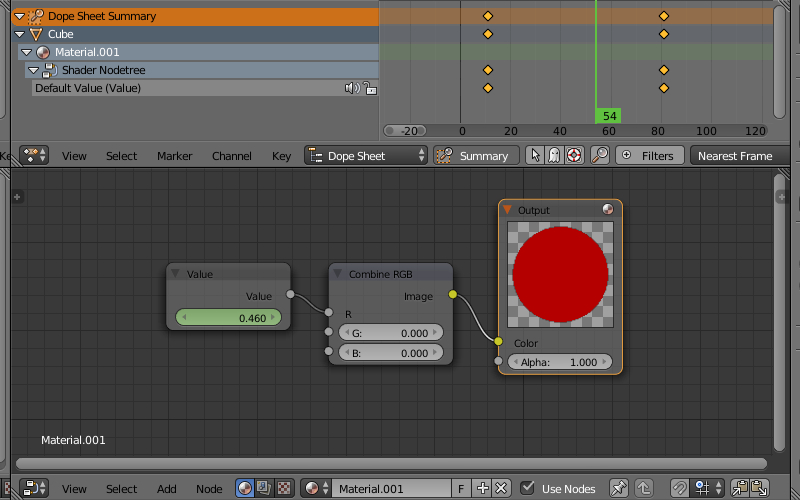
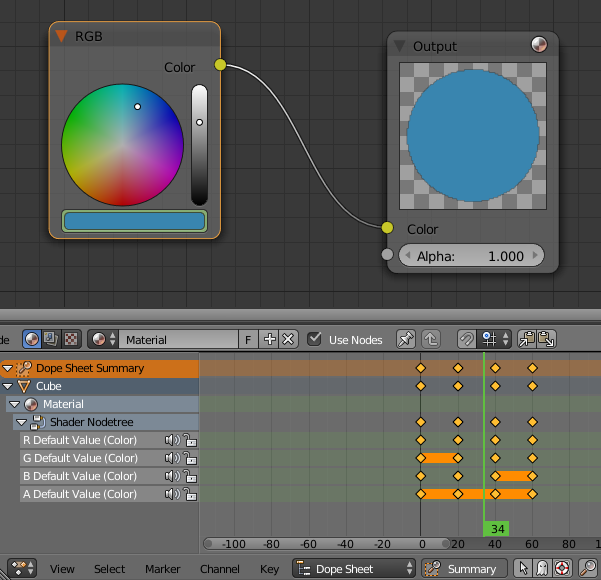
Note
Animation of numerical and color values on other nodes is not supported.
Can be also used to create tracks in the non-linear animation editor. Multiple animated Value or RGB nodes are supported per single material. Values of these nodes can be also modified via API, by using the set_nodemat_value and set_nodemat_rgb methods of the objects module.
See also