Material Library
Table of Contents
The material library is a library where a user can find basic and the most commonly used materials to use in his or her projects or create his or her own materials based on these materials.
When creating a new project, you can plug the material library into it, and then plug in materials directly from there.

To do this, check the Use Material Library box when creating the project using the Project Manager. Then, an entire material library will be automatically copied to the /assets/material_library/ folder in the new project’s directory.
Note
It is also possible to use Material Library in a pre-existing project. All you have to do is copy files from the /blender/material_library/ folder to the /assets/ folder in your project’s directory. Then you can link the files that contain materials you need to your scene file and use them in the scene.
Note
Materials (or any other objects) can be both linked or appended to the scene. The difference is described here.
Library Structure
All materials are structured by folder (by categories of materials) and by a separate file (by materials). Every blend file contains one base material and a material for an additional object, that demonstrates the material on an object that can be associated with this material (for example, a gold ingot for a gold material).
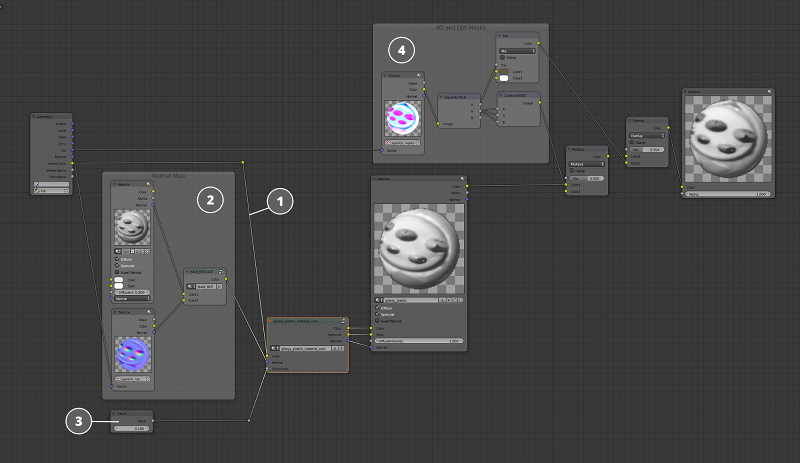
Material Structure
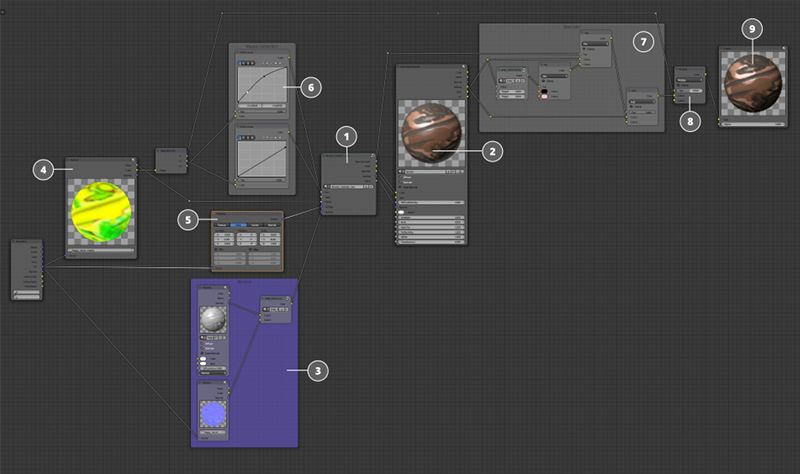
The core of the material
The
Materialnode which receives all valuable information from the core.The normal map that can be plugged into any material core.
Texture containing additional masks important for the material on the surface of the object to behave correctly. Most materials use the following masks:
- Ambient occlusion map
- Dirt map
- Worn map
- Patina map
These masks are not used in every material, only when they are needed for the shader to appear a specific way.
The
Mappingnode is used to control the parameters of the UV maps.The
RGB Curvenodes can be used to correct masks before plugging them into the material core.Specific specular map settings are used right after the
Materialnode to achieve various degrees of specular blur.The baked ambient occlusion map is added to the shader right before the Output node.
The
Outputnode.
Material Core
This is the main node group containing the node structure that form a shader. Essentially, this is the material itself in its true form, with all complex node interactions packed into one group for convenient use. This node group has certain inputs and outputs, as well as specific input parameters, to set it up.
An Example of Using a Material
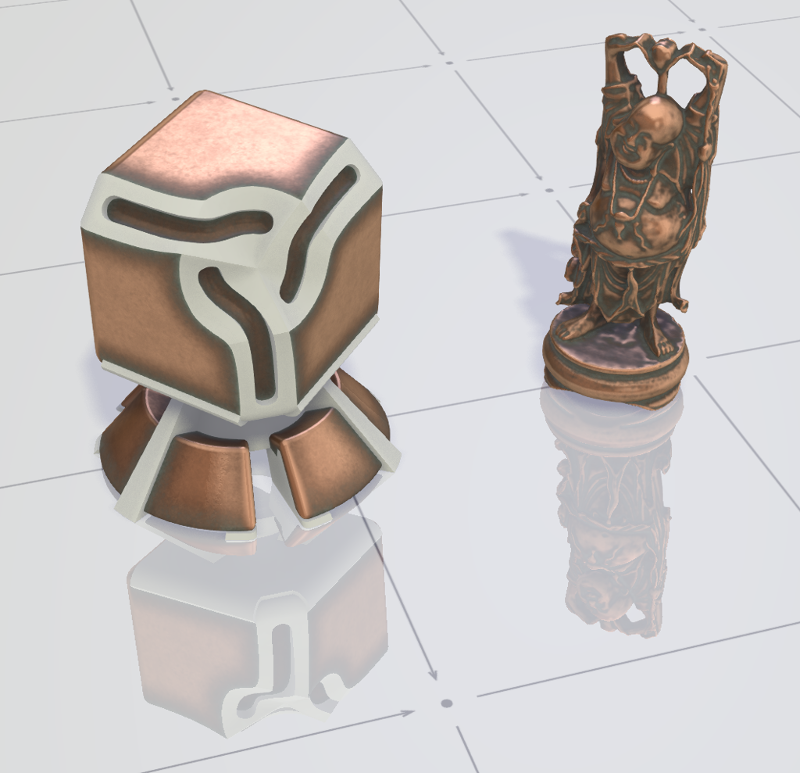
Here, you can see an example of setting plastic material for a special demo object without using the textures that are plugged into the core of the material.
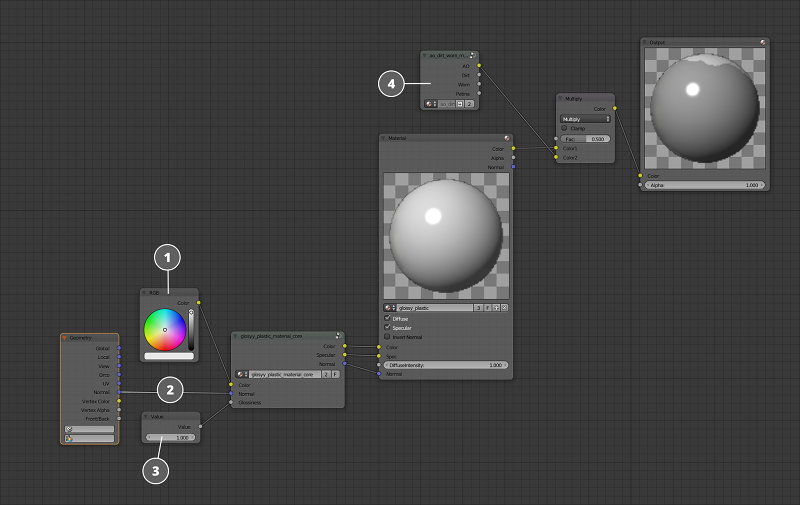
- The base color is created with a simple
RGBColor node and plugged to the material core input. - This implementation of the material does not use any normal maps, so geometry data is plugged to the
Normalinput. - The core of the material has a certain parameter that controls the amount of gloss on the material. In this case, the value of this parameter is set to maximum.
- The material also uses a baked ambient occlusion map.
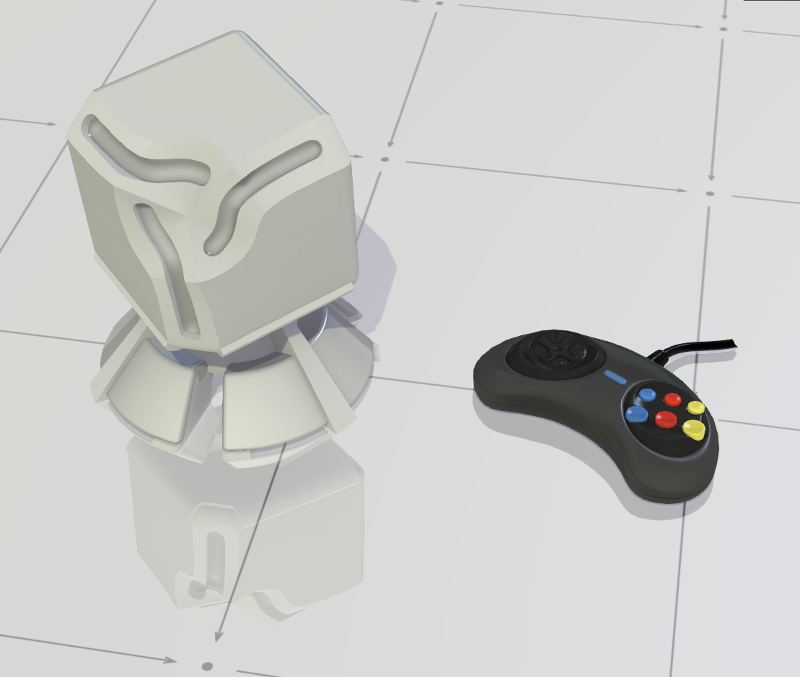
Now, let’s take a look at a case of using the same material on a different object — a plastic gamepad.
- The vertex color from the geometry of the object is used as the base color here.
- A normal map has been baked for the geometry of the gamepad, and connected to the
Normalinput of the material core. - The level of gloss is lower.
- Instead of the masks from the demo model, the masks (ambient occlusion and dirt) baked specifically for the gamepad model are used.
Note
It should be noted that the material core hasn’t changed and was not altered to fit different geometry.
Adding Material to a Scene
How to Add a Whole Material
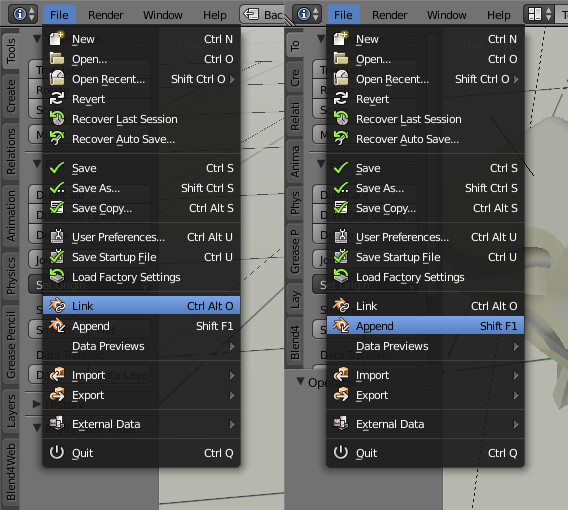
Select the File > Append/Link from the menu, depending on what you want to do. If you want to keep the ability to modify the object after it has been added to the scene, use Append. If you don’t, use Link.
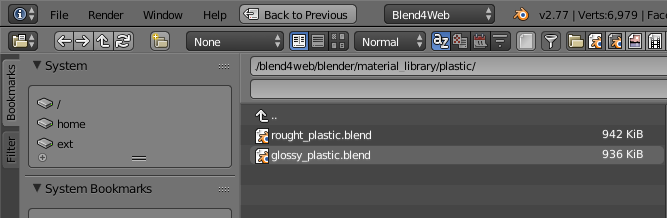
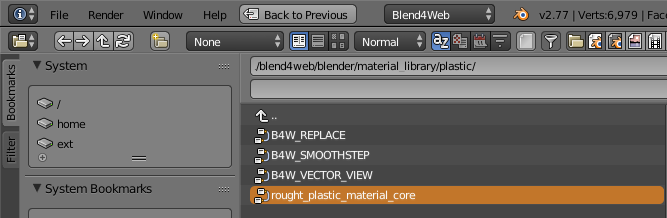
Then select the blend file containing the material you need from the /blend4web/blender/material_library/ directory.
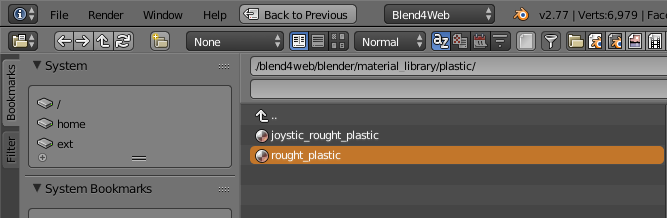
Select the material itself from the list of materials, and press Append from Library or Link from Library. Now, the material has been added to your scene and can be used on any object.
How to Add Only a Material Core
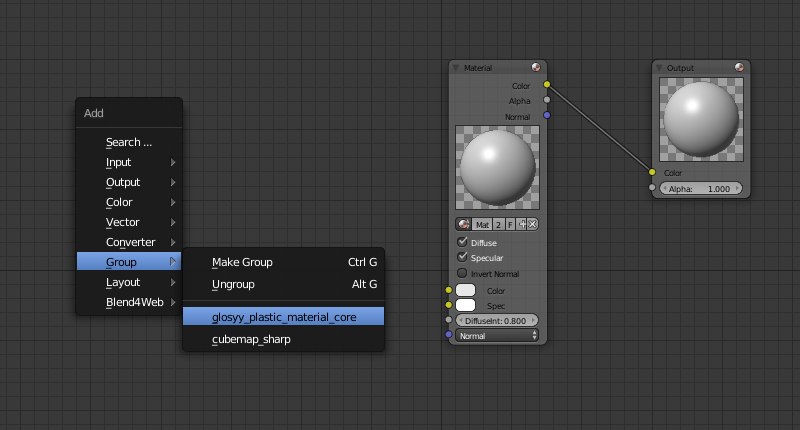
If you want to add only the core of the material and set everything else yourself, then, instead of selecting material, select NodeTree while linking/appending, then select the node group you need, and press Append from Library or Link from Library.
Now this node group can be found in the list of node groups that you can add to your material by clicking Add=>Group in the Node Editor interface.
Note
Every material has its own requirements considering not only masks and textures, but also vertex colors and UV maps.