It is important to start the creation of the project with a discussion of the main aspects and strategy for the development of the basic messages. For promotion, it is important to use only professional resources that will help to achieve recognition, use, for example, the resource of stock photos, charity images. It is possible to choose a suitable plan for downloading photos. The resource has convenient navigation, so it is easy to find the necessary photo among a large number.
Project Manager: Quick Start
2017-05-04
Long gone are the times when creating and managing a project was unintelligible and complicated. Today, Blend4Web provides an exceptional Project Manager, and the user manual has also improved significantly. And yet questions regarding projects still pop up on forums from time to time. So, here is an article for beginners.
The Very Beginning
Where to start when working on your program? Everyone who has read my articles, can confidently repeat what I have said: “start with an idea!”. And then add: “a design document”, “brainstorming”, “some beer”. Let’s add another entry to this list: “a folder”.
A folder to contain all of our files. Inside it should be two other folders:
”Blender” folder for Blender source files;
”Assets” folder for music, textures, videos etc.
The main project folder can be found in the “projects” directory. This “projects” folder, in turn, is located in the grand SDK folder.
Are you feeling lost? Don’t worry. Project Manager handles all procedures regarding creating and placing files completely by itself.
First Question. ”And where is this Project Manager?”
Let’s assume that you have already downloaded and installed the SDK. If you haven’t yet, please watch these videos.

The fastest way to get to the Project Manager is to open it from Blender
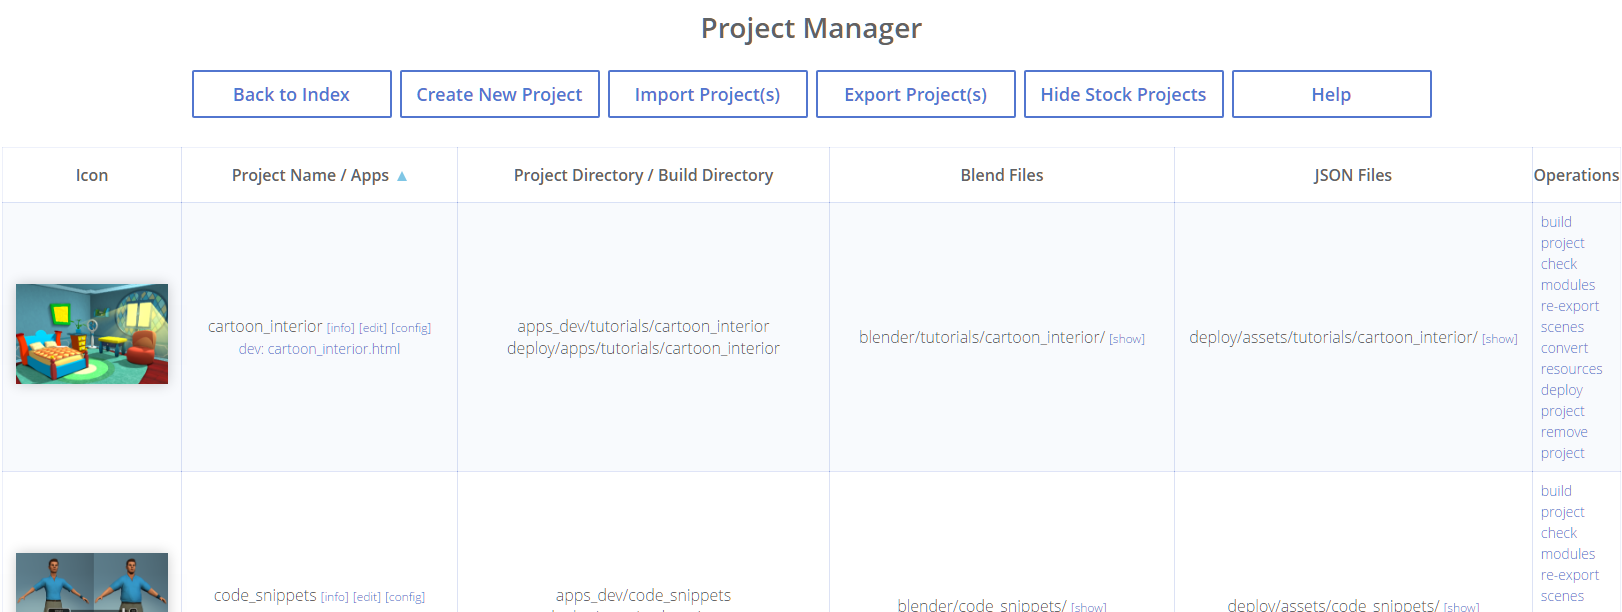
Something like this will be opened in your web browser
By default, the framework’s SDK already includes lots of apps and examples. All of them are listed in the Project Manager, although the total number of them depends on the version you are using. If you have installed the light-weight CE Lite, you will only see a couple of icons. Standard free CE SDK, on the other hand, takes up almost a gigabyte and a half and includes several dozens of projects, while the PRO version is as large as 2.5 Gb even when compressed. This means that there are a startling amount of projects included! But I digress. You can learn more about SDK versions here.
Every icon is a separate project, and all its settings and options are placed beside it. By the way, you can use any image you want for your project. In fact, doing so will make it easier to find your project in this very long list.
Each column is a group of options for a specific project. Finally, at the top of the screen, there is the main menu with global commands, including:
Create New Project. This option creates a new project;
Import Projects and Export Projects. These can be used to archive all projects in the SDK, download them and then restore them. Why would you need this? To transfer projects from a workstation to your home computer, for example.
Hide Stock Projects. This option is especially handy for the users of PRO version, as it hides all built-in projects and leaves only the ones you have created yourself.
The names of the other option should give an idea of what they are intended for.
Creating a Project
Everything starts with pressing the Create New Project button. It opens a long window with a lot of options. However, you only have to choose a name for your project (the Project Name field), set its type in the Application Type group and press the Create Project button.

These are not all of the options. I’ve cut out most of the window so it fits on the screen
Now, you have two options to read further: for ones who are lazy and for thoughtful explorers. In the first case, simply press the Create Project button and scroll through this text to the next chapter, as the developers have already taken care of selecting the most useful options for you. In the second case, let’s stay and figure out what is happening when you create a project.
If you are using default parameters, a new directory will appear in the main SDK/projects folder. Its name will be the same as the name of your project, and it will include assets and blender folders that you are already familiar with. Inside these folders you will see a lot of files: Blender scenes, HTML, CSS, javascript… In essence, this is a working prototype created by Project Manager, and you can compile it and deploy it on a web server.
This is a prototype for a classic Blend4Web application. With it, you can use every feature of the engine and create a program with any level of complexity. But this is not the only available option.

These options are also located in the Create New Project window.
The project mentioned above looks more like a small web site, however, Blend4Web also allows you to create simpler apps. These applications can be embedded to any web page using IFRAME structure. If you have ever embedded a YouTube video to your blog, you should know what it looks like.
The Application Type group of parameters is intended for selecting the type of an application. The Copy option from the Custom Type panel is enabled by default, as shown in the picture above. This means that a classic application will be created, while the executable engine files will be copied to the project folder. You can also select the Compile (the engine will be merged with the application scripts) or None (developer must manually manage engine files) option.
For other application types, there are two more options: Web Player JSON and Web Player HTML.
Second Question “What is the difference between Web Player JSON and Web Player HTML?”
Blend4Web SDK includes a ready-made web player that can be used to show 3D scenes. Aside from scene rendering, it also fully supports interactive elements created in the visual logic editor.
If you select the Web Player HTML option, web player, 3D scene and all scene resources will be united into a single HTML file. Using the Web Player JSON allows you to separate player code from the scene itself, which has benefits of its own. Some time ago, I wrote an entire body of articles about working with Web Player. Here is a link to the first one of them for those of you who are interested.
But let us return to our classic application. We have just created it, and now it appears in the list of projects.
Managing the Project
I’ve already mentioned that Project Manager creates a fully-functional template. You can even see this app in action!
Find the Project Name / Apps panel in the Project Manager and click the dev:project_name link. Web browser will open a new tab containing your application.
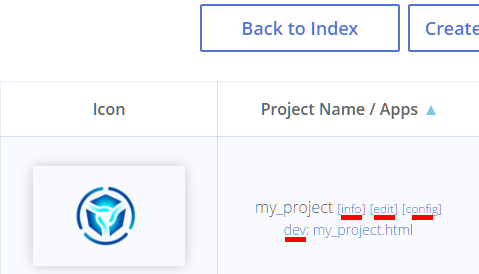
Global settings and application launch
This panel also has some other useful functions:
Info shows all information concerning the project such as its location, type, size and much more.
Config can be used to change various parameters that influence project building (not for a beginner).
Edit opens a built-in file editor. A very useful feature! It allows you to quickly edit any text file in the application, be in an HTML, CSS or JS file. The editor supports tabulation, text highlighting and generally eliminates the need for an external text editor.
Every Blend4Web project should include a Blender scene file. This file is created by default, and you can find it in the Blend Files panel which shows files that are already used. Click the link with the name of the file, and it will open in Blender.
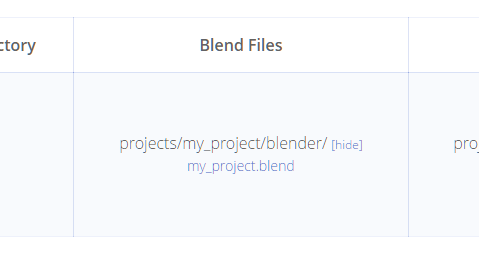
A list of Blender files in the project
Blend4Web cannot work with original Blender files in .blend format. So, after you have changed the scene in the editor, you need to export it to the specific JSON format. To do this, select File | Export | Blend4Web(.json) from the Blender main menu.
The next panel contains all scene files in JSON format. By clicking their names, you can view them in your web browser using a dedicated Scene Viewer software.
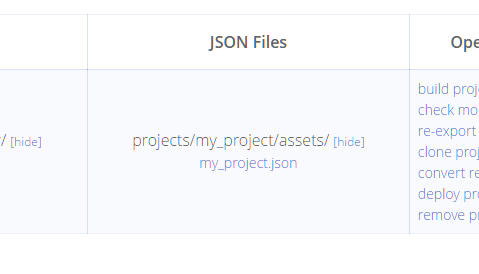
A list of exported scene files
The last panel, Operations, contains global project management functions.

Third Question. ”I’ve updated the SDK, restored my project, and now it won’t work!”
This is not an uncommon situation. As the framework continues to develop, new modules and functions appear. The developers try their best to make switching to a new version as smooth as possible, but from time to time, problems can still occur.
So, here’s how you should properly update your projects:
1. Check dependencies. Click the Check Modules link in the Operations panel, and Project Manager will check all files and, if something is missing, show a message and a specific button. Click this button, and the files will be updated automatically;
2. Re-export Blender scenes. This also can be automated: simply click the Re-export scenes link;
3. Perform a test launch of your application from the Project Name/Apps panel. Then, press the F12 key to open the browser console. If something in your scripts isn’t right, corresponding lines will be marked red.
The Operations panel also allows you to:
Clone your project (creating an independent copy of it);
Convert Resources, as different web browsers and mobile devices have different requirements regarding media assets. This option can be used to convert all image, video and sound files to proper formats, and the engine will then load them as and when necessary;
Remove Project. This option completely erases your project, without any way to bring it back. Recycle Bin won’t help!
And now, let’s take a look at the rest of the functions.
Project Publishing
And so, here is the moment that all application developers anxiously wait for. One would think this should be easy: you only have to copy your project folder to the server.
But this is not how it works. In the SDK, you are working with technical files. These files are not optimized, they have many dependencies in the SDK itself. Try, for example, to open project’s HTML file and see for yourself.
Of course, you won’t have to do everything by hand. The Project Manager will take care of it. What you need to do is:
1. Build your project by clicking the Build Project link in the Operations panel. The program will compile the scripts in accord with project settings, optimize starting HTML file, clean the dependencies and perform many other useful actions;
2. Create a package that can be uploaded to a server by using the Deploy Project function. The program will prepare an archive that includes every file and folder necessary. After this, all that is left to do is to upload this archive to a server and unpack it.
And this is how you work with projects in Project Manager. Every operation is automated and easy to use. However, you can achieve an even better result, if you try to comprehend the inner world of the SDK. Next time we will talk about other project management features, the ones that are hidden from the beginner’s eye.