Much acknowledged to supply this web page . i am so much astounded to see this awesome web page right presently. Well done your group work.
B3 Bomber Shearling Black Hoodie Jacket
B3 Bomber Shearling Black Hoodie Jacket
2017-12-22
Many wait in anticipation for the next release of Blend4Web, as it is slated to introduce PBR to the engine. This exceptional rendering technique, however, is not yet fully suited to handle certain types of materials such as glass, water and other objects that refract light.
Because of this, I would like to talk about creating several interesting effect using some of my apps as examples. I will focus on practical side and not on theories and big words. I am an artist myself, so I’ll try to keep scientific stuff to a minimum.
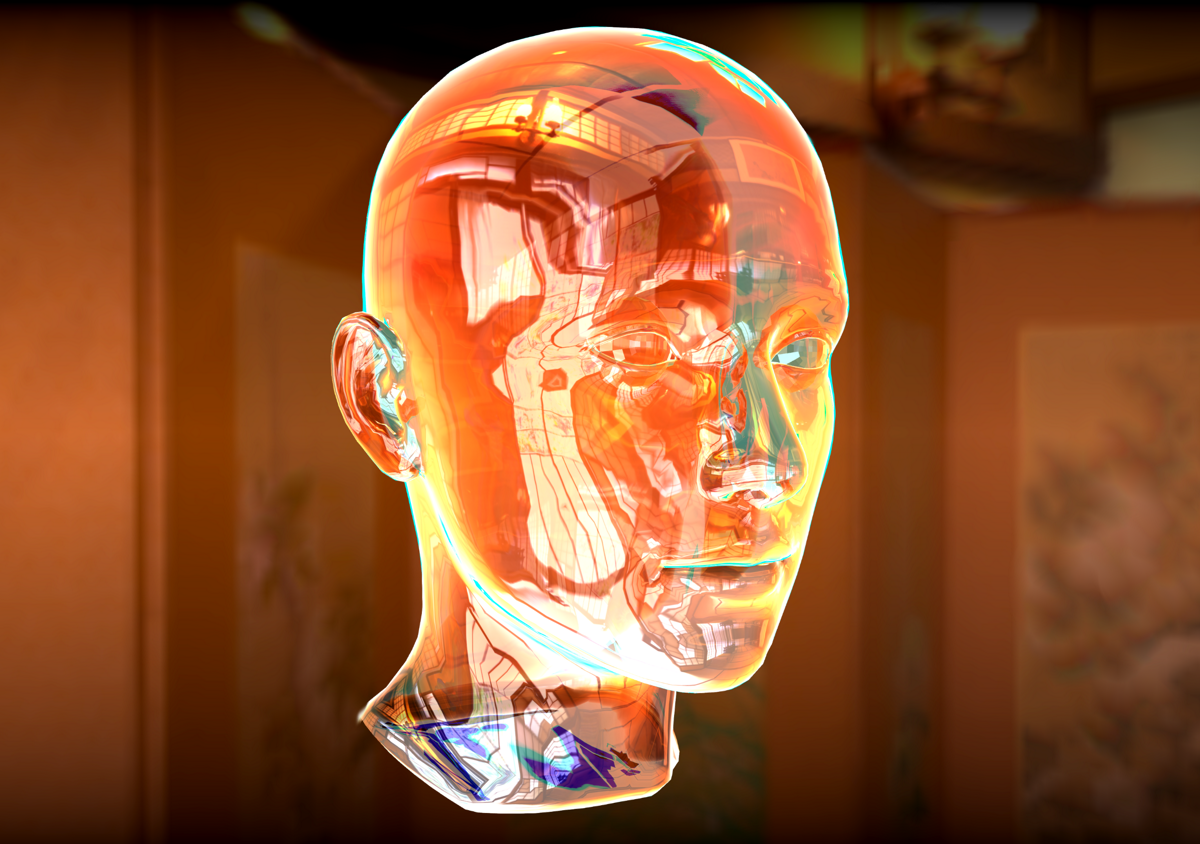
Rainbow Head (click to open the scene in a new window)
To create a simple glass material, you only need reflection and transparency. But if you want to implement light refraction effect, everything becomes a little more complicated. If you are a programmer or a mathematician, you’ll probably won’t have troubles creating such an effect yourself. However, Blend4Web includes a ready-made node specifically for working with refraction. In my materials, I use both this B4W_REFRACTION node and a custom node group.
So, let’s start with a most simple example and create a light dispersion effect using several refraction nodes. I’ve created three node groups to work with refraction, each one of them handles one color channel. Each Vector input is connected to different coordinates to displace image in each channel . After this, the channels are combined using the Combine RGB node.
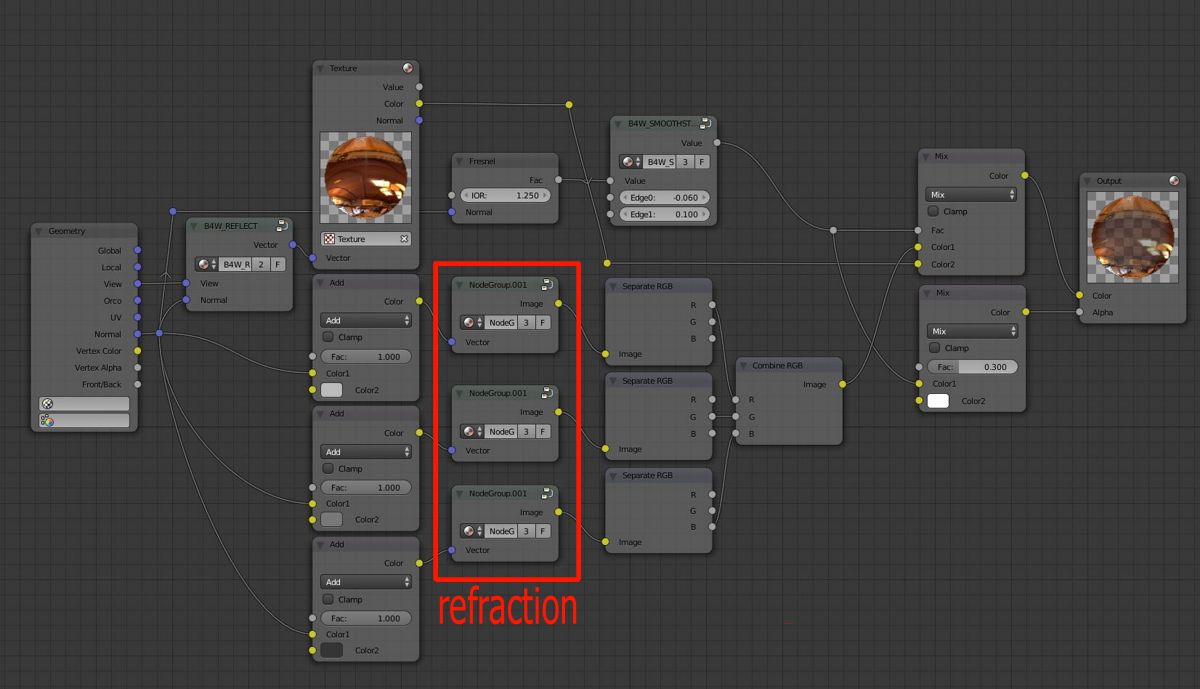
Node material for creating light dispersion effect
A very important point! To make a glass object look more real, we need to add transparency to it, so the reverse side of it would be visible. If we don’t do this, only the surface will be rendered, while entire inner structure will be omitted.
Another moment: glass reflects its surrounding very clear, especially when its surface is placed at an acute angle to the viewer. This effect can be recreated with ease by mixing reflections and refraction with Fresnel node as the mixing factor.
Also, take into account thickness of the glass! For example, if you look at the edge of a glass can, you can see the color of the glass itself. Implementing this effect might very well be the most difficult aspect of creating glass materials. Thankfully, it isn’t always very noticeable.

Rain (click to open the scene in a new window)
Another effect that uses refraction is rain.
At first, I wanted to create a sheet of glass with raindrops falling on it. Later, I decided to try and create the rain itself. This effect is done with refraction and really not much else. There are no reflections and no transparency.

Node material for creating rain (click to see full-size image)
Using Time node (B4W_TIME), we set directions (with different velocities) for moving two normal maps that are them mixed together using a mask. The mask itself also moves with its own speed. All of this make the streams of rain look uneven and constantly changing. This rain refraction looks especially great when combined with lightning flashes; these are done using a moving texture that becomes visible from time to time.
Next, we have an even more simple, but no less impressive scene with crying Suzanne (the monkey from Blender). The author’s idea is then she’s upset at everyone for them mercilessly using her as a test subject. The scene is done using the same technique as the rain scene.

Suzanne (click to open the scene in a new window)
And finally we get to the last demo scene, a simple, yet arguably the most beautiful one in the article: a still life scene with a glass can. The glass can itself is created using methods described above, only it is a little more sophisticated because of its inner structure. I won’t be repeating the process of creating glass material. Instead, let’s touch another important subject: shadows cast by transparent objects.
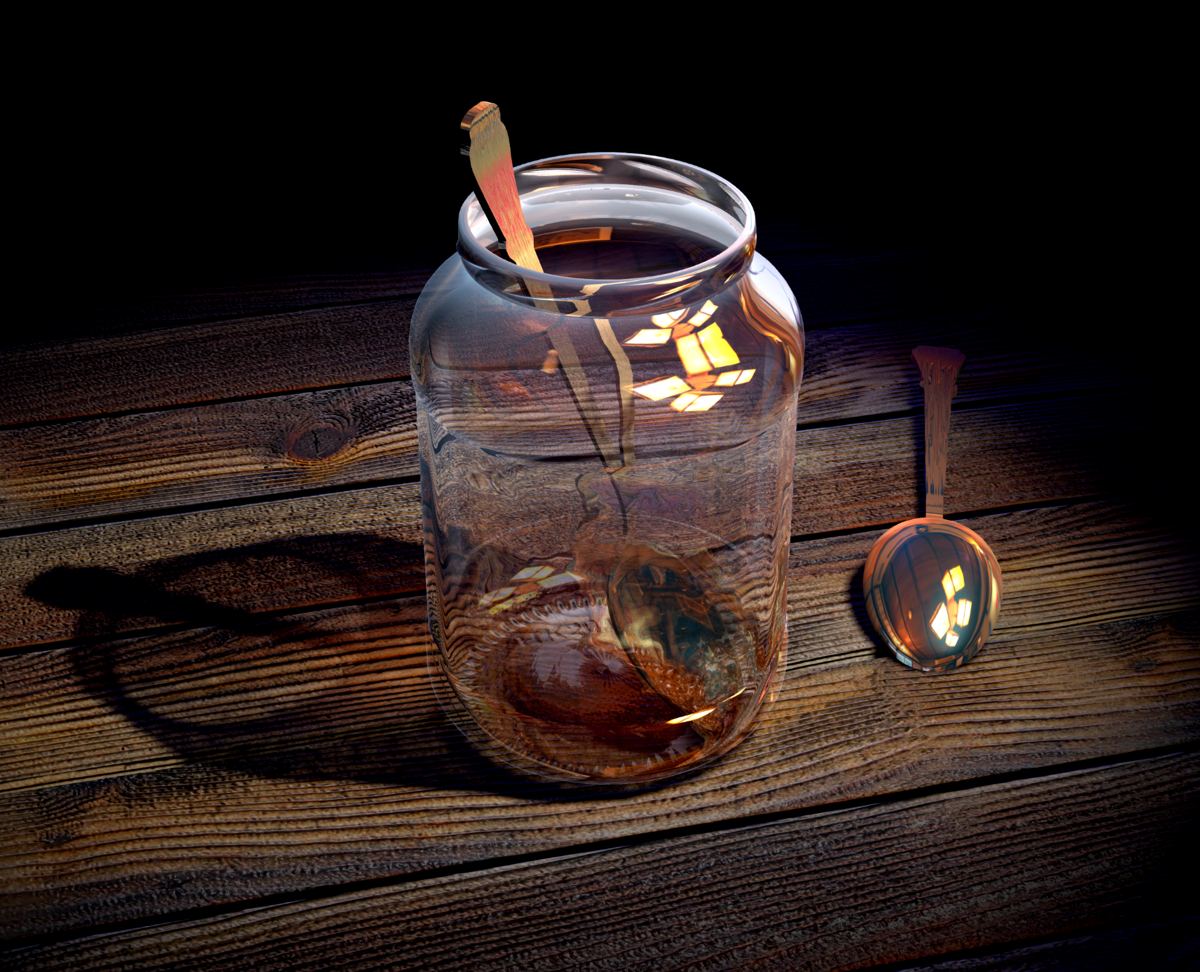
Still life with a glass can (click to open the scene in a new window)
No matter how much real-time web engines want to ignore shadows cast by transparent objects or to make them flat and black, we all know how they really should look.
So, to add a proper shadow to an object with Alpha Blend, Alpha Sort or Add-type transparency, we need to use a duplicated geometry with a different type of transparency, namely Alpha Clip, as only this type supports shadows. Let’s go with it.

A material for creating shadows cast by glass objects.
First, let’s take our transparent object and duplicate it (you can also create a simplified geometry). Then, create a new material with Alpha Clip transparency type. Add a tiled texture to imitate noise. Using any means you like (vertex colors, baked texture, vector values or math operations) make it unevenly fill our object. Pay attention to the fact that the noise should be more thick at the bottom of the object and more thin at the top of it. This will give us soft cascade shadows.
Check the Cast Only box in the Shadow settings. On the Render tab, set Shadows -> Soft Shadows -> Blur Radius to 3 or higher.
That’s it! Now your glass casts an exceptionally beautiful shadow. And no other web-based engine has something like this!
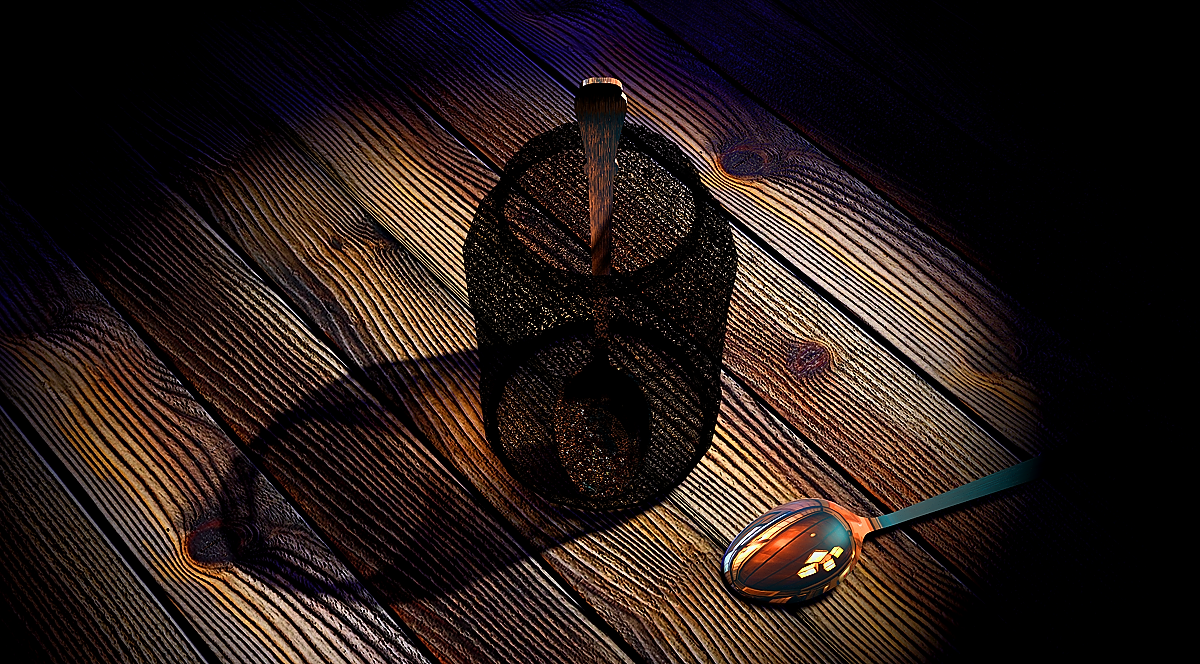
A shadow cast by the glass
I continue to experiment with refractions and plan to write an article on creating liquids in glass cans (a refraction within a refraction!) soon enough.
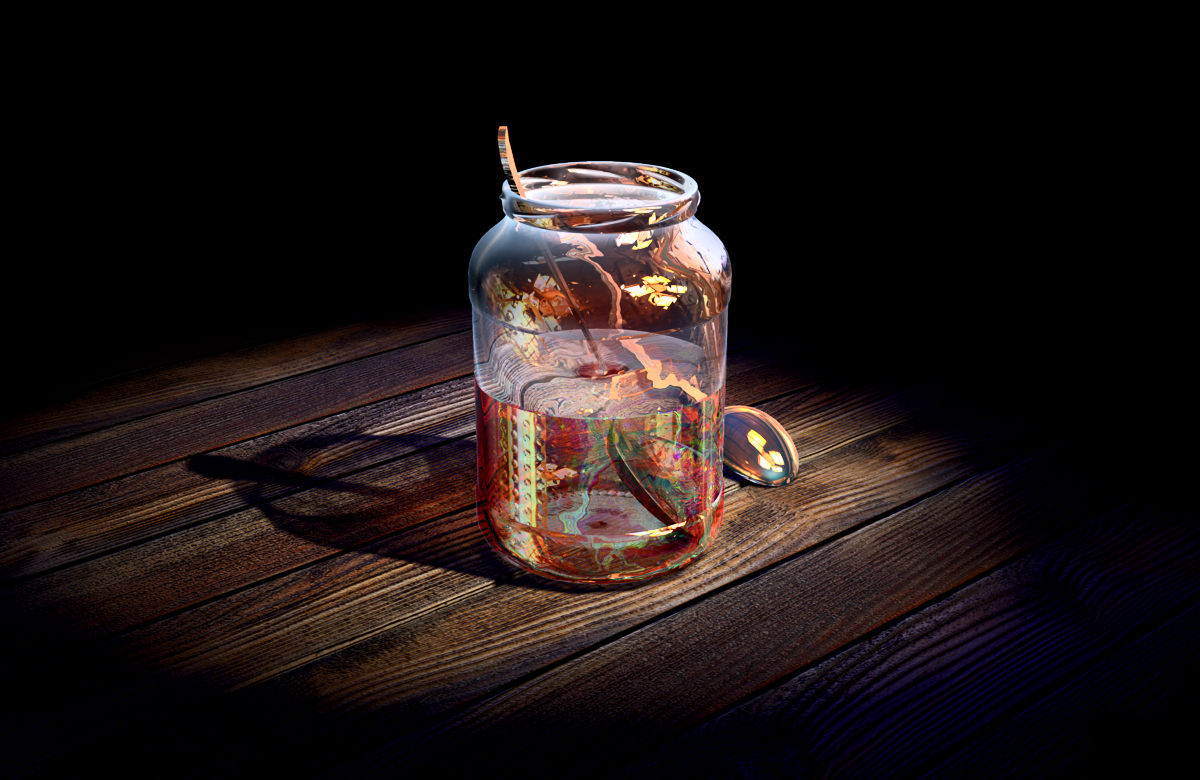
A glass can filled with liquid
If you have any questions, feel free to ask on our forum. There, by the way, you can also find blend files used in this article.