Furnishing a Room Part 3: Models
2014-09-04
This is the final article of the tutorial series about the creation of a cartoon room. We'll look at graphics components of this app i.e. the models and their settings, scene peculiarities etc.

Modeling
The modeling workflow was quite standard: for most objects the high-poly models were created first and then - the low-poly models. Nevertheless in this case I used normals editor extensively together with multiple bevels. This method allows to achieve the illusion of highly detailed corners. Lets look at a cube to demonstrate this technique:

Lighting, scene settings and perspective are the same for all these examples. The first cube is just a standard cube with the smooth shading mode (Shading: Smooth). The second one is the same cube with a single bevel on all its edges. The third cube has its normals edited. Apparently the third option looks the most plausible. In addition to this advantage this method also has better performance than using normal maps. So this is an effective and spectacular solution for simple models.
You may take a closer look at this tool in the corresponding section of the user manual.
Such the technique also allows to create interesting optical illusions. In the cartoon room scene I used this effect for plinths. The normals are directed perpendicular to each other to create a perception of stepped surface - which actually doesn't exist:

Besides this some other artistic tricks were used to create a cartoon-like feeling: the objects' shapes are smooth and prominent, some models' elements are exaggerated such as the propeller and the button of the fan or the drawers handles. Also the polygons count for the rounded shapes is increased that can be clearly seen on the meshes:


Setting up the Materials
Looking on the meshes you may ask yourself: what is the plane under each furniture model used for? These planes imitate ambient occlusion for optimization purposes. They have a transparent material with ambient occlusion from the above object baked to them. The ambient occlusion maps for the majority of objects are packed into the color channels of a single image file: this has been done to save video memory and to reduce the number of texture samples.
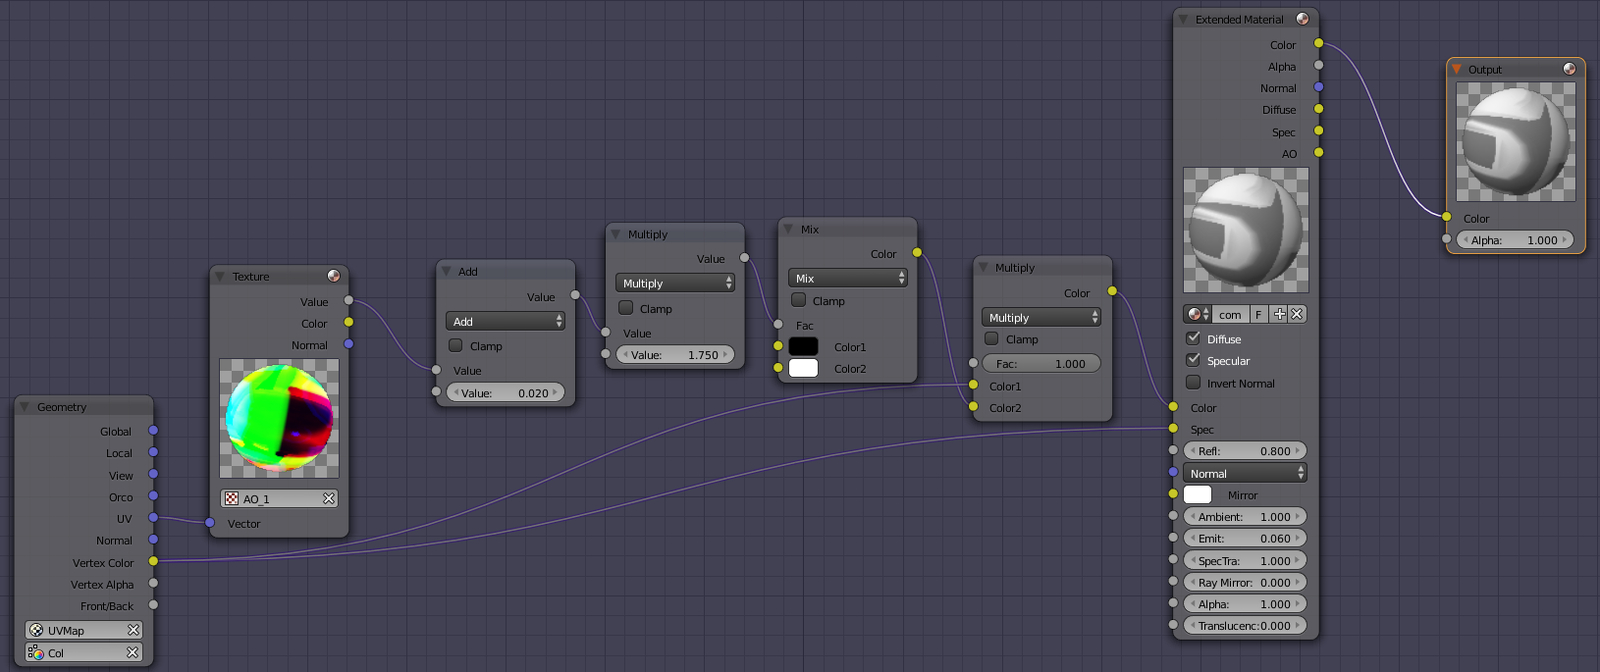
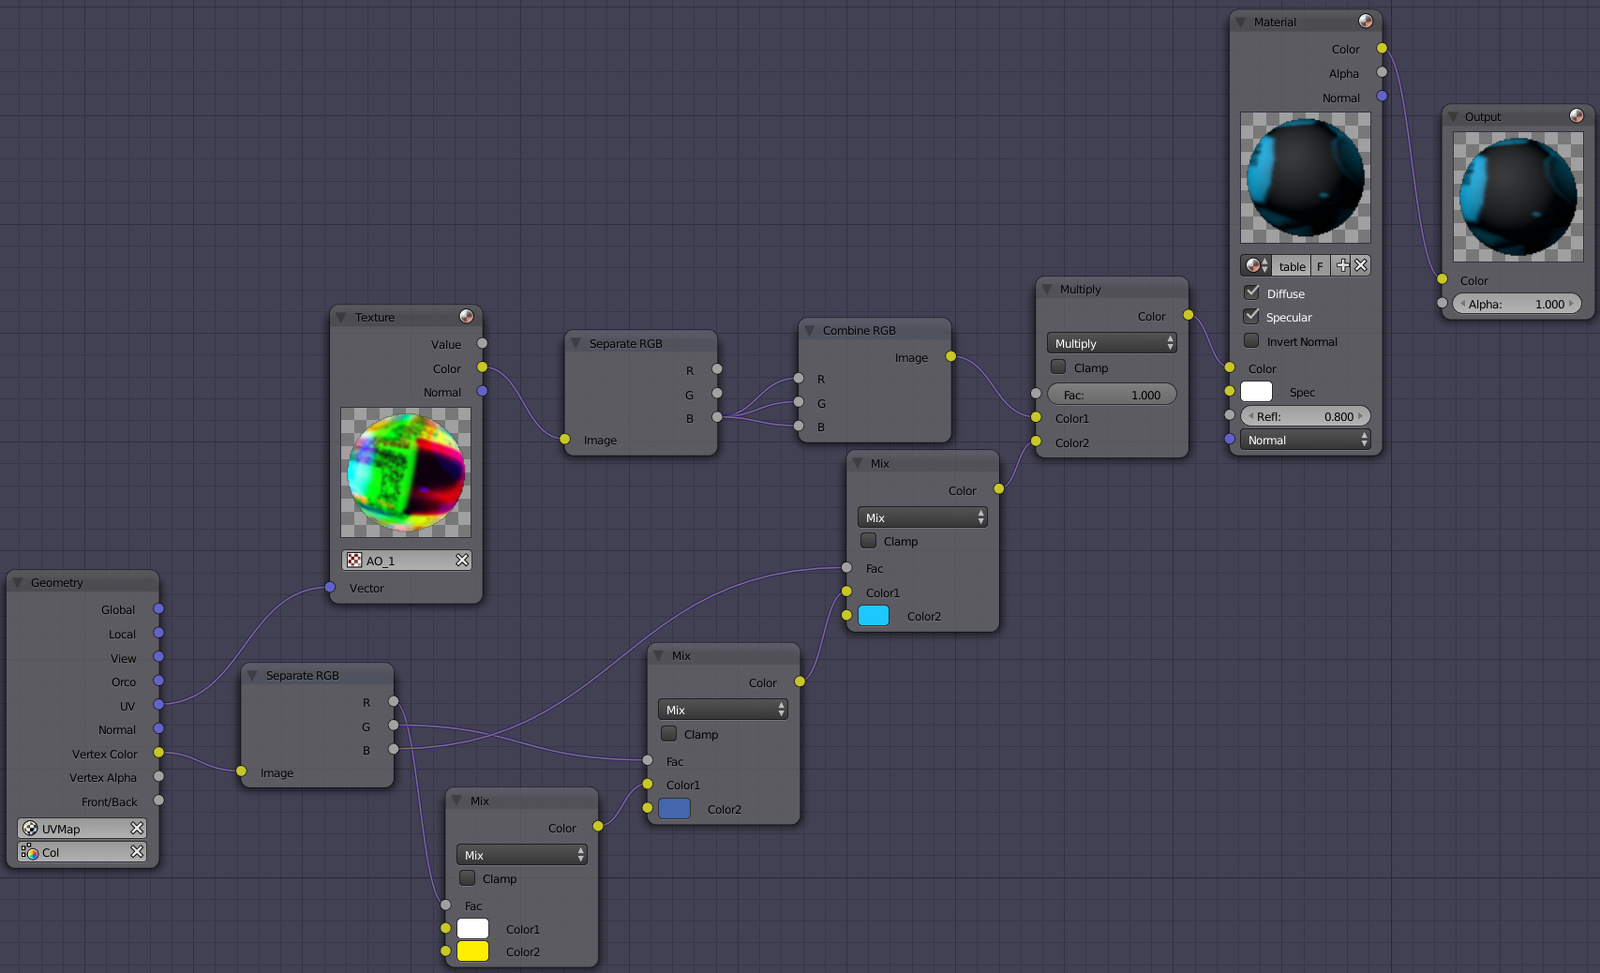
The furniture materials are implemented with the different methods: for example the chest of drawers is painted with vertex color to create the diffuse color but for the table model its vertex color is used solely as a mask - this is very convenient to control the object colors right from the node material. The bed uses a mix of these methods and also seamless textures both for diffuse and normal maps. This material looks weighty; however taking into account that it uses the seamless textures and the vertex color for the most part, it is quite fast in the engine.
The material for the chest of drawers:
The table's material:
The bed's material:

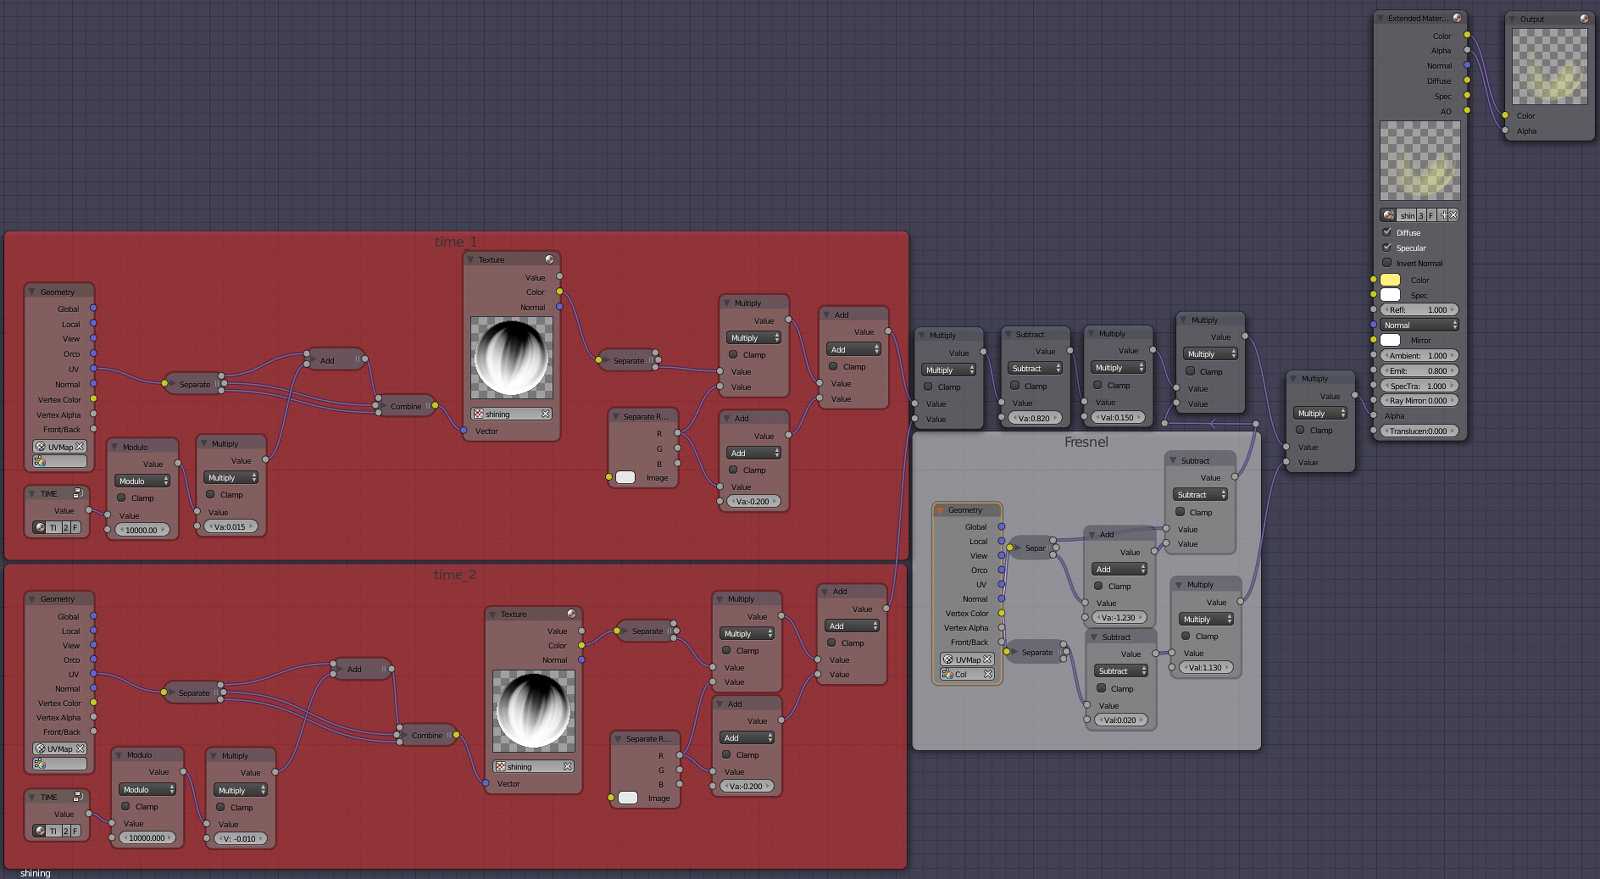
Perhaps the most interesting thing on the scene is the sunbeams from the window. It is implemented as follows: using the TIME node the texture UVs constantly shift towards each other to create an impression of moving sunbeams. Here are also the Fresnel effect and the vertex color mask for smoothing the angles. The numerous math operations provide a decent flexibility for this material. The final result is passed into the alpha channel.
The other materials don't differ much from the described above ones. You can look at them yourself - the scene files are present in the SDK.
Lighting and Setting up the Scene
There are two lamps in the scene: the first one is for main lighting and for shadows (Sun type) and the second one imitates the scattering soft light from the window (Point type). Also Environment Lighting is used with its intensity set to 0.3. Other settings are standard.

Animation
The only animated object on this scene is the fan. I decided to use skeletal animation for it. The armature is rather simple and consists of just 3 bones:

The animation itself has been created by inserting the keyframes and by editing the curves. The Cycles modifier has been also used for the curves. The animation sequences were baked in order to be picked up by the engine.

Conclusion
The "Furnishing a Room" series is now over. You can find all the files inside the Blend4Web SDK distribution.
With Blend4Web you can make interactive web apps with great flexibility and optimization - this does not take much additional time. Some useful tools of the addon extend the Blender functionality and help 3D artists a lot.
Run the application in a new windowChangelog
[2015-09-04] Initial release.
[2017-01-12] Fixed incorrect/broken links.