It’s hard for everyone sometimes, but it’s easy for me, because the typing company will do any typing work that I need, the texts are typing so high quality, especially competently and quickly, which is very pleasing
Blend4Web: Beginner's Guide. Chapter 3. Moving Vertices
2016-11-07
In the previous lesson you created your first model, or, more precisely, a template with a form that resembles a smartphone. There is still a lot of work until this project is complete, but there is nothing to be afraid of. In the third lesson you will get to know new tools and simple and efficient modeling methods. In general, half an hour will suffice in order to become confident with the new material.
For convenience, I've attached a work-in-progress scene with the smartphone template to this lesson (link below). But, of course, you can use any of your previous projects instead. And I am sure the results of yours will be even better than mine!
Editing Basics
You have already learned how to change the form of an object by changing its scale. In reality, though, this is a very rough way to form a model. In essence, only a basic shape can be created this way. The real power is manifested only when you manipulate the elements of an object.
A three-dimensional model is made of vertices connected with edges and polygon planes. All of these can be accessed through a special working mode of the 3D View window appropriately known as Edit Mode. It can be selected in the Mode menu (fig. 1).
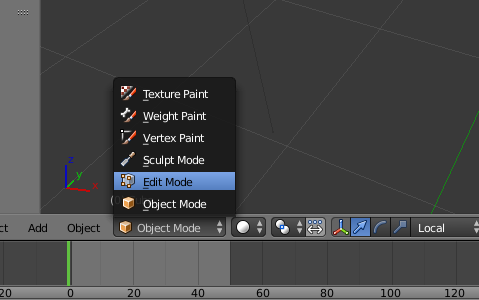
Figure 1
Remember one simple rule: the Mode menu concerns only an active (selected) object in a scene. You gain exclusive access to modify it. And until you exit Edit Mode, all other objects are unavailable.
We are interested in two modes: Object Mode and Edit Mode. The first one is selected by default. It is a mode which allows us to manipulate objects in the scene: move them to specific places, rotate them and so on. However, if you want to edit a particular object, you have to switch to Edit Mode.
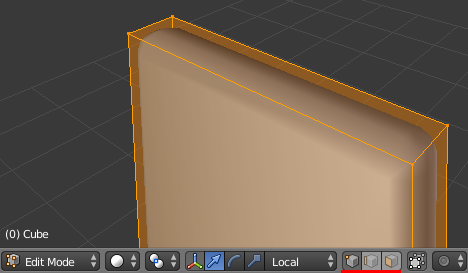
Figure 2
If you've already done it, you'll notice that the appearance of the model has changed a little. This is how the program shows the structure of the object (look at the fig. 2). We can see the vertices and edges connecting them, "filled" by polygons. So, you can manipulate any of these elements, and not necessarily just one at a time. Moreover, all manipulations are performed the way you're already familiar with. You just need to select all those elements beforehand. Blender allows you to set up current selection mode: vertices, edges or faces. This option is available in the Select panel of the 3D View window (look at the fig. 2). I've marked the buttons you will need in the picture. The first of them is responsible for vertices, the second for edges, and the last one for polygons, respectively. Try, for example, to select any vertex and to move it with the mouse. It's easy!
That's exactly how modeling is done. You select elements you need and manipulate them. You can change the scale, move or rotate them. To select several elements simultaneously, you need to use the Shift key.
To work faster and more conveniently, I recommend memorizing the following hot keys:
The G button enables Translate (grab/move) mode
The R button handles rotations
The S button allows you to change the scale.
At the moment, our model is perfectly smooth on every side, but it's not realistic. We need buttons, cameras, various decorative stamps and the screen. It is better to create some elements of a smartphone as separate objects, e.g smartphone buttons. But the screen should be an essential part of the model.
Let's assume that we have to leave some free space for a camera and control buttons at the top and the bottom of the device, and the screen should be pushed a little inside compared to the rest of the frame. But how can we do this, if we only have 8 vertices?
At first, we have to apply the Bevel modifier that we used in the previous lesson to, well, bevel the object's edges. You most likely remember that modifiers change the structure of an object "on the fly". That means new elements will also be modified, which we don't need. Switch to Object Mode, open the modifier tab and press the Apply button.
There are many ways to add elements to an object's structure. In our case, the tool called Loop Cut And Slide will do. It is intended for creating additional edges in circles. Let's see how it works.
Switch to Edit Mode and put the mouse cursor at the center of the model. Press the CTRL+R hot key to quickly activate the instrument. Try moving the mouse within the boundaries of the object, and you will see pink perimeters around the object. And by rotating the mouse wheel, you can create several of these edges (fig. 3).
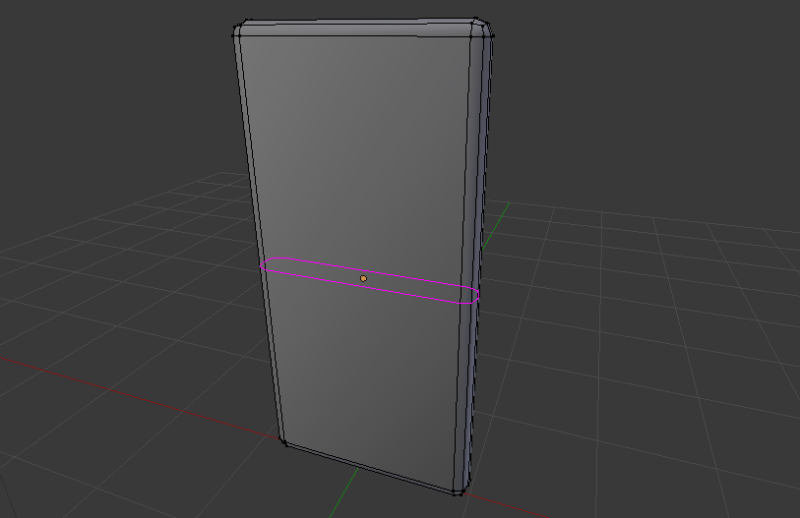
Figure 3
This is how this instrument shows where the edges will initially be set. But, in reality, nothing is done yet. If you press the Esc key, the program will simply disable the tool. By pressing the left mouse button, you can confirm your choice. But this is not the end step either.
The instrument will create new edges at the place you have chosen; it will mark them orange, but it will not save the result. You can move these edges anywhere by simply moving your mouse. And just clicking the left button a second time will mark the end of the work.
This is how I created additional edges seen in the Figure 4.
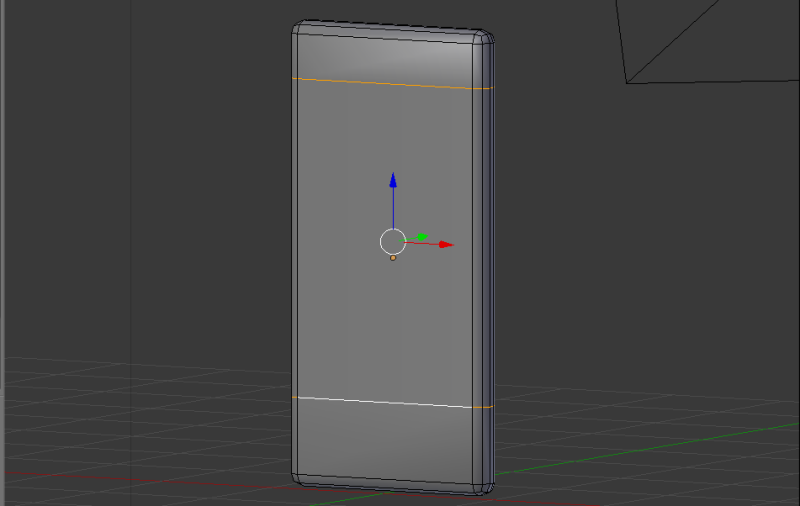
Figure 4
Let's conduct a little experiment.
Enable polygon selection mode, mark where you want your screen to be and try to move it inwards (into the phone). But what's this? You're left with some backward-curved frame that clearly won't do (fig. 5).
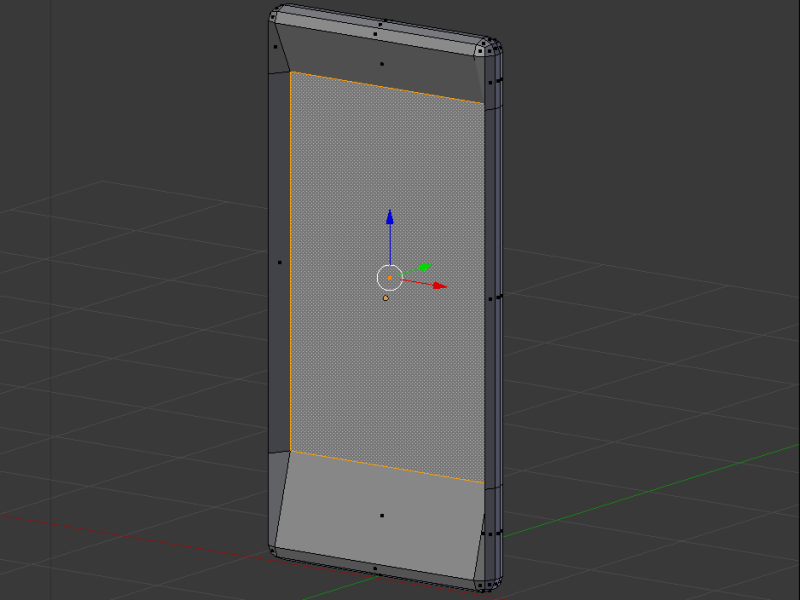
Figure 5
You probably have already guessed the reason for this — there are not enough elements once again. But please don't rush to use the Loop Cut And Slide tool, there is a better solution.
Blender has a very convenient Extrude instrument. Its purpose is to emboss, to fully copy a selected part of the object without breaking connections. Imagine yourself selecting a polygon, pressing the E key and you get your screen. Better yet, don't imagine it — let's do it!
The Extrude instrument works in a way similar to that of Loop Cut and Slide. After activating it, the program will create the necessary elements but will not yet finish the operation. You can move new polygons anywhere you want. Just a click of the left mouse button will set the results in place.
Do this, and you will get a result similar to the one shown in the picture below.
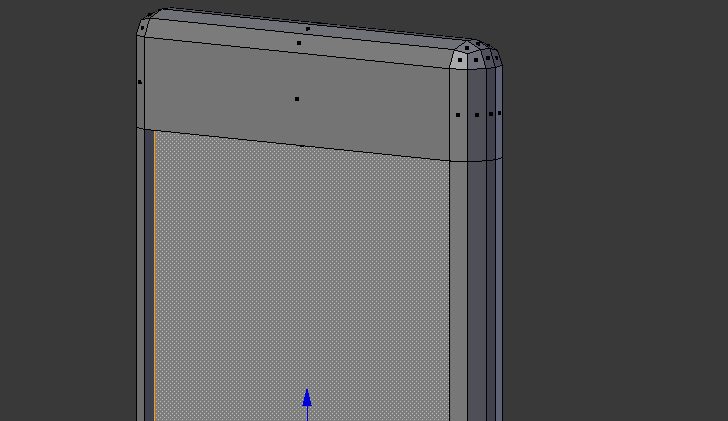
Figure 6
Now you are familiar with the most common method of quick modeling. To help you memorize this method, I've separated it into these steps:
1. Creating the base form from a simple shape.
2. Editing the structure of the object with transform tools.
3. Using the Extrude tool to add new elements and Loop Cut And Slide to subdivide existing ones.
Nuances in the Work
Buttons, cameras, panels — there are still numerous things that we have to add to our smartphone. I won't limit your creativity, so enhance your device with any additions you would like. But let us take a look at several more of the convenient modeling tools the program has to offer.
You can always emboss new elements in the frame with the Extrude tool. However, in some cases it is much more convenient to add new, separate objects, for animation purposes, for example.
Upon startup, the program has already prepared one basic shape that you used to create the frame of the smartphone. But you can always add an unlimited number of other shapes, various forms and complexity to the scene. You can also add new light sources, additional cameras and much more.
In the 3D View window menu, there is an entry appropriately called Add. Select it, and a palette of various objects will unfold before you. For want of a habit, you can even get lost in it (fig. 7).
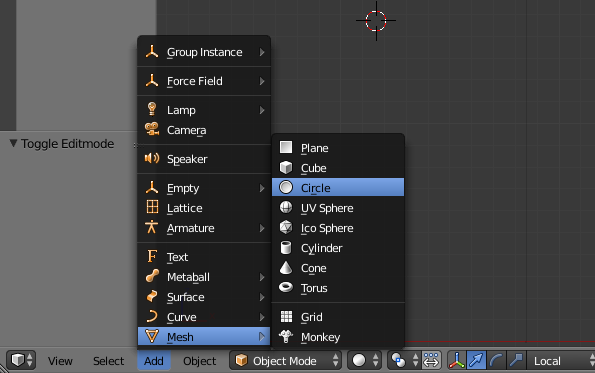
Figure 7
Look closely at the picture. Do you recognize a "target scope" that you're already familiar with? It can be moved in the 3D View window by clicking the left mouse button. This is a very important additional tool for creating a scene. First of all, the 3D Cursor (let's call it that) marks the place where new objects will be added to the scene. It works flawlessly in every window mode, but now we need Object Mode. Enable it.
We are working with Mesh group shapes. They have simple and convenient structures and are perfectly suited for achieving our goals. Figure 7 shows all available Mesh objects. For example, we used a Cube to create the frame, but Circle will be more suitable to create the camera's eye-lens.
Switch to Front View mode (NumPad 1 hot key) and enable orthographic view (NumPad 5 key). This mode is convenient in a way that perspective distortions are not visible.
Place the 3D cursor in any free spot. Select Circle shape from the Add | Mesh menu, and it will immediately appear in the place you indicated.
Remember the following rule: Blender allows you to change the settings of a new shape only directly after it has been created. If you, say, try to move it, the settings will disappear. However, these settings are very important for our task. Look at the left panel of the 3D View window. It usually contains tools for the current mode, however, when creating a new object, parameters of that object appear at the bottom of it (fig. 8).

Figure 8
It is entirely possible that the newly created Circle is pointed in a wrong direction, so check the Align to View box. This shape has 32 vertices by default, and that's too many. You can change the number of vertices in the Vertices field. And the Fill Type menu allows us, of course, to choose the fill type.
At first, the Circle has no volume. It can be added using the Extrude tool. Switch to the Edit mode (Tab hot key), select all elements (the A key) and press E to extrude the volume. To add depth, switch to the vertex selection mode and move the central point a bit deeper. All in all, here's what I've got (fig. 9).
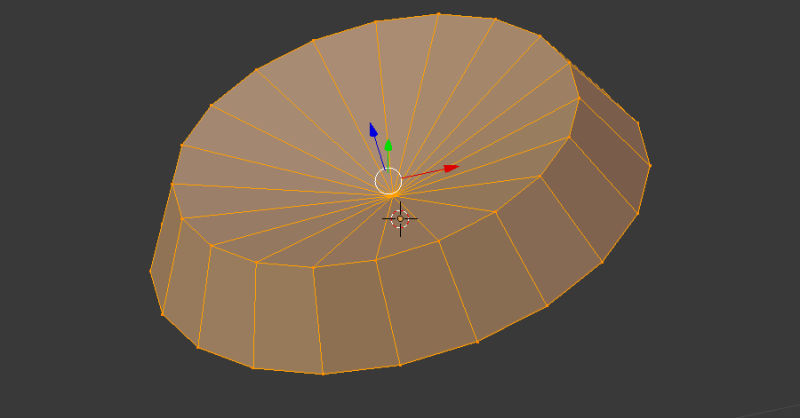
Figure 9
As you can see, creating separate parts of a model does not pose any difficulties. All you have to do is select a fitting shape and "polish" it with the Extrude tool. Let's take a look at some additional instruments that we might need during editing.
Delete. You can delete either single or multiple elements. Select the ones you need, press the X hot key, and the program will show a corresponding menu where you can select, what you specifically want to delete. By the way, this hot key works in Object Mode as well, however, it will delete the whole object.
Polygon fill. You can "stretch" a polygon between several vertices, if you select them and press the F button.
Duplicating. Unlike the Extrude tool, duplicating allows you to create a separate copy of whatever you have selected, both in Edit and in Object modes. For example, you can make a button object and copy it as many times as you need. This is done by using the Shift+D hot keys.
We have examined basic modeling in Blender. By using only a handful of tools you can create an object of almost any complexity. Of course, features of the program do not end here. Now I will move to another very interesting style of modeling and while I'm thinking of the next paragraph, you can fine-tune small details on your device.
Symmetrical Modeling
Left and right, right and left — symmetry is all around us. It would be silly to model two identical parts of an object separately. For example, it's easier to create one character's hand and then use its mirror image. And, there is a developed mechanism for this kind of modeling, with the "reflection" automatically being created.
Usually, a cube shape is used for symmetrical modeling, but you can just as well choose a different object from the Mesh group. However, I would still advise you to use a cube.
Before starting your work, you will need to prepare your shape the following way:
Add a cube to the scene and switch to the Front (NumPad 1) view mode. In the Edit Mode, you have to slice it into two halves vertically using the Loop Cut And Slide tool. Delete all vertices on the left side of the object. You should get what is shown in the picture below.
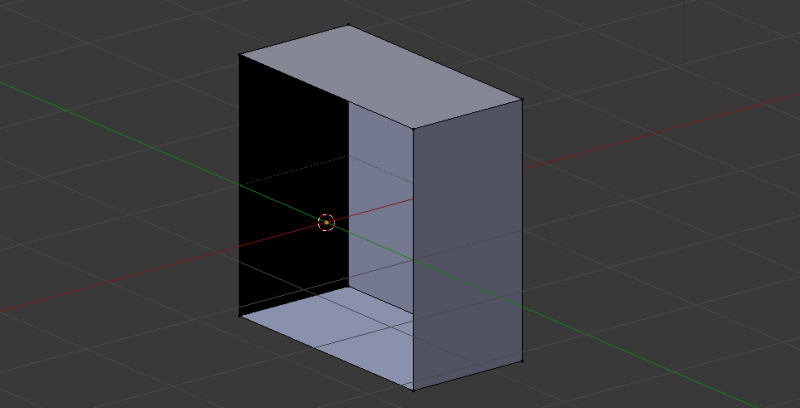
Figure 10
All these steps are determined not by my whim but by a pattern developed by many artists. You edit the right side of the object using the tools you are already familiar with, while the program automatically builds the left side. And the Mirror modifier will help us with this.
Add it to the object, and you will see the following (fig. 11).
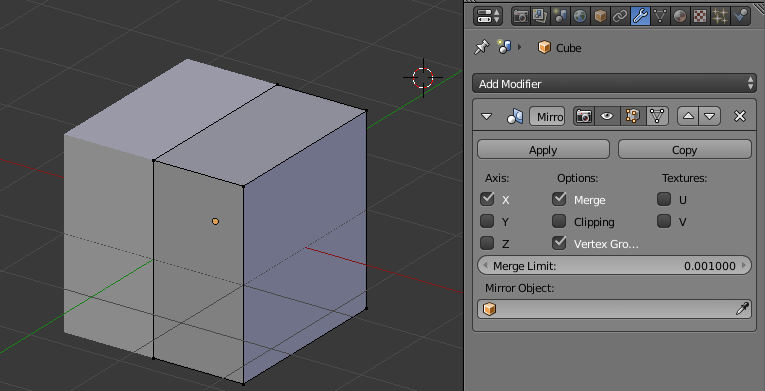
Figure 11
Now you can boldly edit the visible half of the object. Try to extrude one of the polygons, move, rotate and scale it. The program will imitate all your actions with ease. This way, for example, you can create a stand for your smartphone. The Mirror modifier is very often used in modeling, so we better discuss its parameters more thoroughly.
The Axis option group. This is none else than an instruction for the modifier, which specifies what sides it should process. It is set to the X axis by default. For example, you can remove the bottom half of the shape and check the Z box. Then, this coordinate will also be used for doubling.
The Clipping option. It prohibits translation of the object center by moving the vertices. It can be used to be sure you won't ruin your object.
The Merge option. It automatically combines the vertices that are placed within the range set in the Merge Limit field.
And that's all for now. The knowledge you have acquired should be enough to make a scene like mine (fig. 12). You didn't think that I would describe every single step of creating it, did you?
I believe that you can make a much better model than mine. Go for it, but don't get comfortable just yet! We still have many interesting things ahead of us.
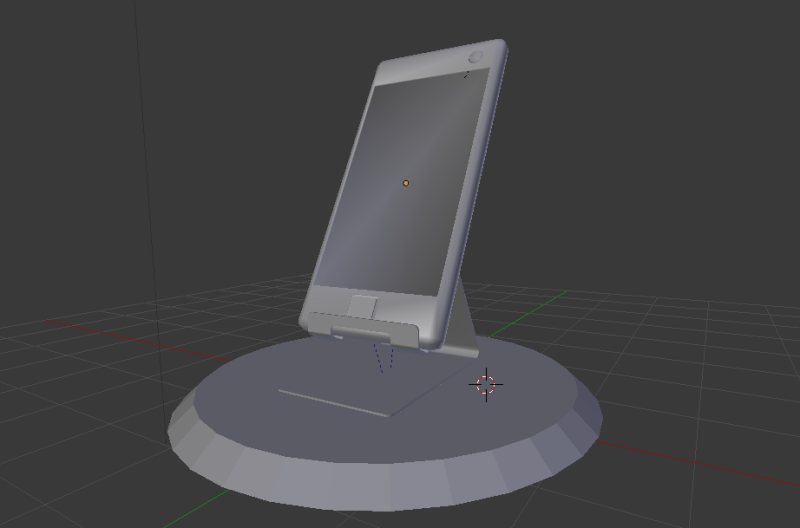
Figure 12