A job well done! Natural light refraction is a phenomenon that occurs in the field of slope game physics.
Creating Blend4Web Materials. Leather and Glass
2017-12-12
We are continuing to share the secrets of creating high-quality materials. The first lesson in this series was dedicated to matte materials, while the second one dealt with copper and chromed steel. Now, it is time to explain how glass and leather work.
Working with Fresnel Effect
As we know, some materials (such as leather, wood, plastics or rubber) reflect their surroundings unevenly, depending on the point of view.
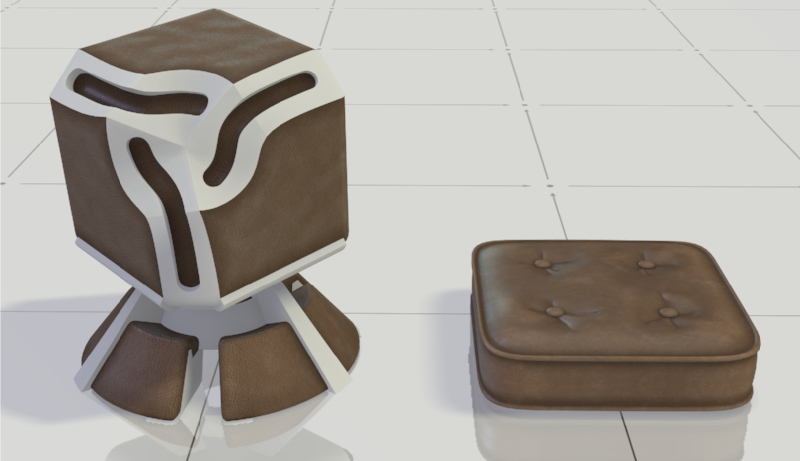
Leather material with Fresnel effect
The Leather material from our library can be seen as one of the most simple examples of this. Let’s see how it can be built.
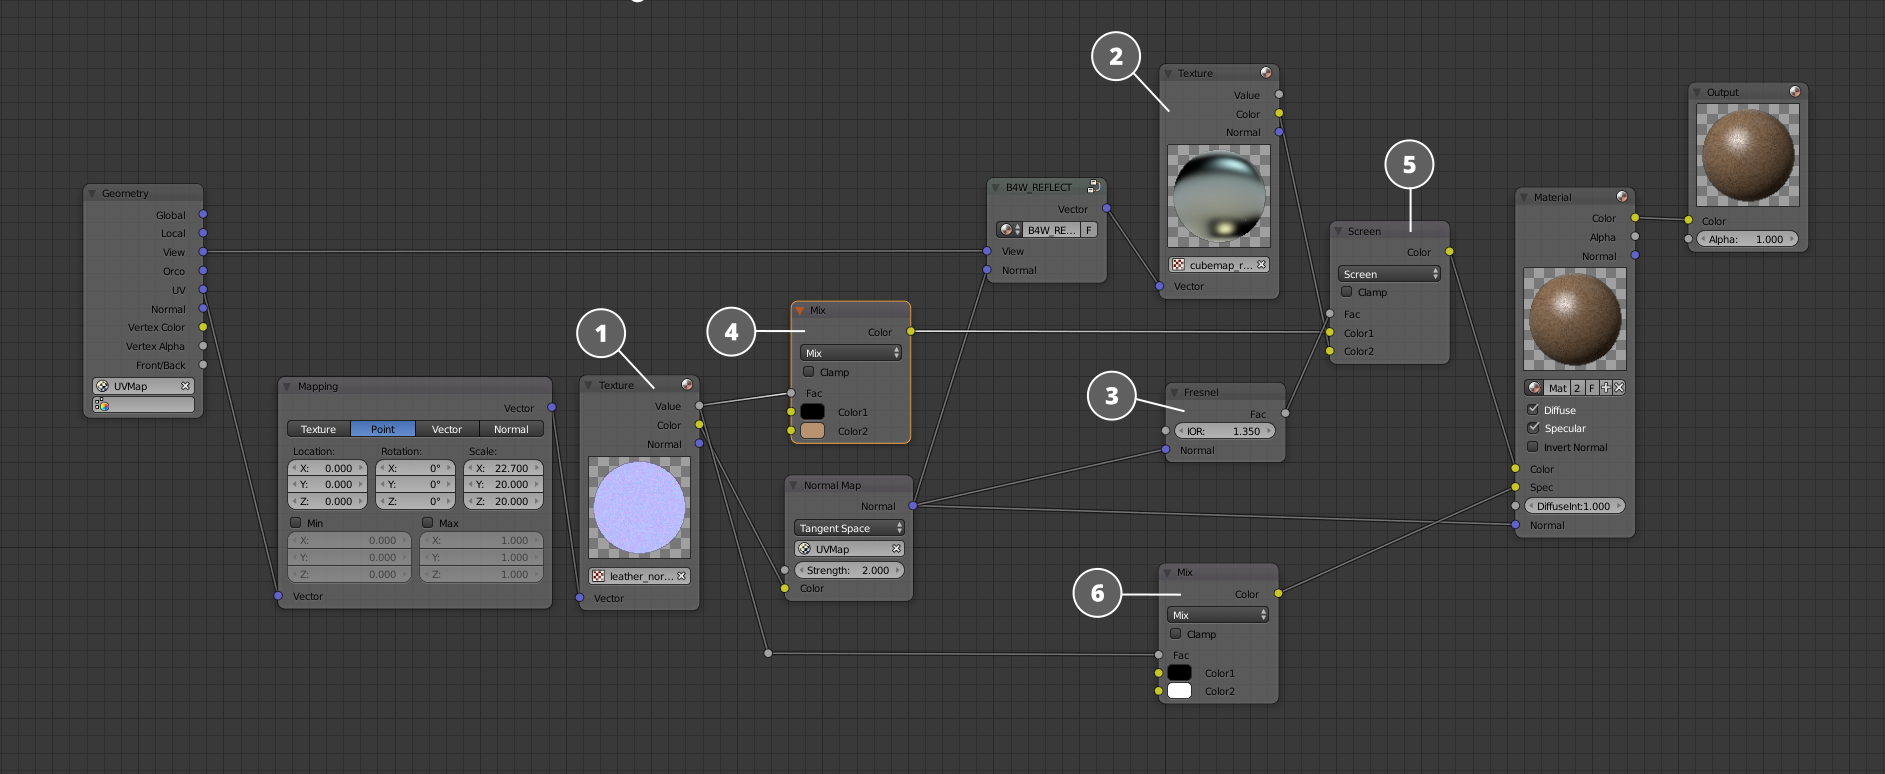
Simplified core of the Leather material
The core of the material is shown here is a simplified form to make its structure easier to comprehend. If you have read the previous article, you will probably notice that it is very similar to the core of the Copper material.
The core includes a normal map (1) to imitate inequalities of the surface of the leather. The alpha channel of this map contains a basal black and white texture that is then colored using a ColorMix node (4). This setup reduces the size of the resulting application and decreases loading time.
The main feature of this material is the Fresnel node (3). Using it, we can create a mix mask from the reflection map (2) and the base color of the material (4).
A Specular map is used to control the highlights. It is created from a black and white mask. If you want to know how exactly it is done, please watch the video below.
Transparency and Reflections
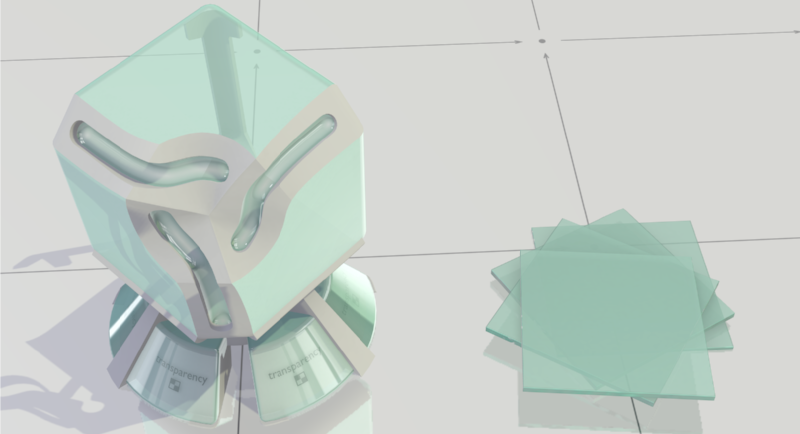
Glass material from the Blend4Web Material Library
Now, let’s make our task a little more complicated and make our material look more interesting by applying transparency, reflections and Fresnel effect to it.
Let’s start with simple thin glass. Sometimes, it’s better not to use refraction, as it is a rather performance-heavy effect, especially for low-tier mobile devices.
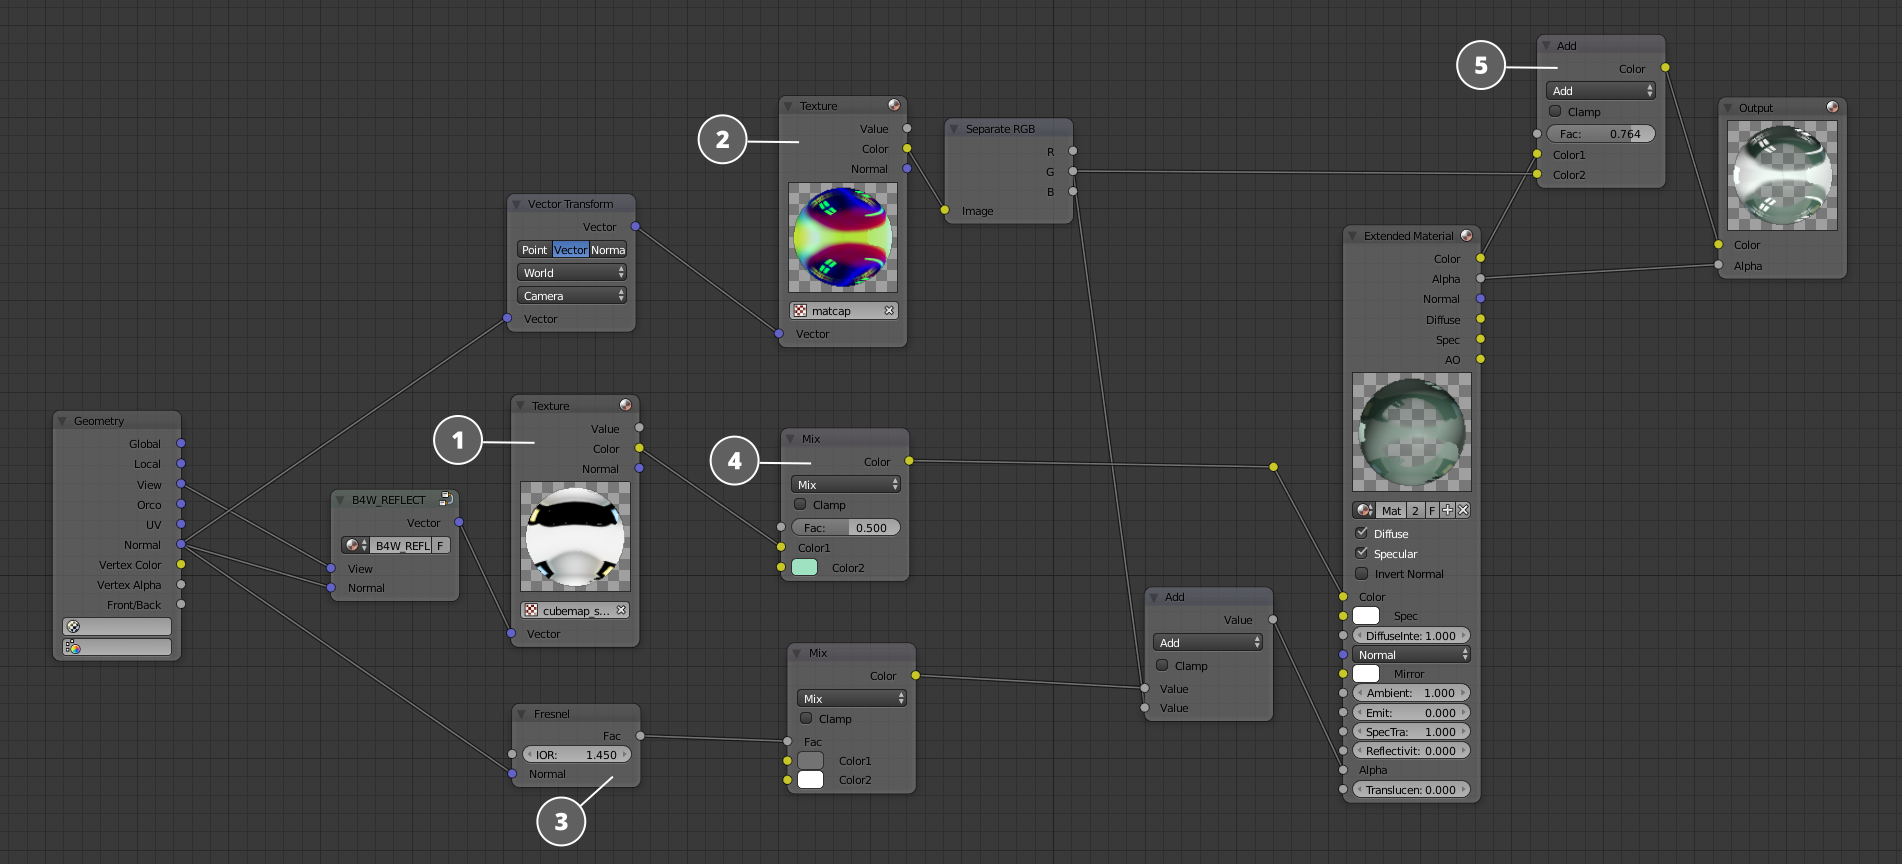
Simplified core of the Glass material
At the base of the material lies a cubemap (1) that is used to imitate reflection. This cubemap is tinted green (4) a little. A simple Matcap texture (2) is used to create realistic-looking highlights. Fresnel effect is connected to the input of the Material node, creating uneven transparency that changes depending on the view vector.
Now, let’s watch another video that shows the process of creating a transparent material. It, by the way, also contains several useful tips on Blender viewport setup.
Transparency and Refractions

Ribbed Glass material from Blend4Web Material Library
Our next step will be creating a ribbed glass that uses both transparency and refraction. Refraction effect is implemented using a special node developed by our team.
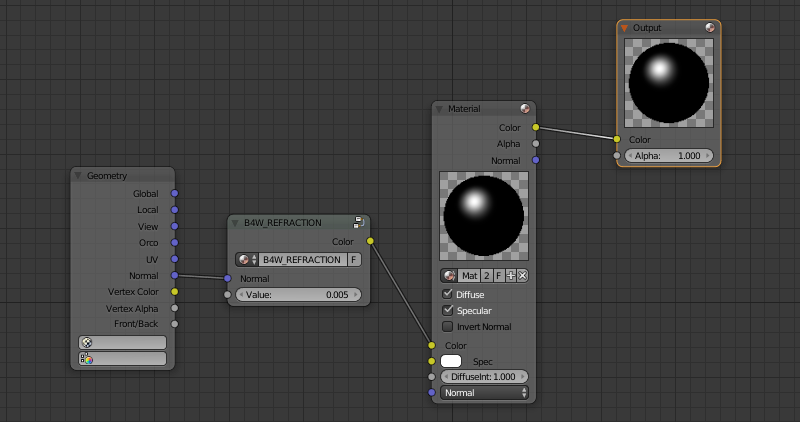
B4W_Refraction, a special-purpose Blend4Web node
All you have to do is to connect geometry normal or a Normal Map to the input socket of the B4W_Refraction node. Refractive power can be set using a dedicated numerical value. Unfortunately, refraction is only visible in Blend4Web viewport.
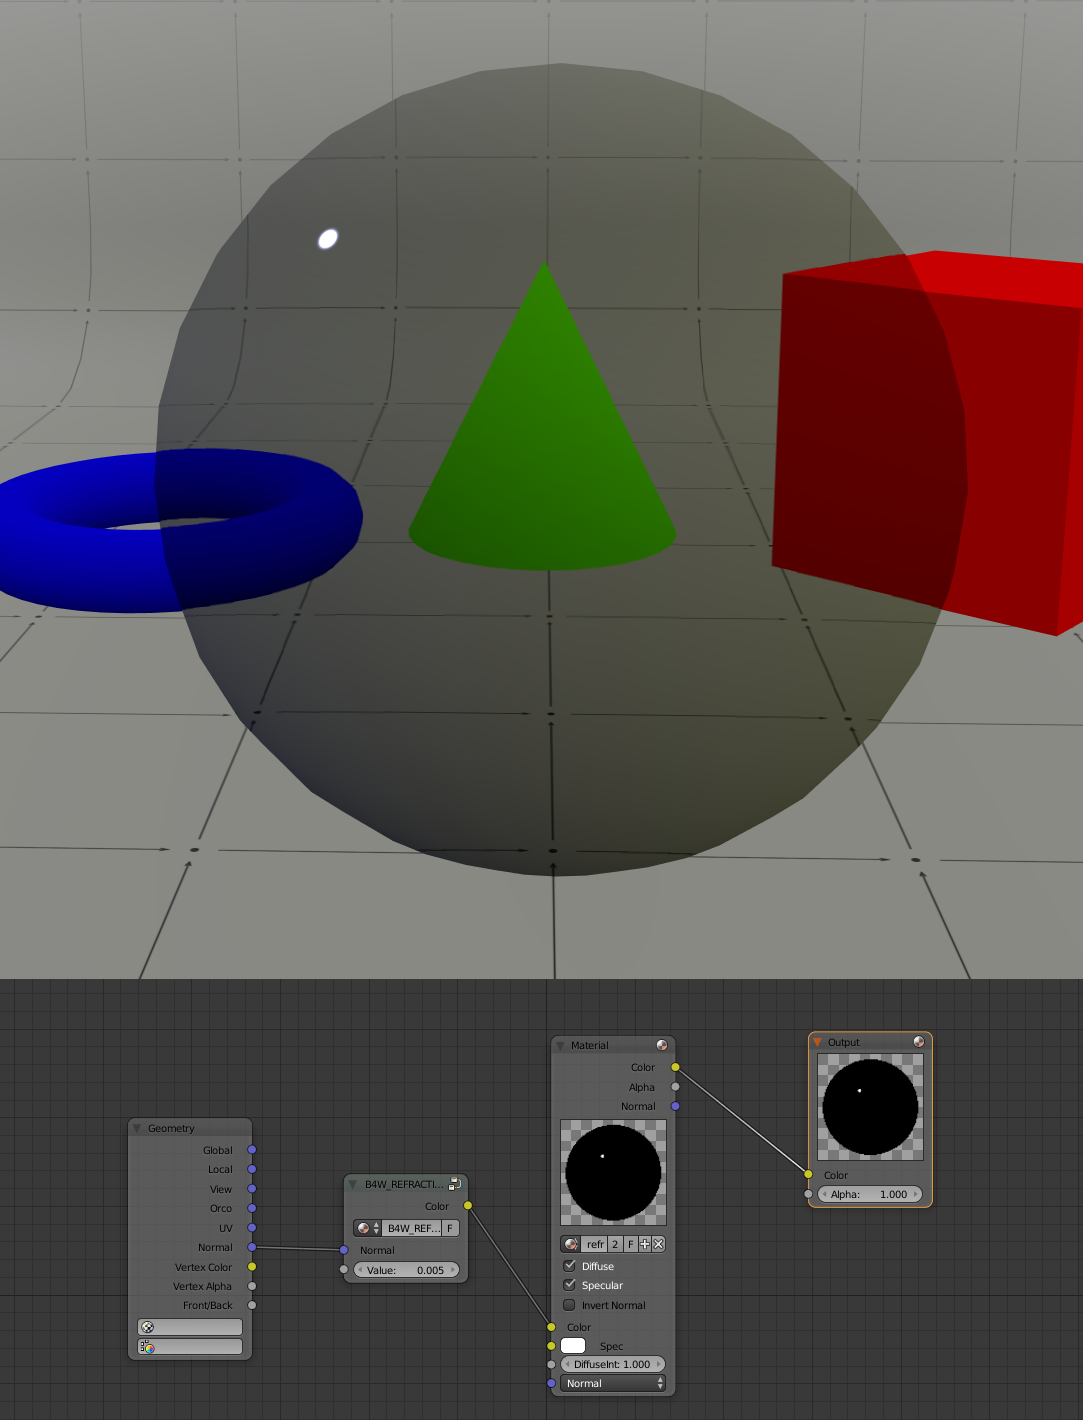
A transparent material that uses Refraction node
The picture above shows the Refraction node in action. To make the effect more complex, we will need to add a normal map.
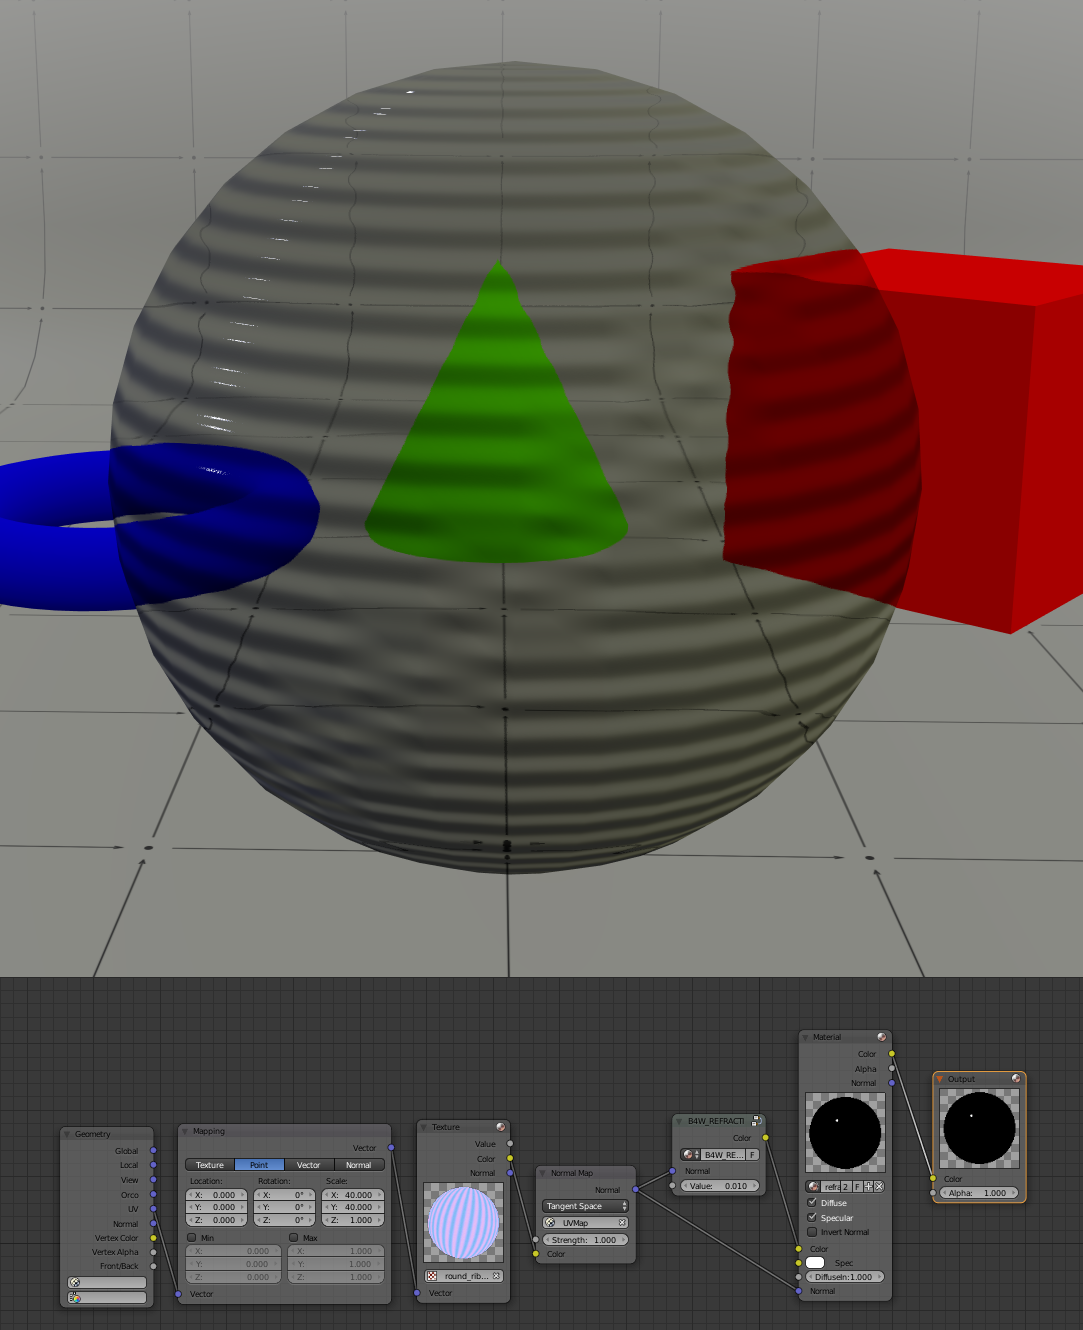
A transparent material that uses a normal map
After a normal map is applied, we can now see how sphere distorts the objects behind it. The only thing left to make a realistic-looking glass is Fresnel effect.
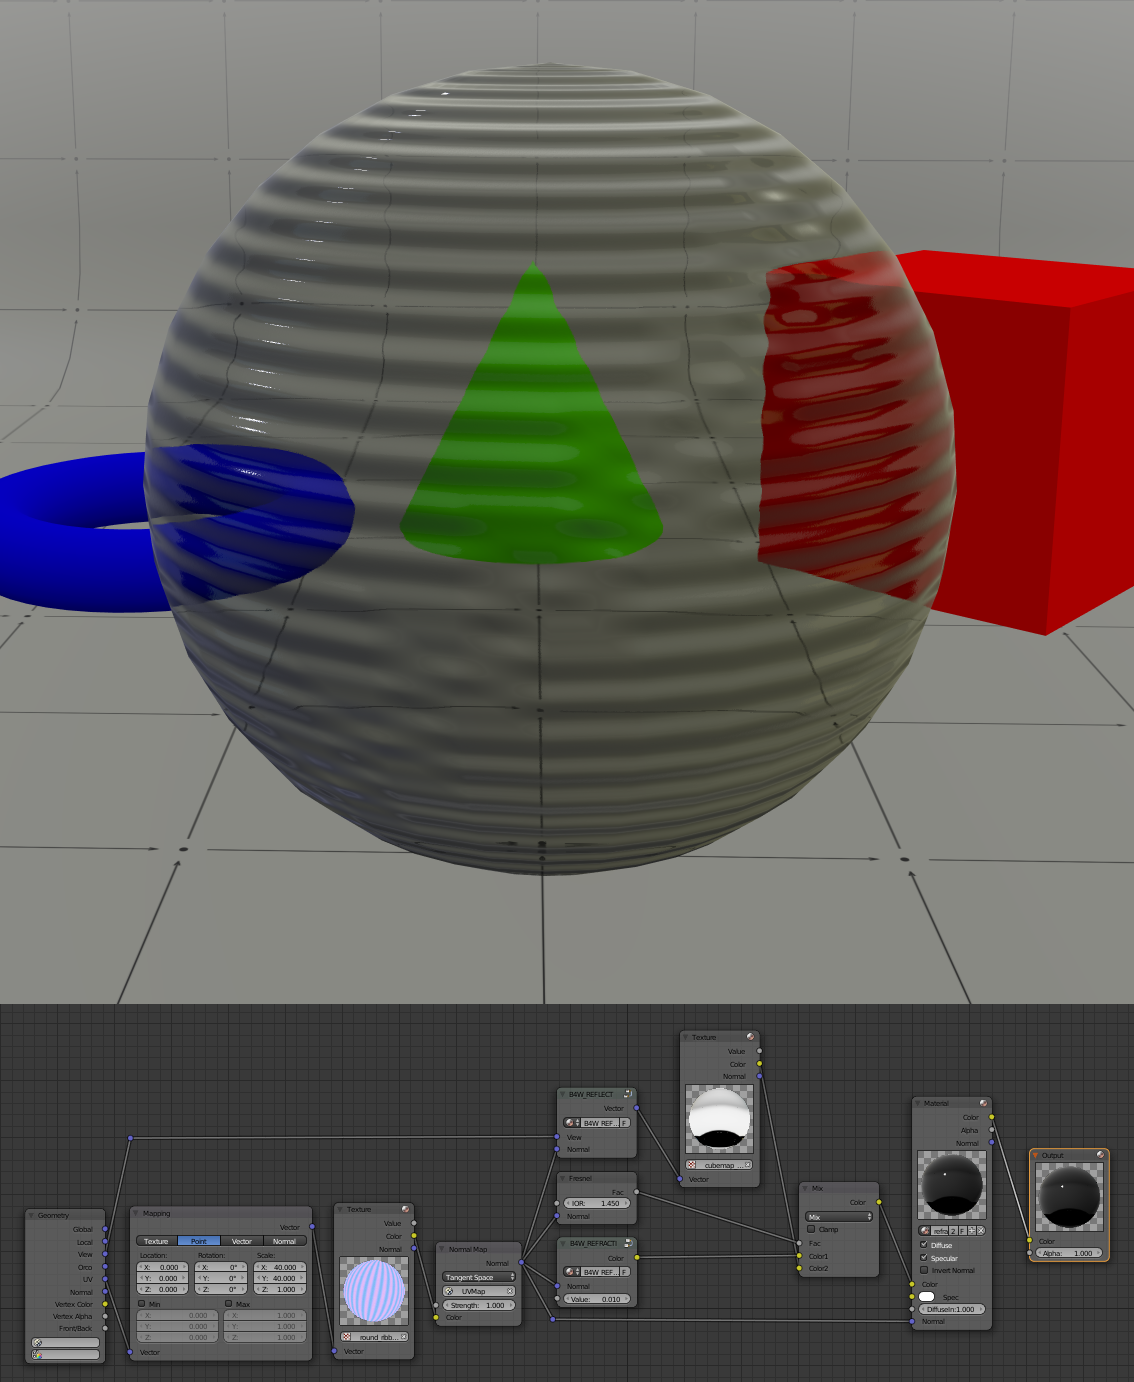
Transparent material that uses a normal map and reflection with Fresnel effect
Now, the glass looks better, as reflections help to emphasize unevennesses of the surface. Now, if we mix the refraction with some color, we’ll get a colored glass.
The picture below shows the final version of the material core. The color is created using a ColorMix node and a couple of math node to control Fresnel mask.
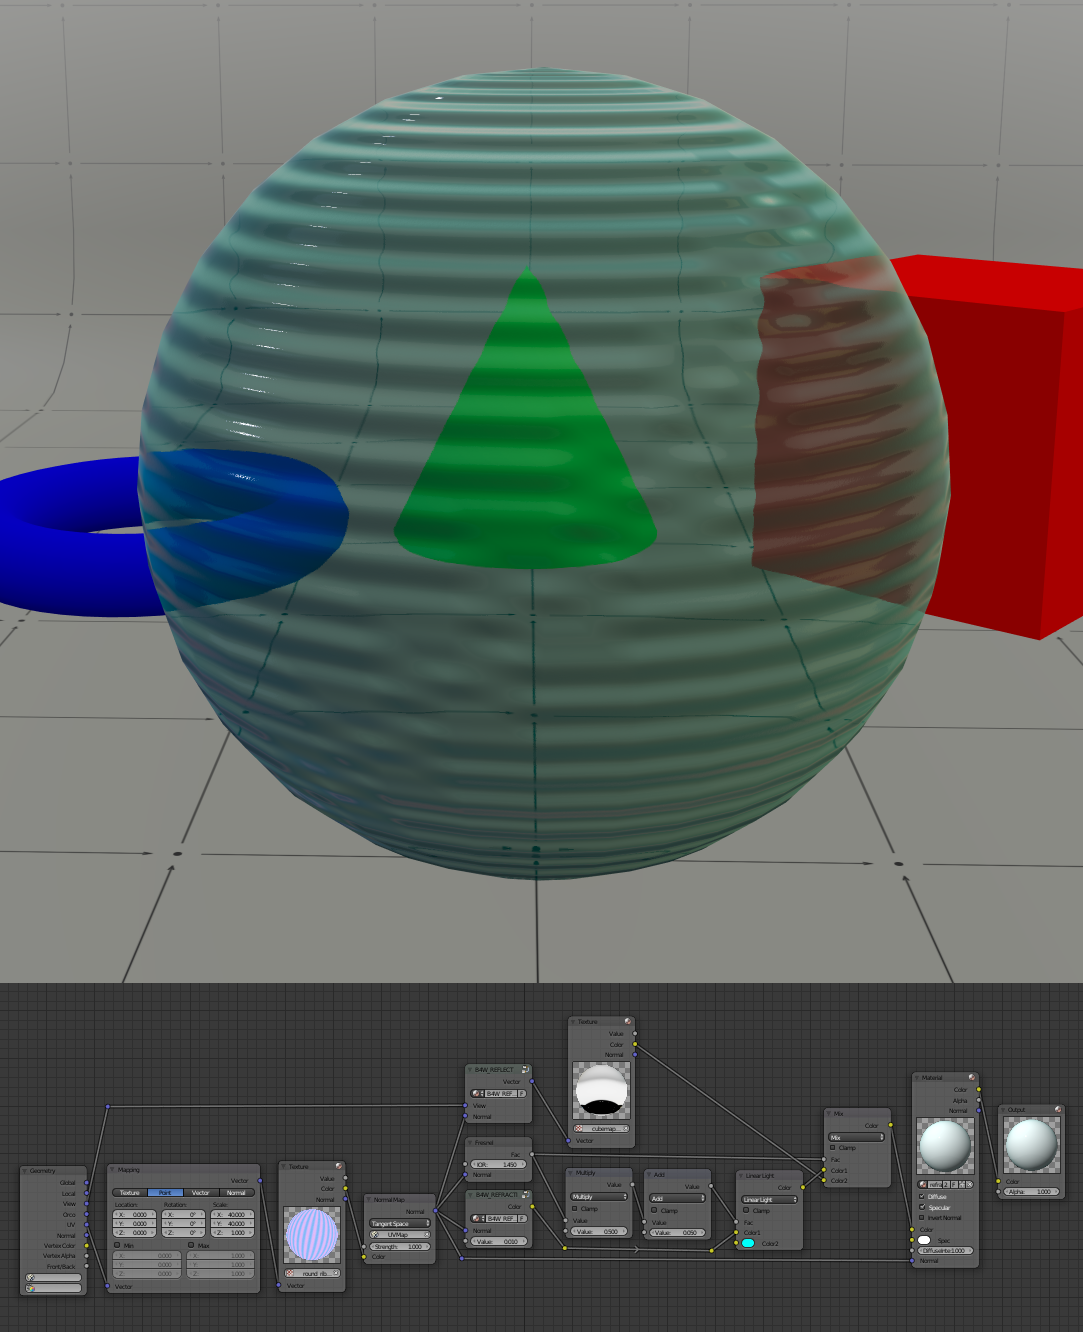
The material with added transparency and color
Next time, we’ll get to the multi-layered materials.