It is no secret that developing Internet-related applications is the most popular job on the market nowadays. This kind of apps include various news and entertainment web sites, online trading platforms, social networks, CRM systems, various services and online games… And every day, new technologies make their appearance. Yesterday, we might have been skeptical about them, yet today we put them to extensive use, and the only thing you need to access them is a web browser. One of these technologies is WebGL. Later, we’ll be talking about it in a greater detail. And for now, let’s dive into the past – if only for a few moments.

Historical Notes
In the year 2009, after a long period of research and development, a new software platform based on the V8 engine (which is used in Chrome web browser) was introduced. In essence, NodeJS is an environment for running JavaScript programs; it transforms JavaScript for a strictly browser-based into a general-purpose programming language. NodeJS is especially popular in server application development.
Later, a well-developed infrastructure for creating JavaScript applications was implemented. It includes NPM package manager, which is used to install libraries and their dependencies.
Soon after this, some of the NPM libraries were put to use for web pages development. Today, NPM is an enormous repository that includes countless server and browser libraries, frameworks and utilities.
And now, Blend4Web is also available for download from the NPM repository.
Installing NodeJS
There are several ways to install NodeJS on different operating systems, but we’ll discuss only one of them: the one that we consider most convenient, as it keeps the probability of any problems in the development process to a minimum.
The point of this method is to abstain from setting NodeJS up using install packages (.msi on Windows, .pkg on macOS, .deb or .rpm on Linux) and use another type of distribution kit instead. You might need to use several versions of NodeJS in your work, and it can be difficult or outright impossible if you are using install packages.
You can download NodeJS from its official web site. What we need is packages marked as Binaries: Linux Binaries (x86/x64), Windows Binary (.zip), macOS Binaries (.tar.gz).
After you download a kit suitable for your OS, keep in mind that any install package is nothing more than a simple archive that you need to unpack and make node and npm files available through the console. In other words, after unpacking the archive, we need to set up the environment. In each and every operating system, there is the PATH environmental variable that serves this exact purpose. We need to add the path to the folder containing our files to it.
In Linux and macOS, environment is set up similarly.
I recommend to use the ~/.profile file for setting up the environment, as it, on one hand, contains local user setting, while on the other hand it (unlike, for example, the ~/.bashrc config file) initializes environment for graphical utilities too.
So, add the following line at the end of the ~/.profile file:
PATH=/home/user/path/to/node/binaries:$PATH
We need to add the path to the beginning, before the content of the PATH variable. The reason for this is the fact that command line interpreter reads the addresses stored in the variable from start to finish and calls the first program that it finds; so we should make sure that no other programs with titles containing words node and npm would get in the way. In my case, the line looks like this:
PATH=/home/dal/soft/node-v8.8.1-linux-x64/bin/:$PATH
Reboot your OS and run the terminal. Make sure that node and npm are available.
Starting from here, I will be using *nix-system commands. If you are using Windows, simply add .exe extension (example: node.exe, npm.exe).
node --version
npm --version
If the terminal tells you that the program cannot be found, it means that you have made a mistake somewhere. Use the env command (in *nix systems) to view all environmental variables. Find PATH among them and manually check if the files are available at the path set there.
You can learn how to set up environment variables in Windows here.
After this, NodeJS is installed and ready for work. So...
Getting The Work Started
1. Open the project directory and create a new folder in it. Name it something like b4w_test.
2. Open this folder and create a new package (a project in npm terms):
This command will ask you a few questions. You don’t have to answer them and can simply press Enter.
After the command finishes its work, you will find a package.json file in your folder. You can change your answers at any moment by editing this file.
3. Now, we are getting to the most interesting part:
This command will install the blend4web package to the node_modules folder.
4. The package description mentions example applications stored in the projects folder. At the moment, there is one project titled my_project.
Let’s try it!
a. My_project includes its own package.json file that is different from ours. We will be looking on these differences in another article, but for now let's just copy all content of the node_modules/blend4web/projects/my_project/> folder to our b4w_npm_test project. Doing so will replace every file in the project directory, including package.json.
b.
Install all dependencies of the application that we have copied:
c. Run the start script from the package.json file:
The script will run webpack bundler in the watch mode, and webpack-dev-server as well. It will also open our app in a web browser.
After this, you can edit the code of the application and watch the effect of you work by refreshing the page. Webpack bundler automatically recognizes any changes made to the source files and updates application on the fly.
To stop the server, press Ctrl+C in the console window that runs the npm run start command
To Make Something From Scratch
So, what can we do...
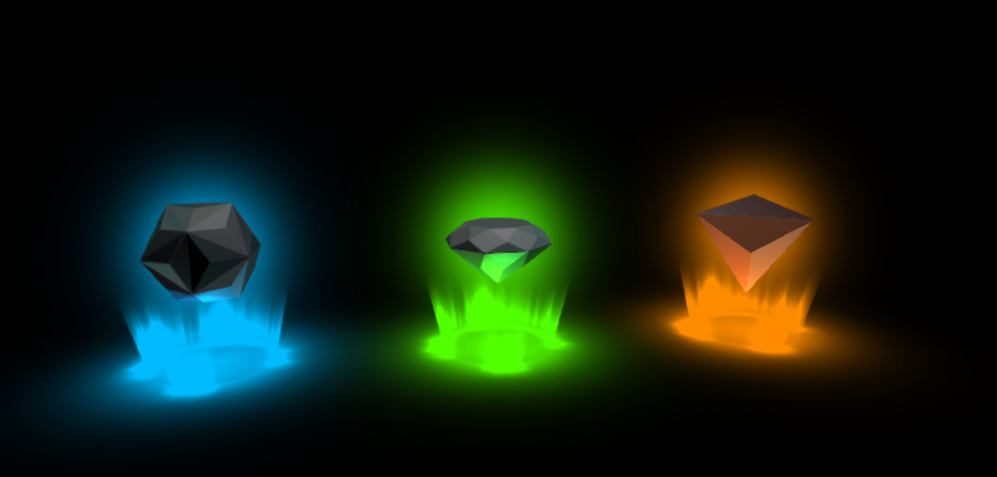
After playing with crystals from the previous app, I’ve noticed that while user can interact with the crystals, crystals cannot interact with each other. This made me wanting to build an application that uses physical object.
We will start the same way we already did: by creating a new package titled b4w_npm_test (steps 1-3 in the Getting The Work Started chapter)
To create a scene, we will need Blender with Blend4Web add-on installed. You might already be familiar with Blender, and you might know how to install add-ons – and even if you don’t, it won’t take long to google how to do it. As I’ve already mentioned, an npm package contains everything you need to develop your own application, including an add-on that can be found in the dist/addons/ folder.
After you have installed this add-on, the Fast Preview button should appear in the 3DView header (only in Cycles and Blend4Web rendering modes).
By pressing it, you order the add-on to export the scene into JSON format, save it in a temp folder and load it in the dedicated Scene Viewer application that is intended for viewing exported scenes. Scene Viewer is a very powerful debug tool that can, for example, show what parts of your scene are the most “heavy” and take the longest time to render. You can learn more about Scene Viewer in the user manual, but for now we only need its ability to show our 3D model in a web browser.
Even now, you already can conduct all kinds of experiments with model export – and observe the results. If something looks different from what you expect, this might be because a certain feature is not yet implemented in the engine… or you might have encountered a bug. If you run into any problems, be sure to leave you comments on Blend4Web community forums. This way, you can help us to make Blend4Web better.
A Scene From The Ground Up
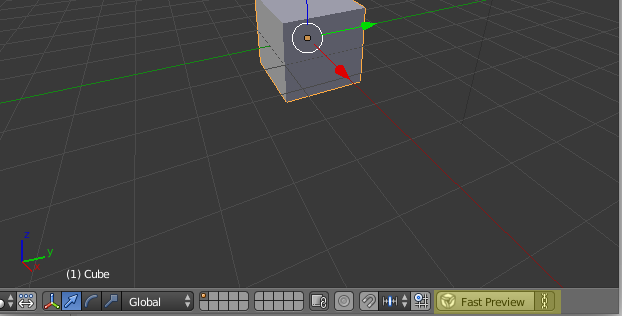
We will be creating a tower made of cubes, so we won’t have to delete the default cube. What we will have to do, though, is to edit its physical settings.
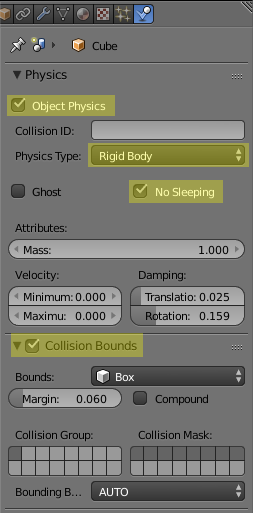 |
Open the Physics tab, check the Object Physics box and set Physics Type to Rigid Body. Then enable the Collision Bounds option and leave the Bounds with the default Box value. You will also need to enable the No Sleeping option so our cube won’t freeze if its velocity is too low. This way we will be able to create a simulation of a tower collapsing.
|
If you press the Fast Preview button, you’ll see our cube falling down, as it is now a physical object affected by gravity. Let’s save our .blend file. Name it main.blend and place it in the blender folder in the project directory.
Our tower will be standing on the floor, which we will make out of a Plane object. Place the objects so the cube won’t intersect with the Plane. Select the Plane, open Physics tab and simply enable Object Physics: we need the Static physics type that is selected by default. Now, our cube will stand on the floor and won’t fall anywhere.
The tower can be made directly in Blender. To do this, simply duplicate our cube several times:
1. Select the upmost cube and duplicate it (Shift+D, Enter);
2. Move the cube to the top (G, Z, 2, Enter).
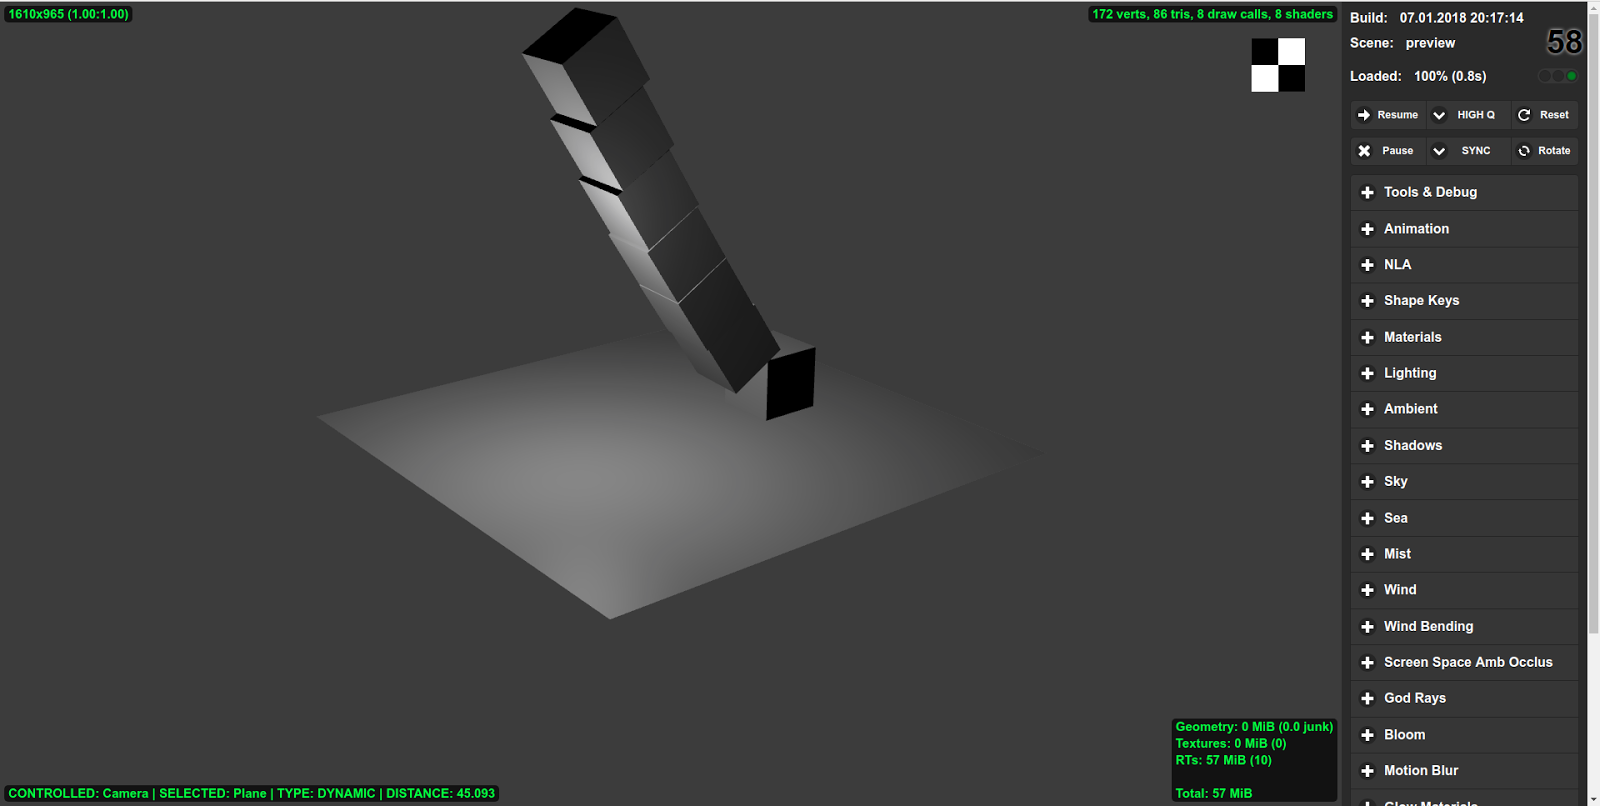
Let’s also move the lowest cube a bit aside to make the tower unbalanced so it can fall apart. Here’s how this may look:
 |
Everything seems to work, but if we try to use the mouse wheel to zoom out, our scene disappears for some reason. To fix this, we need to change the Clipping settings of the scene camera.
|
Now we need to export our scene. To do this, select File→Export→Blend4Web(.json) from Blender main menu and save the files to the assets folder of our project. There should be two files, main.json and main.bin. The main.json file contains meta data for the exported scenes, while the .bin file contains the data on geometry, texture coordinates and other 3D model parameters. But what should we do with these files?
What we’ll be doing is writing an application of our own...
Let’s Get To Programming
You might have already heard that starting with the version 17.12 Blend4Web supports ES6 modules. This, to put it simple, is a new method of plugging in JavaScript libraries. In ES5, we include every script we need using a script tag with type="text/javascript" attribute. In ES6 notation, however, the script tag with the type="module" attribute plugs in the core module, while all dependencies are downloaded automatically. This approach can also reduce the size of the application code base by ignoring unused function in the plugged libraries. The only downside is that for ES6 modules to work correctly, in many cases you will have to use module bundlers.
The example that you can find in the npm package is written using ES6, and it uses Webpack module bundler. I would also like to point out that if you are using any ES6 constructions aside from import/export (these are the keywords for ES6 modules), you’ll have to convert your code to ES5 if you want it to work across all modern browsers. This can be done using, for example, babel. We will talk about bundlers next time. For now, I’ll describe an approach that works flawlessly for any modern browser: we’ll use the pre-build blend4web library that it written using ES5 notation.
Built libraries can be found in the dist folder. We need any of the following files: b4w.js, b4w.min.js, b4w.simple.min.js, b4w.whitespace.min.js; their only difference is obfuscation level.
You can use static server to open your project. It can be installed using npm install node-static console command. To run it from project directory, use the static command; the application is available at the http://127.0.0.1:8080/index.html address. The listings of the main application files (with comments) that you can use in your projects are provided below.
So, let’s start with index.html:
<html>
  <head>
    <title>Blend4web Test</title>
    <!--Built engine-->
    <script src="b4w.min.js" type="text/javascript"></script>
    <!--Our code-->
    <script src="b4w_npm_test.js" type="text/javascript"></script>
  </head>
  <body style="background-color: black;">
    <div id="main_canvas_container" style="height: 100%; left: 0px; position: absolute; top: 0px; width: 100%;"></div></body>
</html>
And here is the main application code b4w_npm_test.js:
"use strict"

b4w.register("b4w_npm_test", function(exports, require) {
// import the modules you need
var m_app       = b4w.require("app");
var m_cfg       = b4w.require("config");
var m_data      = b4w.require("data");
var m_preloader = b4w.require("preloader");

var DEBUG = true;

// set the path to assets
var APP_ASSETS_PATH = "assets/";
// set the path to physics engine
m_cfg.set("physics_uranium_path", "node_modules/blend4web/dist/uranium/")

/**
 * export the initialization method that will be called at the end of the file
 */
exports.init = init;
function init() {
    m_app.init({
        canvas_container_id: "main_canvas_container",
        callback: init_cb,
        show_fps: DEBUG,
        console_verbose: DEBUG,
        autoresize: true
    });
}

/**
 * callback function is called when the application is initialized
 */
function init_cb(canvas_elem, success) {

    if (!success) {
        console.log("b4w init failure");
        return;
    }

    m_preloader.create_preloader();

    // ignore right mouse click on the canvas element
    canvas_elem.oncontextmenu = function(e) {
        e.preventDefault();
        e.stopPropagation();
        return false;
    };

    load();
}

/**
 * loading scene data
 */
function load() {
    m_data.load(APP_ASSETS_PATH + "main.json", load_cb, preloader_cb);
}

/**
 * updating the preloader
 */
function preloader_cb(percentage) {
    m_preloader.update_preloader(percentage);
}

/**
 * callback function is called when the scene is loaded
 */
function load_cb(data_id, success) {

    if (!success) {
        console.log("b4w load failure");
        return;
    }

    m_app.enable_camera_controls();

    // place your code here
}
})

b4w.require("b4w_npm_test").init();
That’s all for today! Hope this article has been useful for beginners and intermediate developers alike. Source files for the application are available at the link below. We wish you all best of luck and interesting projects!
Run the applications
Application source code