Cloth Simulation Workflow
2014-07-04
In this article we'll describe the vertex animation workflow that is practiced by the Blend4Web team. Using a flag model as an example, we'll cover the following topics: cloth physics simulation, looping and baking the vertex animation, setting up a double-sided translucent material, tweaking and exporting the whole scene. You can find the source files in the free Blend4Web SDK at blend4web/blender/tutorials/basic/flag/.
We'll work with two different files for convenience. In one of them we'll process cloth simulation (flag_simulation.blend), and in the other - set up the looping animation playback and get the scene ready for exporting to the engine (flag_cashes_mix.blend).
Modeling
First of all lets make the flag, the flagpole and the environment. The flag is a subdivided plane, the corners of which are a little bit stretched near the flagpole to imitate tensions. This model will serve as a simulation cage.
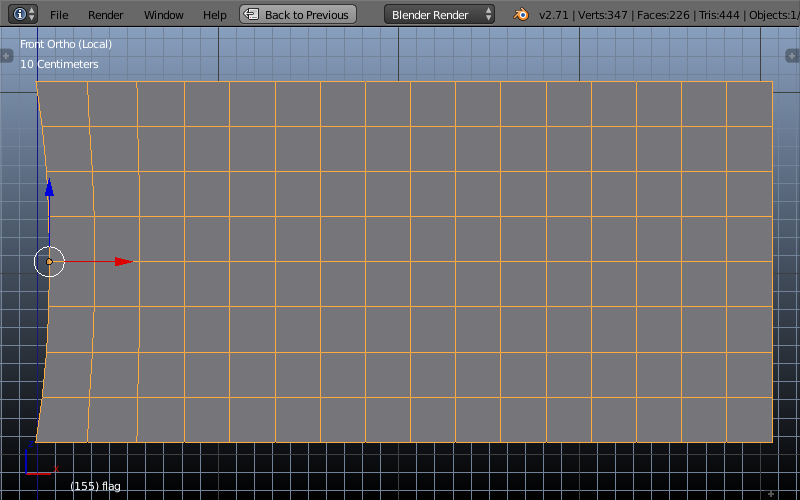
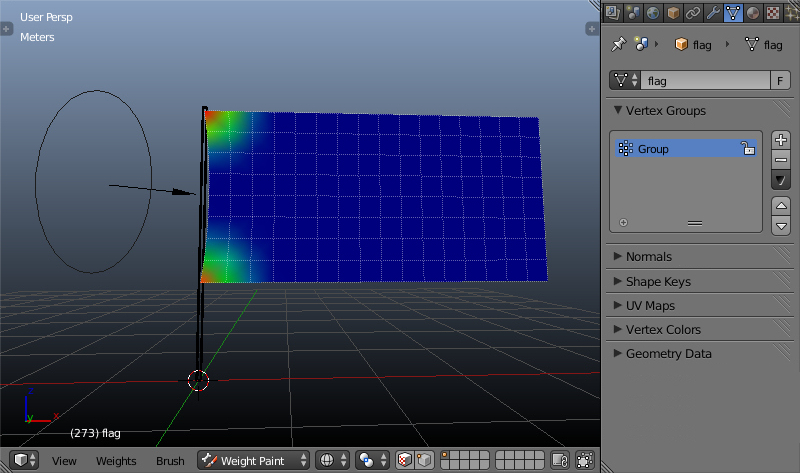
Lets assign a vertex group (named just "Group") to the vertices near the flag fastenings in the Weight Paint mode. In these places the simulation influence will be minimal.
Lets create a wind source as we need it for the flag to wave.
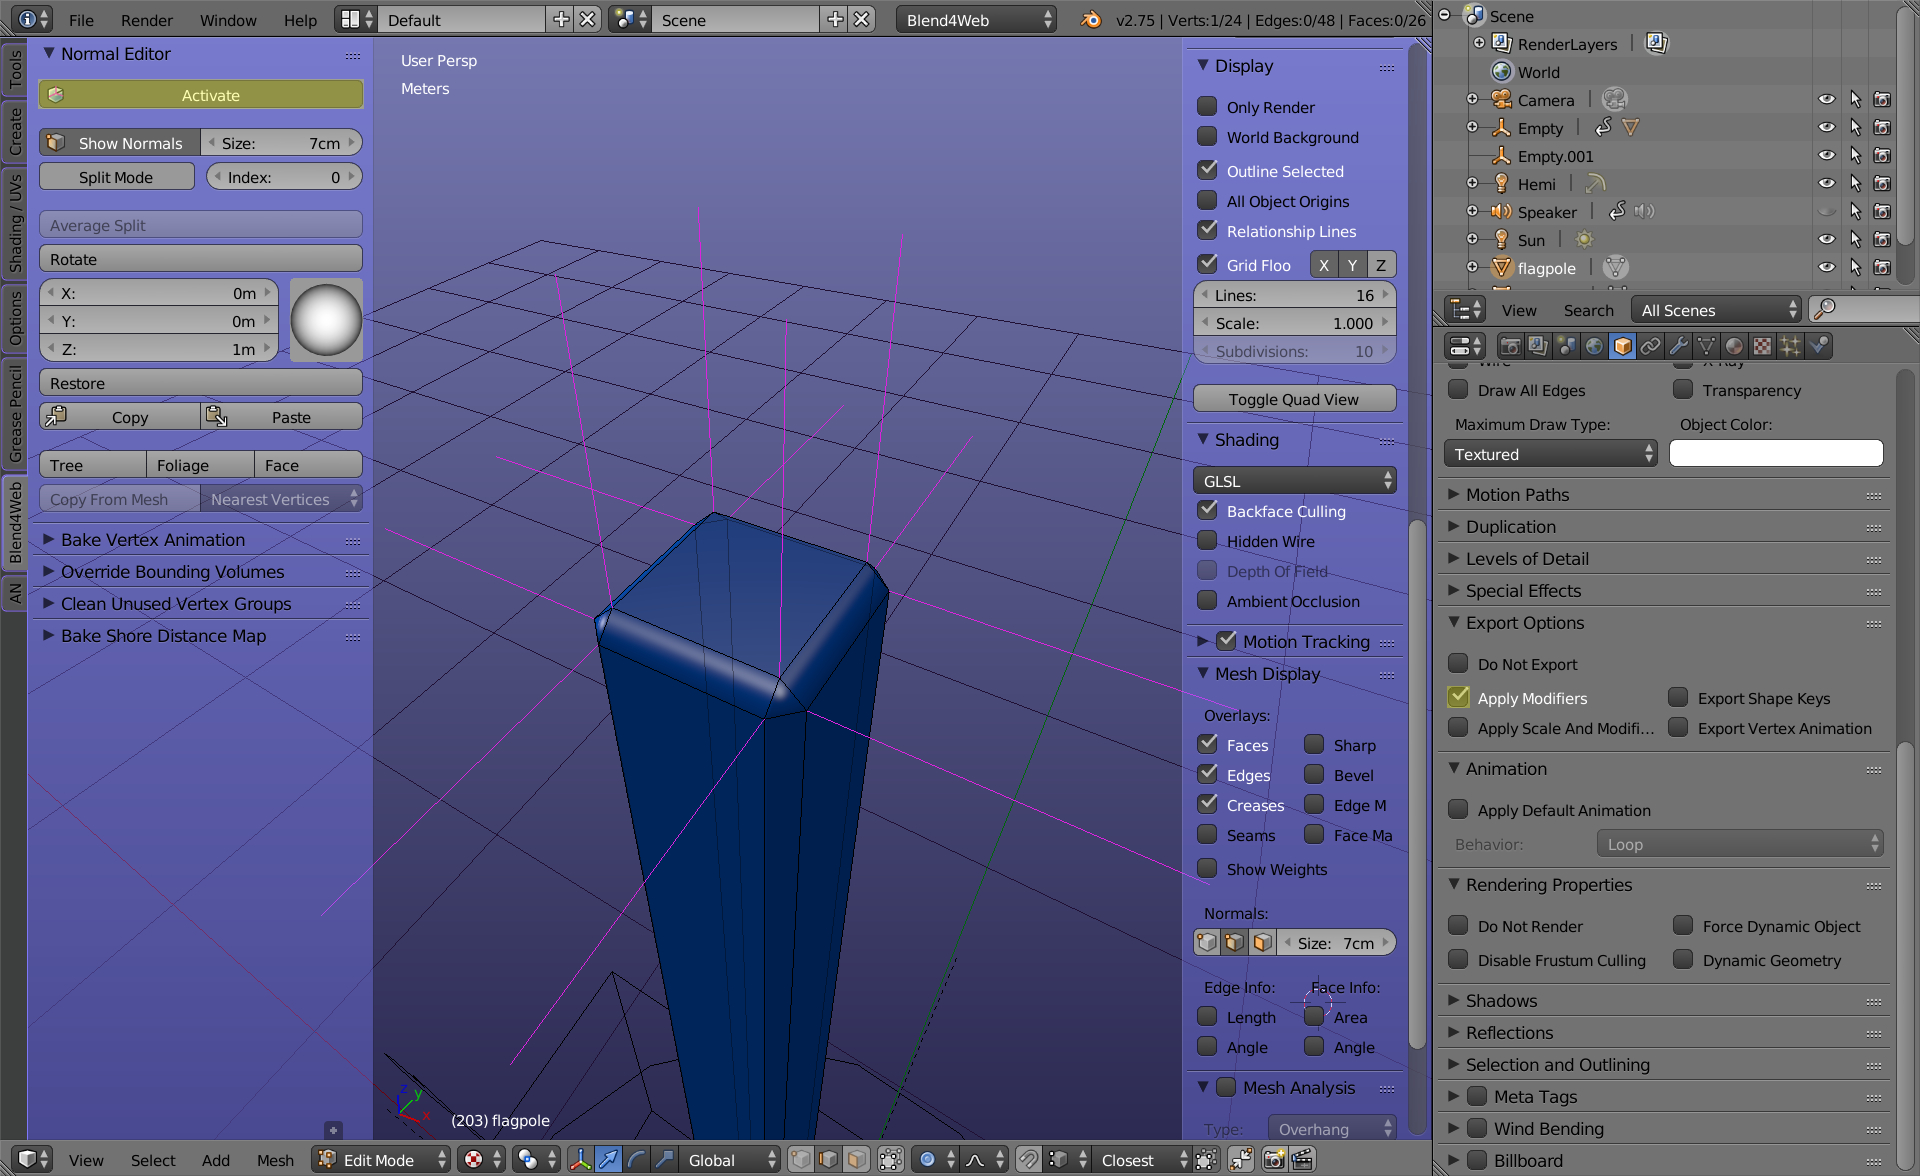
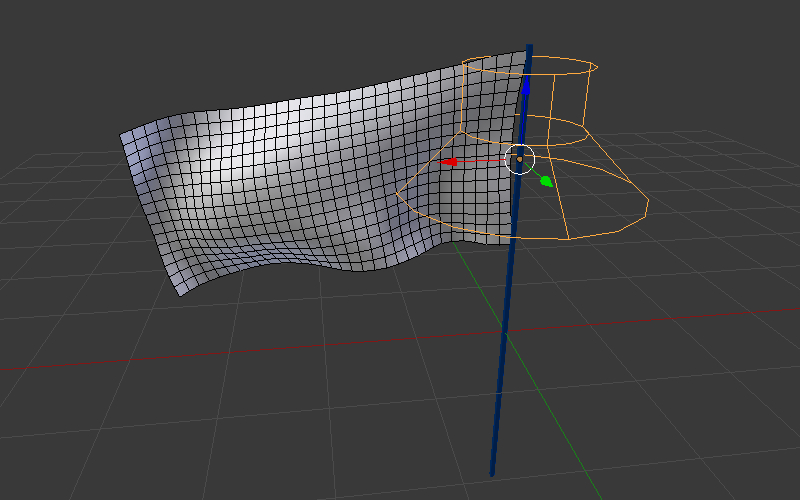
The flagpole object is an extended box with an ordinary bevel. Lets select the Smooth Shading mode for this object. In order to avoid a sphere-like shading we'll correct the vertex normals using the Normal Editor. Edited normals will automatically be exported with Activate button enabled.
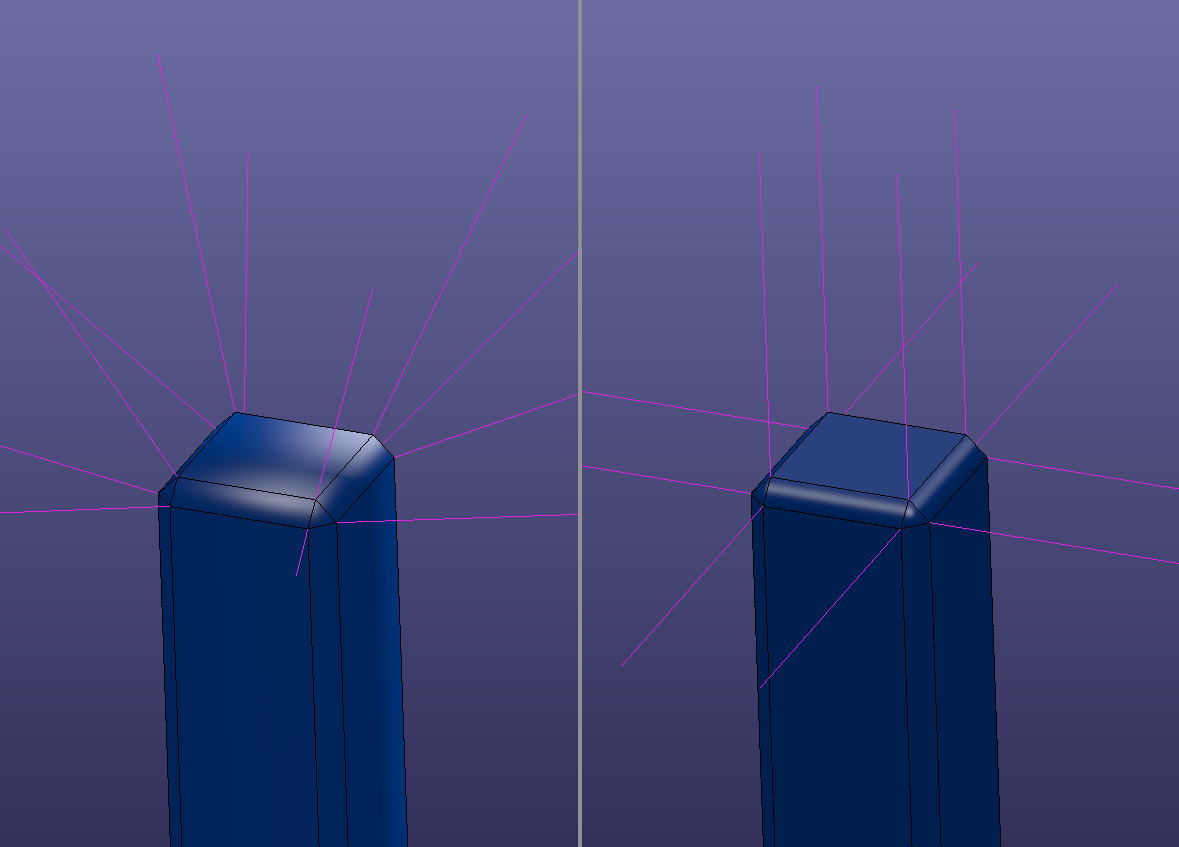
The model before and after editing is pictured below. On the left: the object shading reveals a low-poly mesh. On the right: the shading outlines the bevel correctly and produces the illusion of a high-poly object.
Also there is an object on the scene for imitating the earth surface. A procedural sky can be set up as described in the previous tutorials.
Physics simulation
The next step is setting up physics for the simulation. Lets go to the Physics tab, click on the Cloth button and tweak the physics parameters. Lets activate the Pinning option. There is a field below in which we'll select the vertex group created earlier.
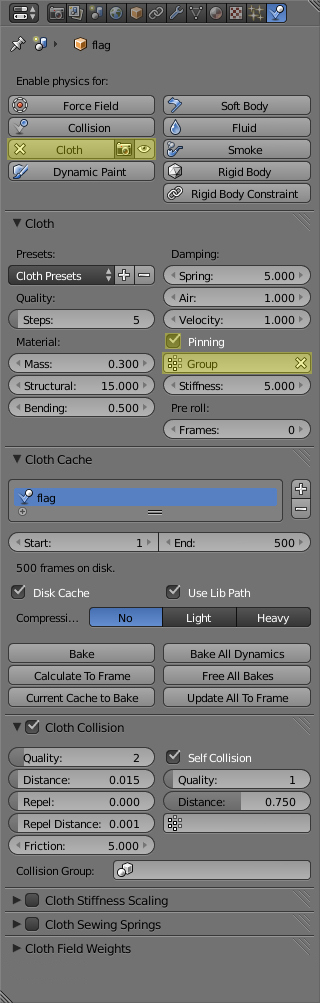
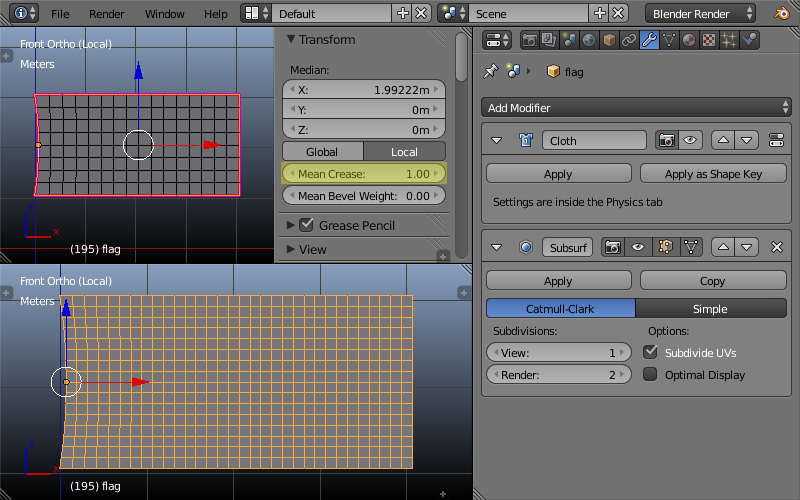
After activation of the Cloth mode a new Cloth modifier is automatically added to the object. Lets add a Subsurf modifier below it to smooth out the deformated flag edges. In the Catmull-Clark mode this modifier has a side effect of rounding the edge corners. To avoid this lets assign the Mean Crease property = 1 to the perimeter edges of the flag.
Exporting the animation to the point cache
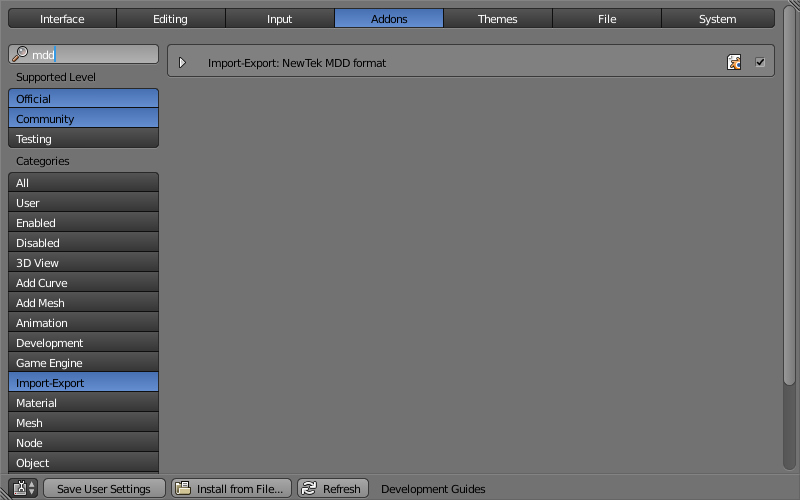
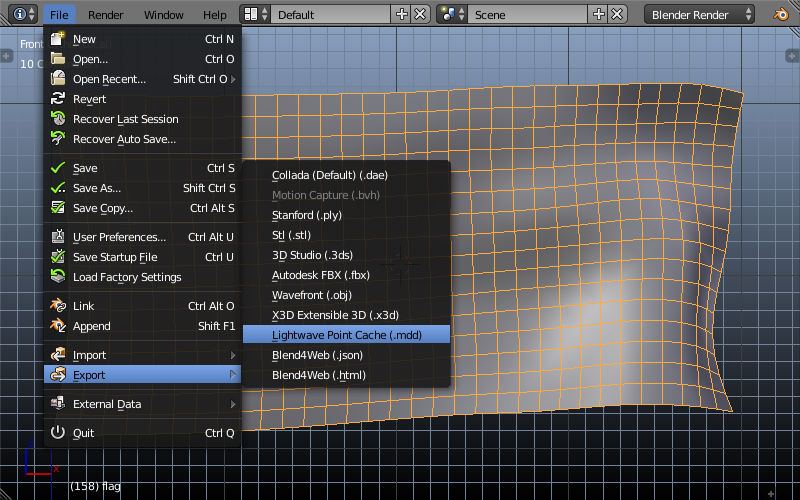
Lets prepare the source data for making the looping animation seamless. After the simulation is finished lets select a set (from frame 155 to 304) from the whole range of frames in which the first and the last frames are almost similar. It is convenient to compare the frames by switching between them with the Shift + Right/Left Arrow hot keys. Lets mark the middle of this range (e.g. frame 230). Now we'll export two ranges of the animation sequence (frames 155-230 and 230-304) in the Lightwave Point Cache (.mdd) format - flag_155_230.mdd and flag_229_304.mdd. This export option becomes available after activating the NewTek MDD format addon. These caches will be used later for building up the final scene.
Seamless animation
Lets transfer the prepared objects into the target scene file (flag_caches_mix.blend). We'll remove all the modifiers from the flag except Subsurf, which we'll apply to the object. Lets add three new Mesh Cache modifiers. We'll load the prepared flag_229_304.mdd and flag_155_230.mdd caches into the first two modifiers and leave the last one inactive - it will be used later.
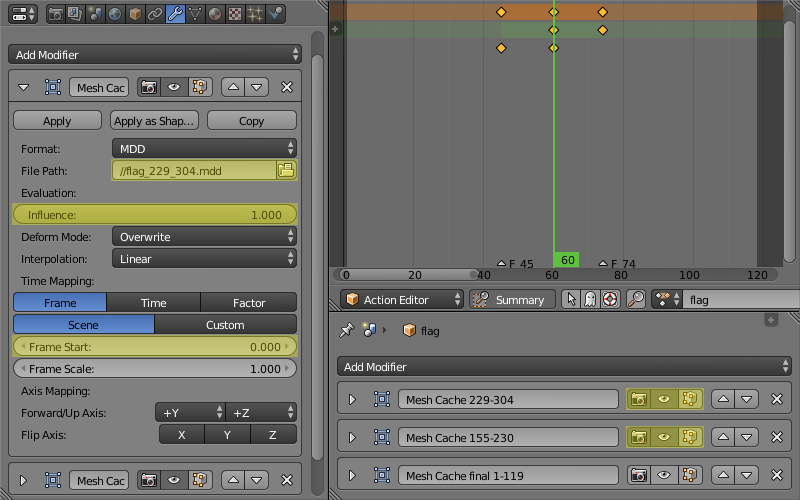
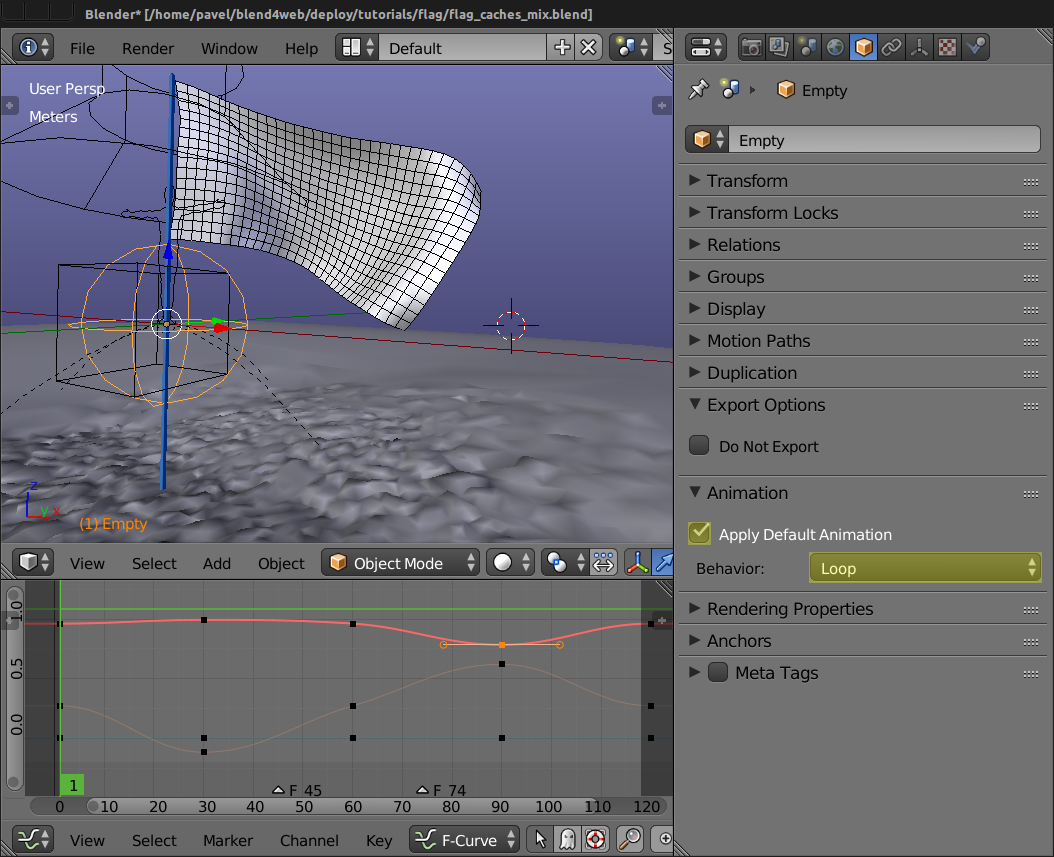
We can implement a seamless animation loop quite easily. Just swap two halves of the animation and overlap them a bit. We'll mix them in the overlapping region by inserting keyframes for the Influence values of the modifiers.
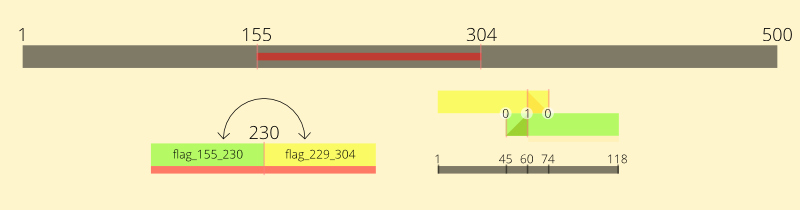
Lets get rid of intermediate constructs and export the result of mixing into yet another cache - final_flag_1_119.mdd. Load it into the third Mesh Cache modifier (and also switch off the upper two Mesh Cache modifers). Now the creation of the seamless vertex animation loop is finished.
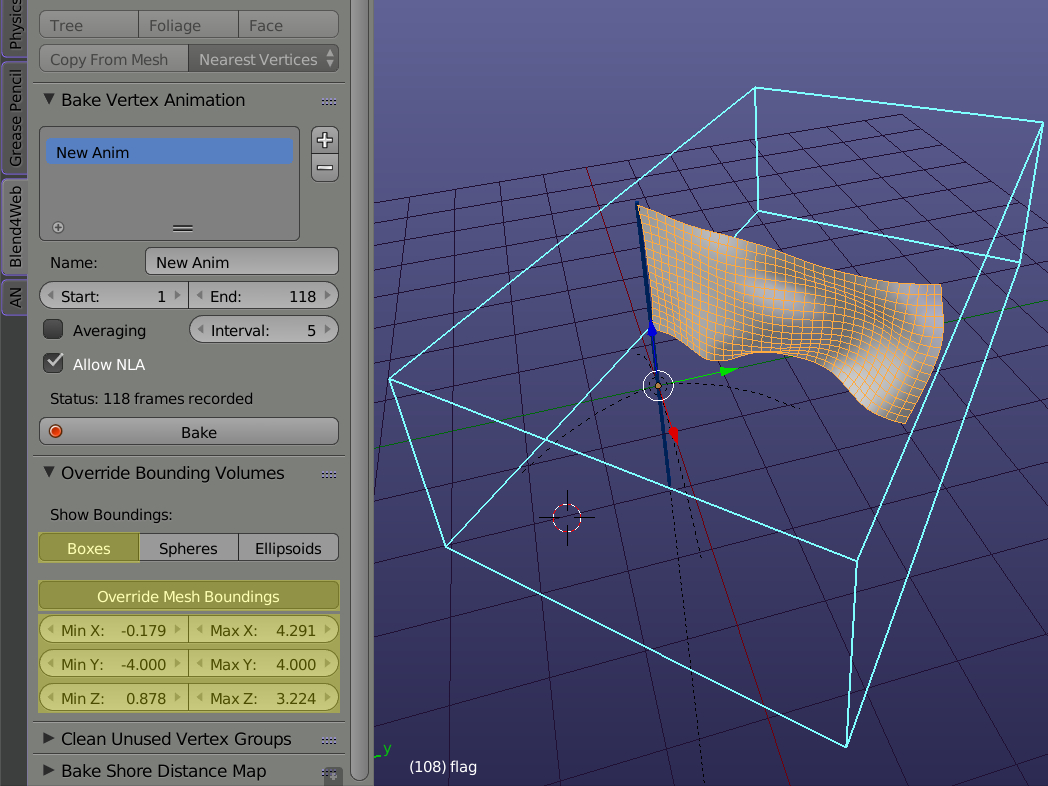
Baking and exporting vertex animation
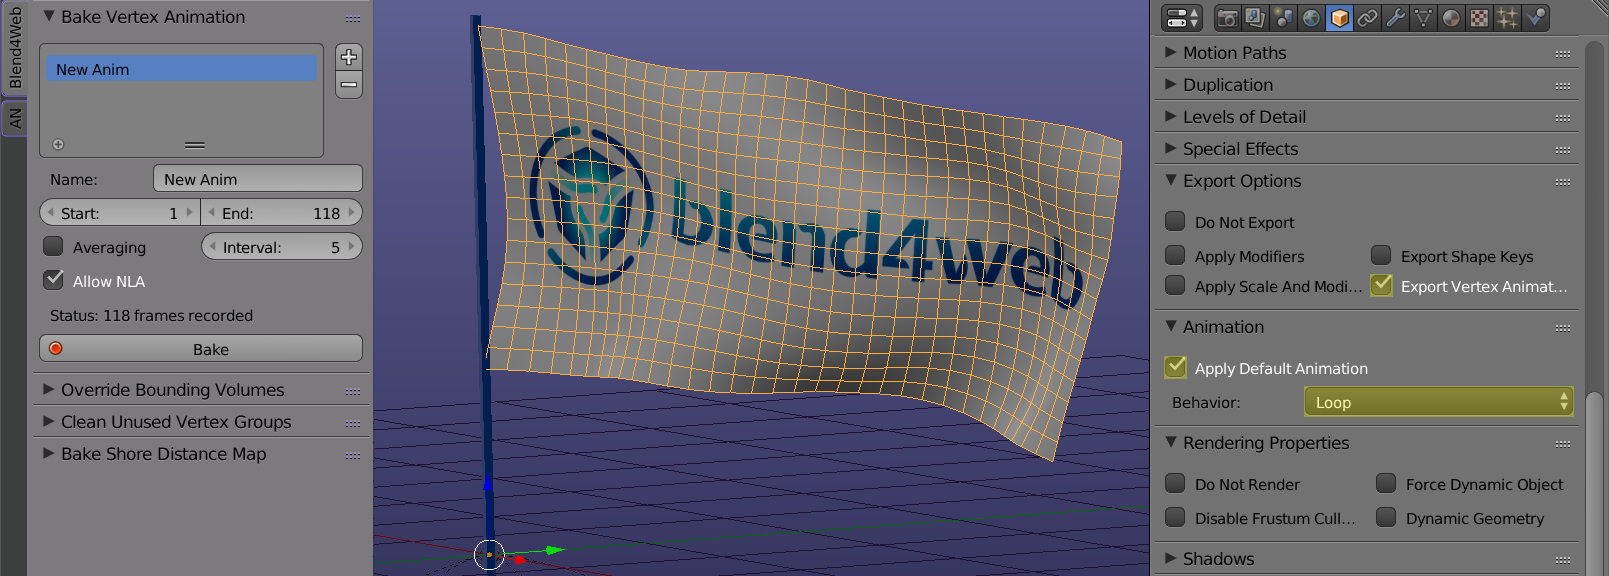
We need to bake the vertex animation first with the Bake Vertex Animation tool before exporting it for the engine. After baking, lets enable the Export vertex animation option in the object settings. Also the Apply Default Animation and Loop options must be enabled to loop the playback of the animation, which is assigned to the flag, automatically.
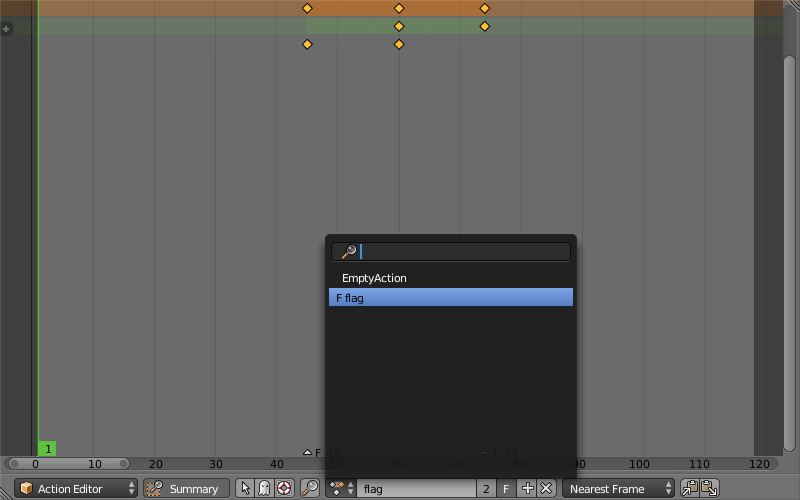
We need to remove the animation of the modifiers' influence parameters before exporting, otherwise the engine will ignore the vertex animation. Lets activate the Fake User mode for this auxiliary animation (F button) to prevent it from vanishing after Blender is reopened.
Setting up the bounding volume
Object bounding volumes are used by the engine to optimize the number of draw calls, and as a rule, are calculated automatically. At the same time, in case of vertex and skeletal animation it is possible for the model geometry to get off the bounding volume. As a result, objects (or their shadows) can disappear. In such cases the volume can be artificially extended with the Override Bounding Volumes tool.
Cloth material
As the object lacks thickness, lets activate the Shadow > Double-sided Lighting option in the material settings for correct shading.
To demonstrate another Blend4Web feature - double-sided materials - lets use different images for the flag sides: a full-color version and a monochrome version of the logo. To save video memory we'll bake both images into one texture (flag_diff.png): the full-color image - into the RGB channels and the monochrome one - into the alpha channel. The monochrome image will serve as a mask in the node material.
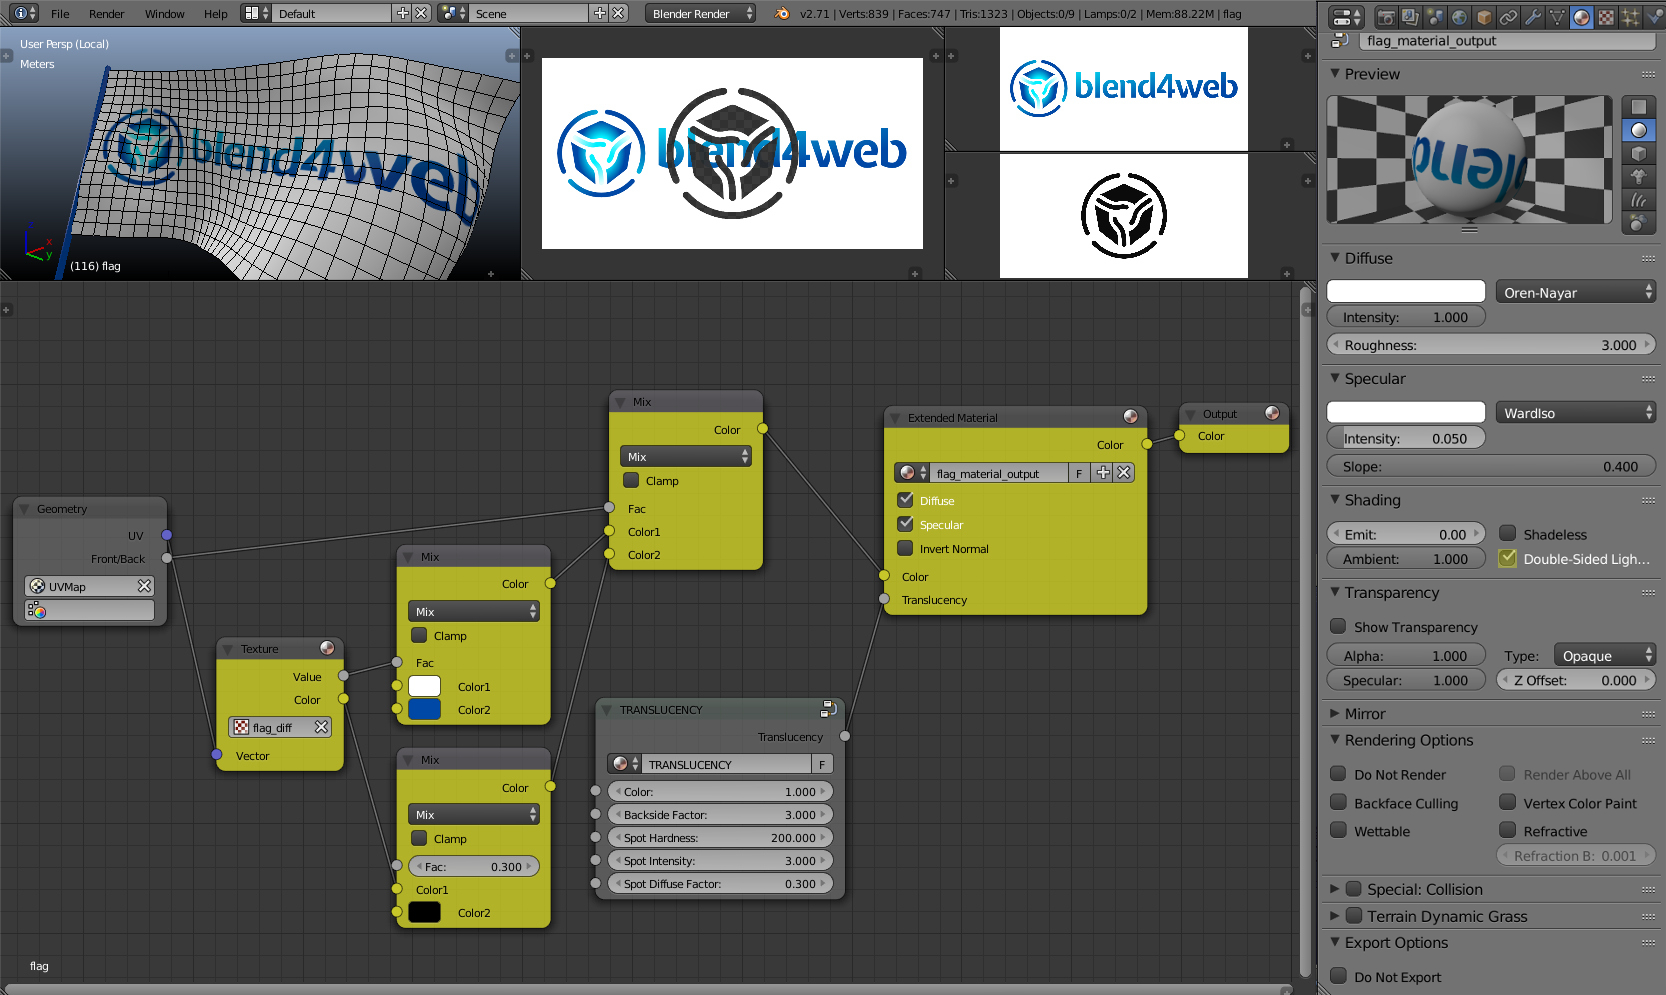
The translucency effect is implemented with the TRANSLUCENCY node.
Animating rotation
For further effect, lets animate the flag rotation around the flagpole which will imitate the wind direction changes. Because the flag already has a vertex animation, we'll create a new object (empty) and animate it instead (in the quaternion mode). Parenting the flag to it will do the trick.
Adding a sound
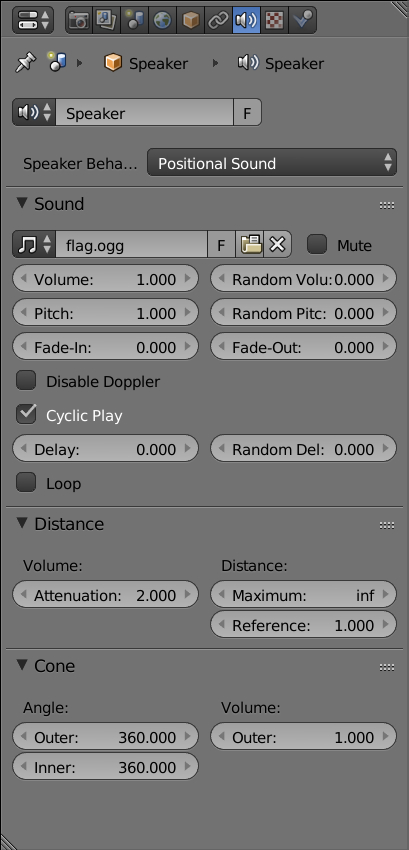
Lets place an audio source (aka speaker) in the scene and load a sound sample for the flag into it (in ogg format). Activate the Cyclic play option and tweak the Attenuation parameter. As a result the sound will get louder upon approaching the flag.
Conclusion
Blend4Web allows to combine animations of different types, as well as materials and sounds, into a single object. Such composite objects can be linked and used as a single whole in more complex scenes, which makes it possible for designers to incarnate their vision without any coding.
Changelog
[2014-07-04] Initial release.
[2015-05-07] Fixed the path to the source files.
[2015-08-14] Added GitHub link.
[2017-01-12] Minor changes in the text.