Intro
In this sunglasses tutorial I'll show you how photo-realistic materials and environment can be created.
While reading this article I recommend you to open the blend file of this scene and look at the described moments right in Blender. You can find the blend file in the free Blend4Web SDK at blender/tutorials/sunglasses/sunglasses.blend.
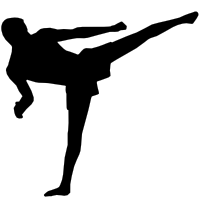
Below you can find the reference image and the interactive embedding of the final model, one under another.
Preparing the Model
Our story starts from a high-poly model. I envisioned the final scene and decided to create a middle-poly model (via high-poly retopology) first and then to edit its normals.

Figure 1. High-poly model.
Normals editing can sometimes help us to get rid of normal maps. The drawback of this method is that it requires quite a large number of polygons. Therefore you should decide what is the best option for each scene. In this scene I used normals editing for "global" influence and normal maps for "local" influence on the normals.

Figure 2. Normal maps.
In the cases when I edit normals for numerous surfaces I use a trick to save my time, especially if I need to edit the mesh itself after editing its normals. I create a copy of the object and delete those polygons that adversely influence the surface normals:

Figure 3.
1. Main model with unedited normals.
2. Auxiliary model which has distorting polygons removed (on bevels).
3. Main model to which auxiliary model's normals are copied using the Copy From Mesh tool.
At this stage the model is ready and we can proceed to UV unwrapping.
UV Unwrapping
Before unwrapping the model it is highly advisable to take into account some Blend4Web peculiarities. A single mesh cannot have more than 2 UV layers and more importantly normal maps always use the first UV layer in the list. Two UV layers are quite sufficient for objects of any complexity. In most cases I use one of the UV layers for baking various maps and the other - for tiling textures.

Figure 4. UV layer for baking.

Figure 5. UV layer for tiling textures.
Textures
For this scene I have used the first UV for baking and layering ambient occlusion texture only.

Figure 6. Ambient occlusion texture.
The "LV" label is present on the sunglasses in two places - as embossings on the sunglasses rim and as a transparent legend in the one of the lenses corner. That's why I have decided to combine the embossing normal map and a grayscale texture used for making the lense corner legend transparent.

Figure 7. Normal map with a mask in its alpha channel.

Figure 8. That's how it looks in the engine.
The normal map of leather-covered surfaces is simple to the limit, so we'll now take a look at the more interesting gold matcap texture.

Figure 9. Matcap texture.
This image can be used as a matcap texture.
Such images can be easily obtained right in Blender, I did that with Cycles.

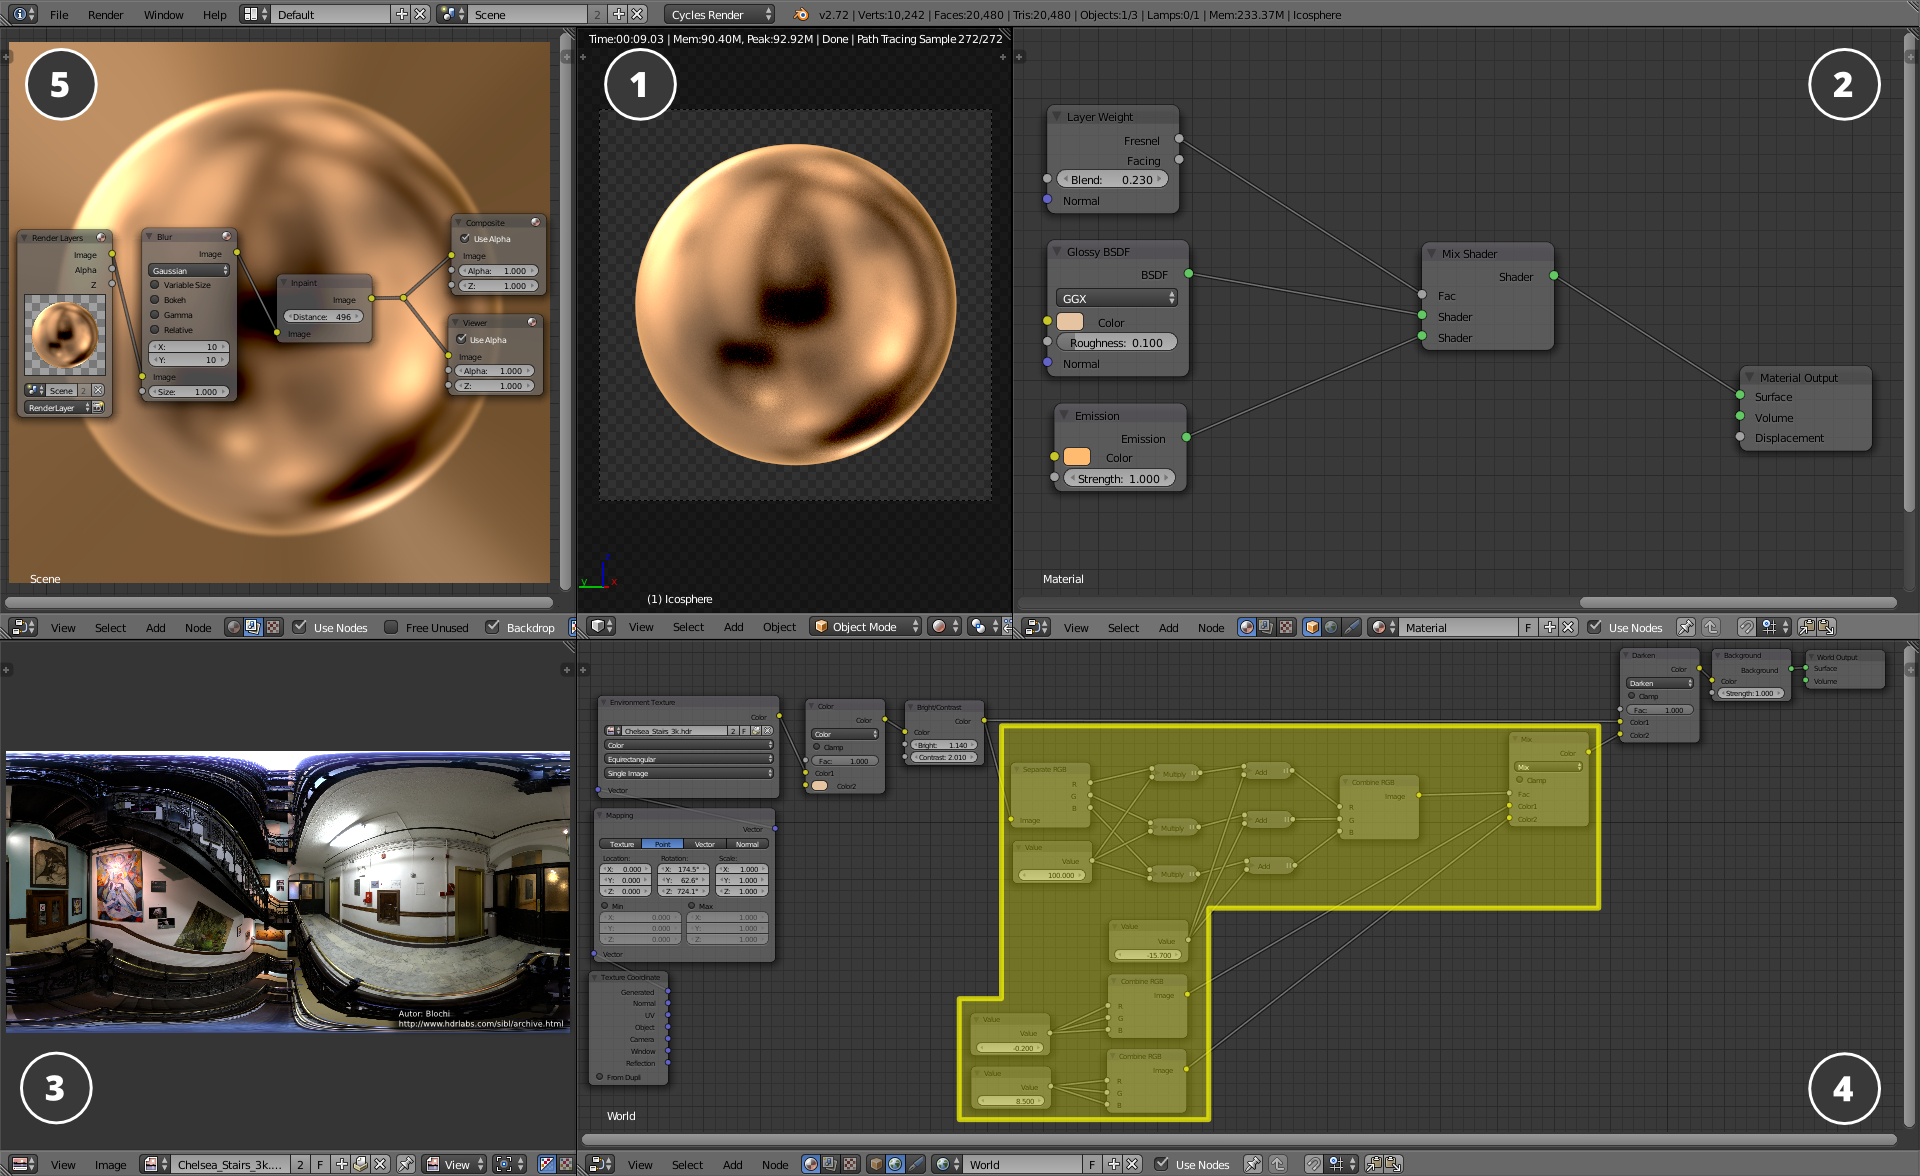
Figure 10. Scene for creating matcap textures.
1. Camera view on the sphere 3D model. 2. Sphere node material. 3. Spherical panorama image. 4. Environment node material (spherical panorama processing) 5. Node compositing window.
The overall process is as follows:
1. Ico sphere with high subdivision number.
2. Ico sphere's material:
Glossy BSDF allows the material to reflect the environment
Pink color defines a tint for the reflected environment
Roughness hides unneeded details of the spherical panorama
Layer Weight - using this node and the Emission node you can highlight the sphere on its edges
3. The spherical panorama image is taken from the wonderful hdrlabs.com website
4. Environment material:
Here it is worth to note only the yellow-colored node block. This sequence allows us to create darker spots that still do not break the color scheme.
5. Within the compositing process the transparent background is filled with the object color using a Inpaint node. The Inpaint node produces an effect similar to the margin parameter in the Bake menu.
Vertex Color
One other important thing here is the vertex color (VC). In most cases (and in this scene too) I use it for creating different masks. Mask variations that can be done by using different vertex color channels, can only be described in a separate tutorial, so I'll just show you how VC is used in this scene. When I describe the materials I will explain the influence of these colors.

Figure 11. Vertex color defines the masks.
Materials: Gold

Figure 12. Node structure of the gold material.
First of all I'd like to say that the Geometry node's Normal output works as a neutral color on a normal map (i.e. it does not affect the normals at all) - if it is not transformed by the VECTOR_VIEW node. In order to lay the "LV" logo only to the external rim edge, I use the red VC channel as a mask. Thereafter the mask is passed to the Fac input of the Mix (1) node. We need to pass the Normal output of the Geometry node into the Color1 input, while the normal map should be passed into the Color2 input. The result can be seen on Figure 8.

Figure 13. Influence on the normals.
Please pay attention to the left part of the image: the object can be qualified as plainly unwrapped and so the normals direction in every pixel will be the same. I.e. there are no shifts along the XYZ axes (and in RGB channels) and the color is neutral light blue as shown in frame 1. On frame 2 the gray color is the model area to which our gold material is assigned. On frame 3 you can see how the texture passed into the Color2 input of the Mix node defines the normals shift with respect to the VC mask. On frame 4 you can observe the attempt to orient the normals by passing the needed color into the Color1 input of the Mix node. Apparently this is not an option: the right way is to pass the Normal output of the Geometry node to the Color1 output. The result is shown on frame 5: all the gold surface is unprinted except the thin strip on which the normals create the effect of the embossed "LV" logo.
Materials: Leather

Figure 14. Separation of different texture layout parameters using masks.

Figure 15. Seams masking.
Only masks are worth mentioning here. The material uses 2 VC channels (Figure 11). Red - in order to use different node parameters Mapping on the temples and the bridge (Figure 14). The green channel is used to hide the seams of the multiplied leather normal map (Figure 15).
Apart from VC masks I also used ordinary texture masks. On figure 16 on the left hand side you can see the resulting texture, and on the right hand side red (R) and green (G) channels separately. On figure 17 you can see how the red channel was used.

Figure 16. Two different textures in different channels of the same image.
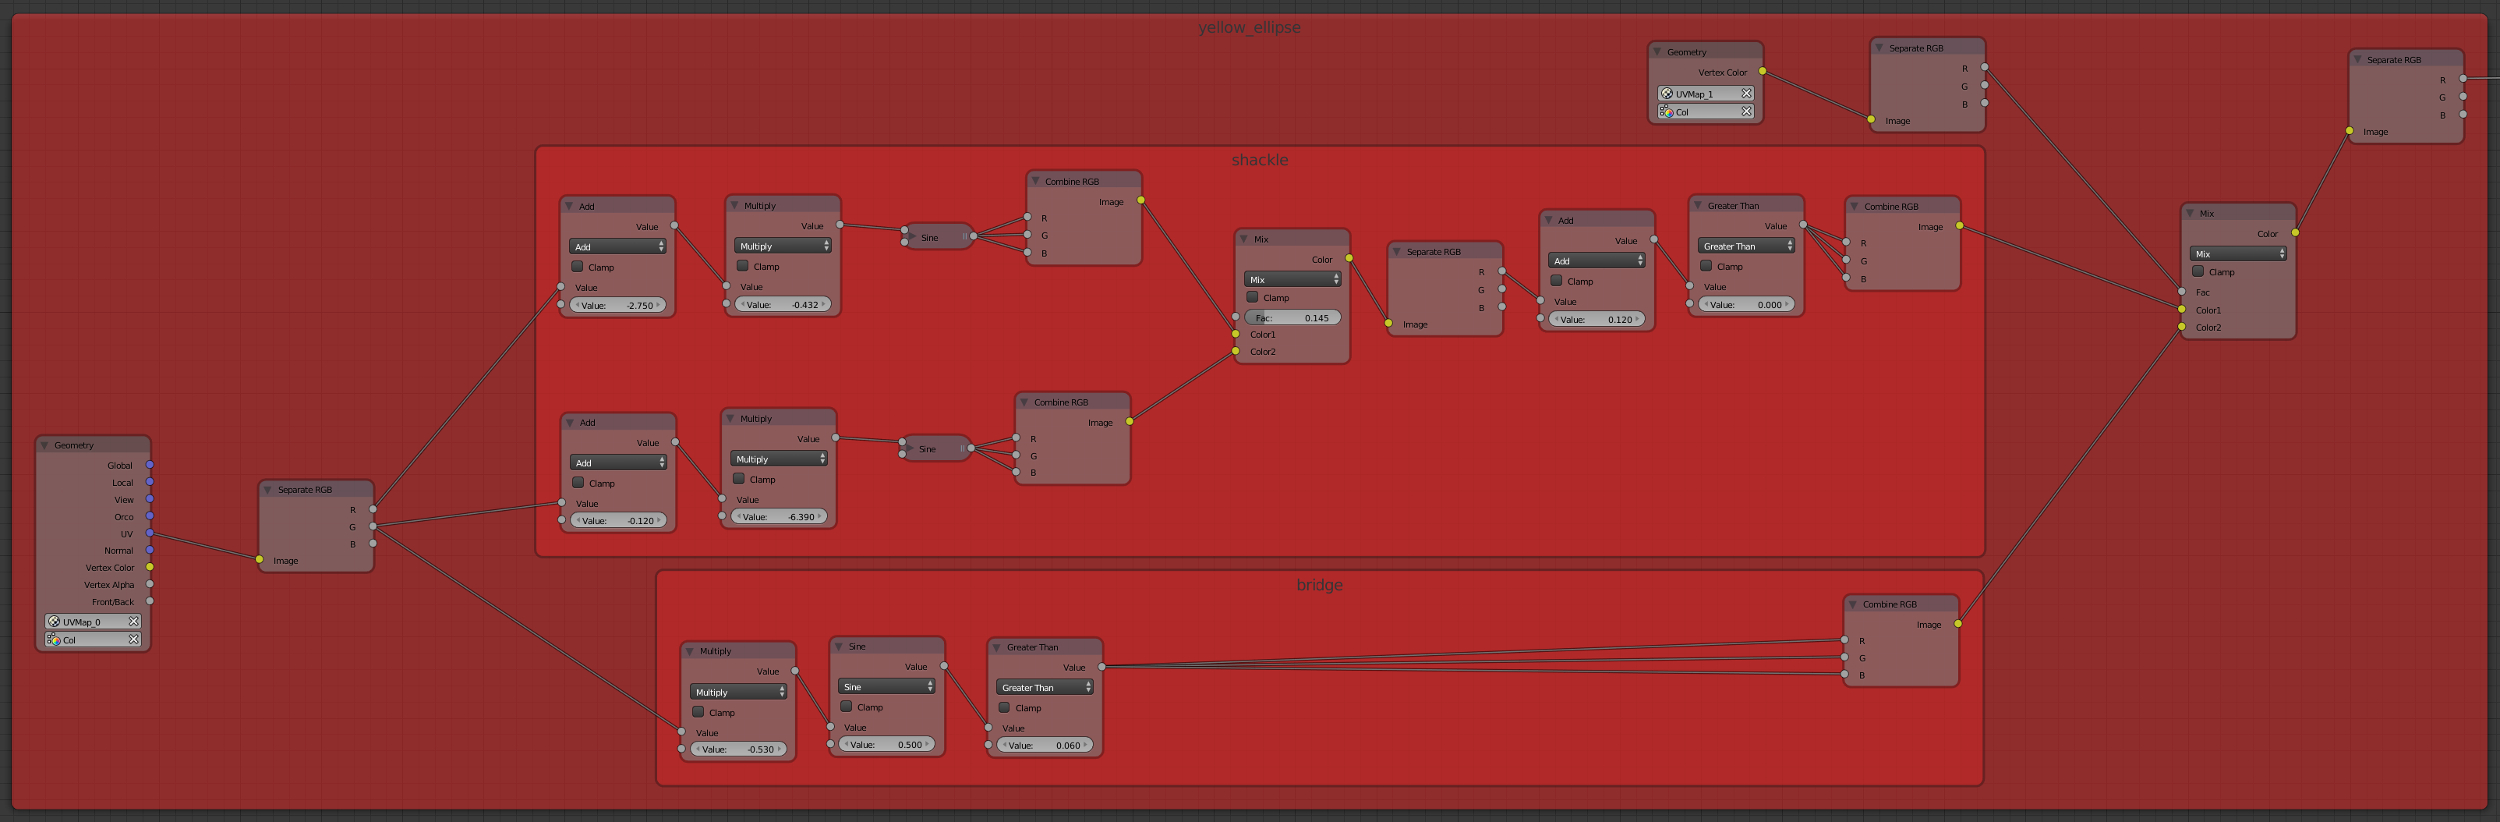
Also a pretty unusual mask is used in this material because it is built mainly from math nodes. As shown on figure 17, this mask cuts the multiplied texture in the required places. The node structure of this mask is shown in the red node block of the leather material (Figure 18).

Figure 17. Procedural mask influence.

Figure 18. Procedural mask.
Materials: Glass

Figure 19. The basic elements of the lens material.
Figure 19 shows the basic elements of the material: 1 – transparency mask, 2 – color. Color is hidden in the transparent places according to mask 1. Artificial speculars are added using the Matcap texture after the Extended Material node (3).
Other Materials
The nose pads material is a rather simple material and I don't see the point of describing it. It's just worth mentioning that the transparency type for lens and nose pads materials was selected as Alpha Sort, because it allows to correctly display the overlapping of different transparent surfaces (at the cost of performance).
Environment
I created the environment in this scene in the following way:

Figure 20. Creating the environment.
First I created the cube, added the edge in the middle and then closed the edge with the polygon: the result is a cube with a polygon inside. Next I positioned the normals in such a way that the object lying on the inside polygon is visible through the nearest cube boundaries. Thus the far boundaries form the background of the scene.

Figure 21. Material of the environment cube.
The environment material is used mostly to render the baked shadows. The shadow image is extracted from the green channel of the texture as shown on Figure 16.
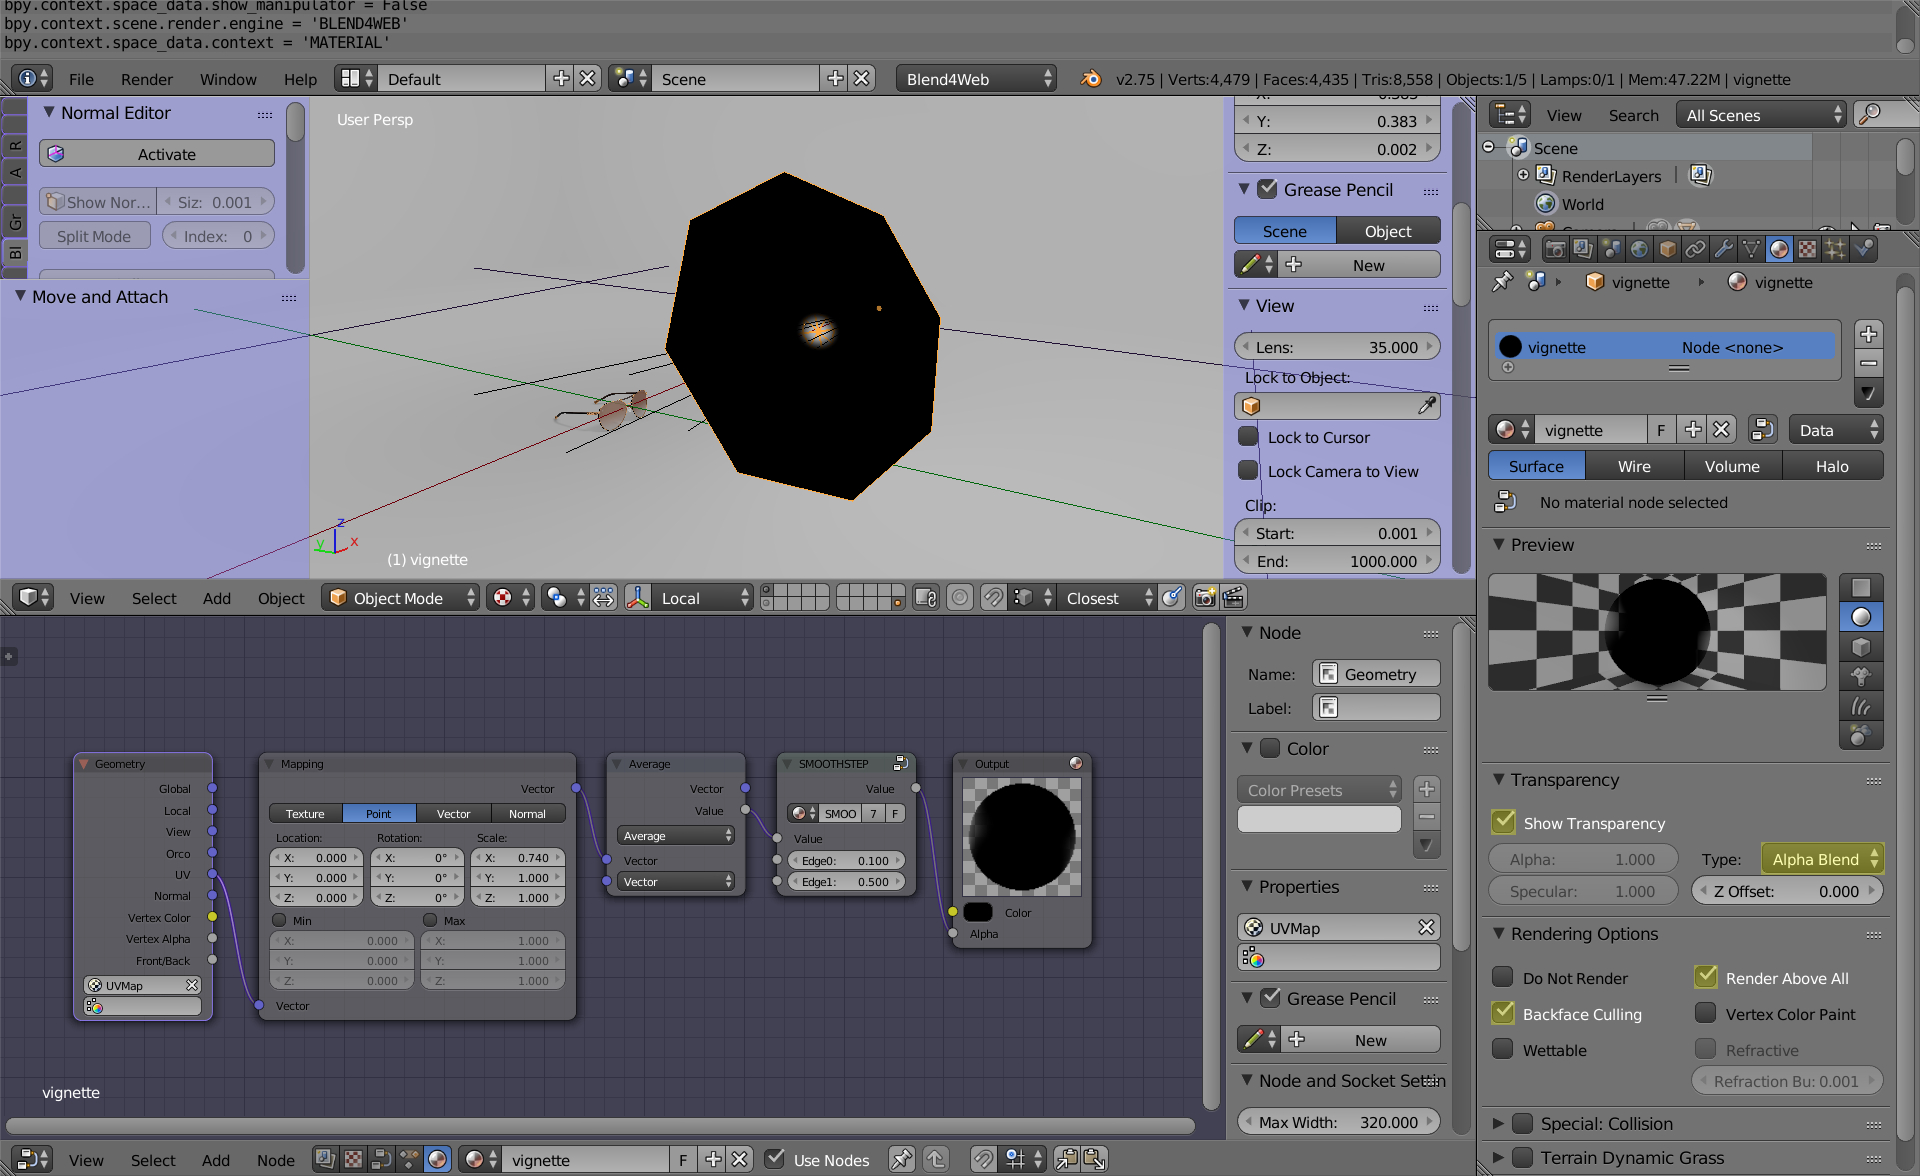
Vignetting Effect (Not Presented)
The vignetting effect was used in the helicopter demo to focus the viewer on the object. As it did not match with the white background of our website we've decided to drop it.
For this effect I created a plane with UV made with the Unwrap tool. After that I parented it to the camera (Ctrl+P > Object) and aligned the plane's position to the local camera coords (Alt+P > Clear Parent Inverse). The next thing was shifting the plane to the distance where it would not be clipped out by the camera's Clipping parameter.
The material is trivial enough and just creates a circular transparent region near the plane center. The node tree for this material is shown on Figure 22.

Figure 22. Vignetting.
Changelog
[2014-11-21] Initial release.
[2015-04-20] Updated the link to Github.
[2015-09-17] Changed illustrations because of new interface.
[2016-06-03] Fixed a User Manual link.
[2017-01-12] Minor changes in the text.