Making a Game Part 3: Level Design
2014-06-17
This is the third article in the Making a Game series. In this article we'll consider assembling the game scene using the models prepared at the previous stage, setting up the lighting and the environment, and also we'll look in detail at creating the lava effect.

Assembling the game scene
Lets assemble the scene's visual content in the main_scene.blend file. We'll add the previously prepared environment elements from the env_stuff.blend file.
Lets open the env_stuff.blend file via the File -> Link menu, go to the Group section, add the geometry of the central islands (1) and the background rocks (2) and arrange them on the scene.

Now we need to create the surface geometry of the future lava. The surface can be inflated a bit to deepen the effect of the horizon receding into the distance. Lets prepare 5 holes copying the outline of the 5 central islands in the center for the vertex mask which we'll introduce later.
We'll also copy this geometry and assign the collision material to it as it is described in the previous article.

A simple cube will serve us as the environment with its center located at the horizon level for convenience. The cube's normals must be directed inside.
Lets set up a simple node material for it. Get a vertical gradient (1) located on the level of the proposed horizon from the Global socket. After some squeezing and shifting it with the Squeeze Value node (2) we add the color (3). The result is passed directly into the Output node without the use of an intermediate Material node in order to make this object shadeless.

Setting up the environment
We'll set up the fog under the World tab using the Fog density and Fog color parameters. Lets enable ambient lighting with the Environment Lighting option and set up its intensity (Energy). We'll select the two-color hemispheric lighting model Sky Color and tweak the Zenith Color and Horizon Color.

Lets place two light sources into the scene. The first one of the Sun type will illuminate the scene from above. Enable the Generate Shadows checkbox for it to make it a shadow caster. We'll put the second light source (also Sun) below and direct it vertically upward. This source will imitate the lighting from lava.

Lets add a camera for viewing the exported scene. Make sure that the camera's Move style is Target (look at the camera settings on the Blend4Web panel), i.e. the camera is rotating around a certain pivot. Lets define the position of this pivot on the same panel (Target location).
Also, distance and vertical angle limits can be assigned to the camera for convenient scene observation in the Camera limits section.

Adding the scene to the scene viewer
At this stage a test export of the scene can be performed: File -> Export -> Blend4Web (.json). Lets add the exported scene to the list of the scene viewer external/deploy/assets/assets.json using any text editor, for example:
    {
        "name": "Tutorials",
        "items":[

            ...

            {
                "name": "Game Example",
                "load_file": "../tutorials/examples/example2/main_scene.json"
            },

            ...
        ]
   }
Then we can open the scene viewer apps_dev/viewer/viewer_dev.html with a browser, go to the Scenes panel and select the scene which is added to the Tutorials category.
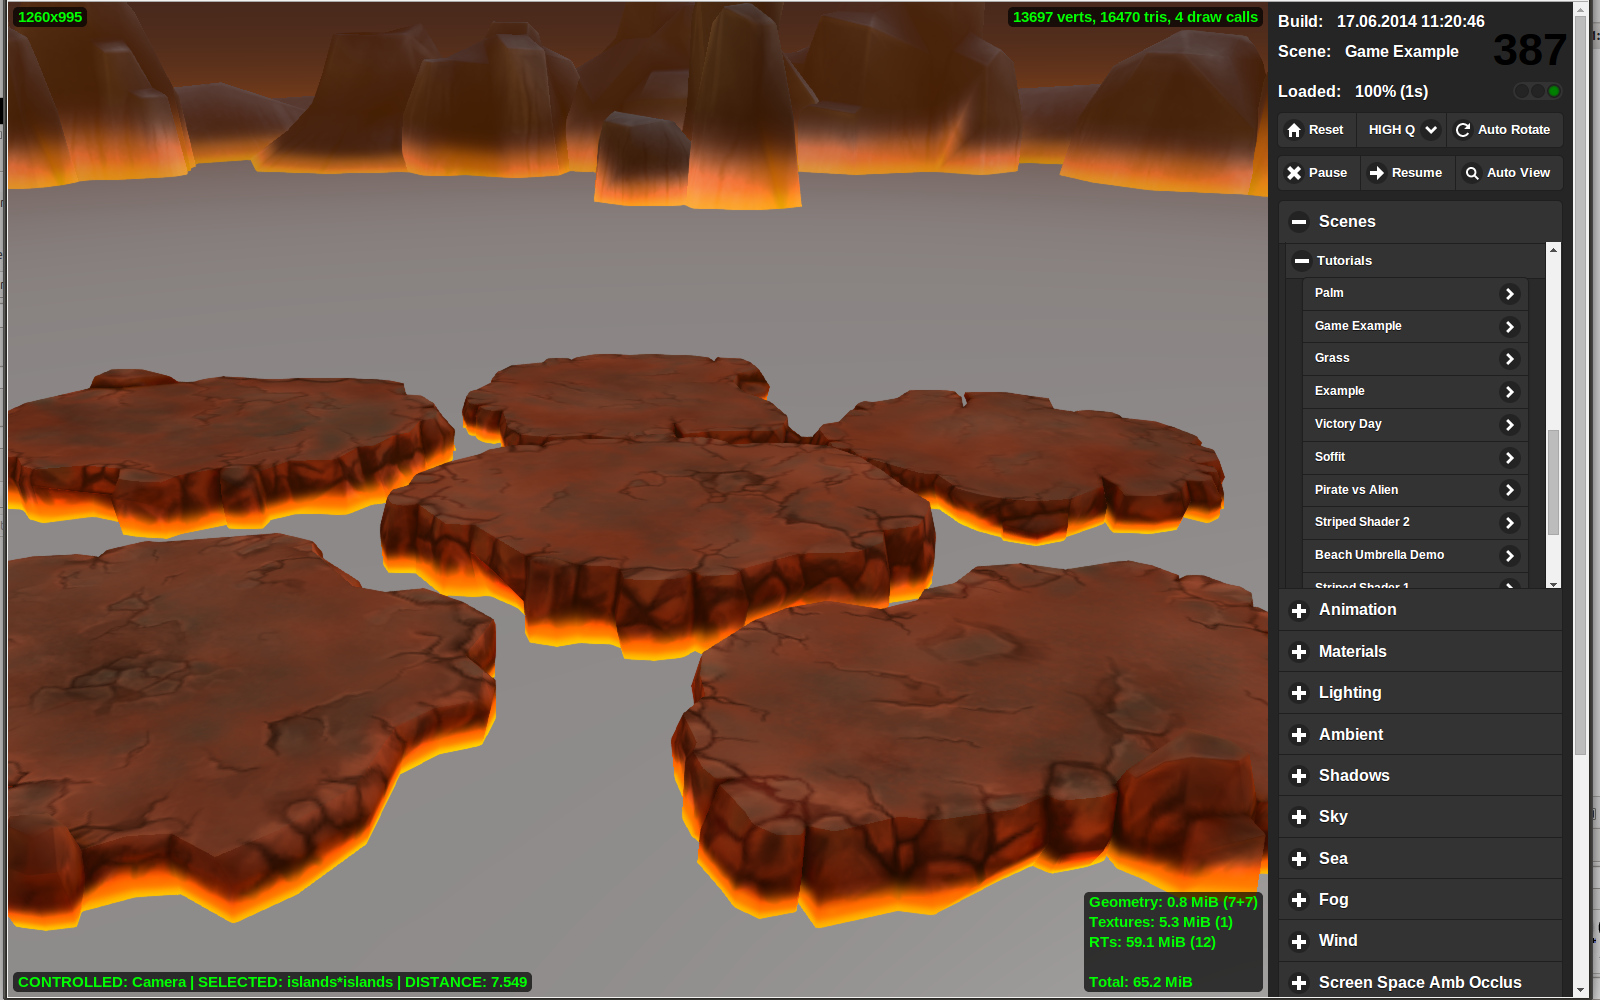 The tools of the scene viewer are useful for tweaking scene parameters in real time.
Setting up the lava material
We'll prepare two textures by hand for the lava material, one is a repeating seamless diffuse texture and another - a black and white texture which we'll use as a mask. To reduce video memory consumption the mask is packed into the alpha channel of the diffuse texture.

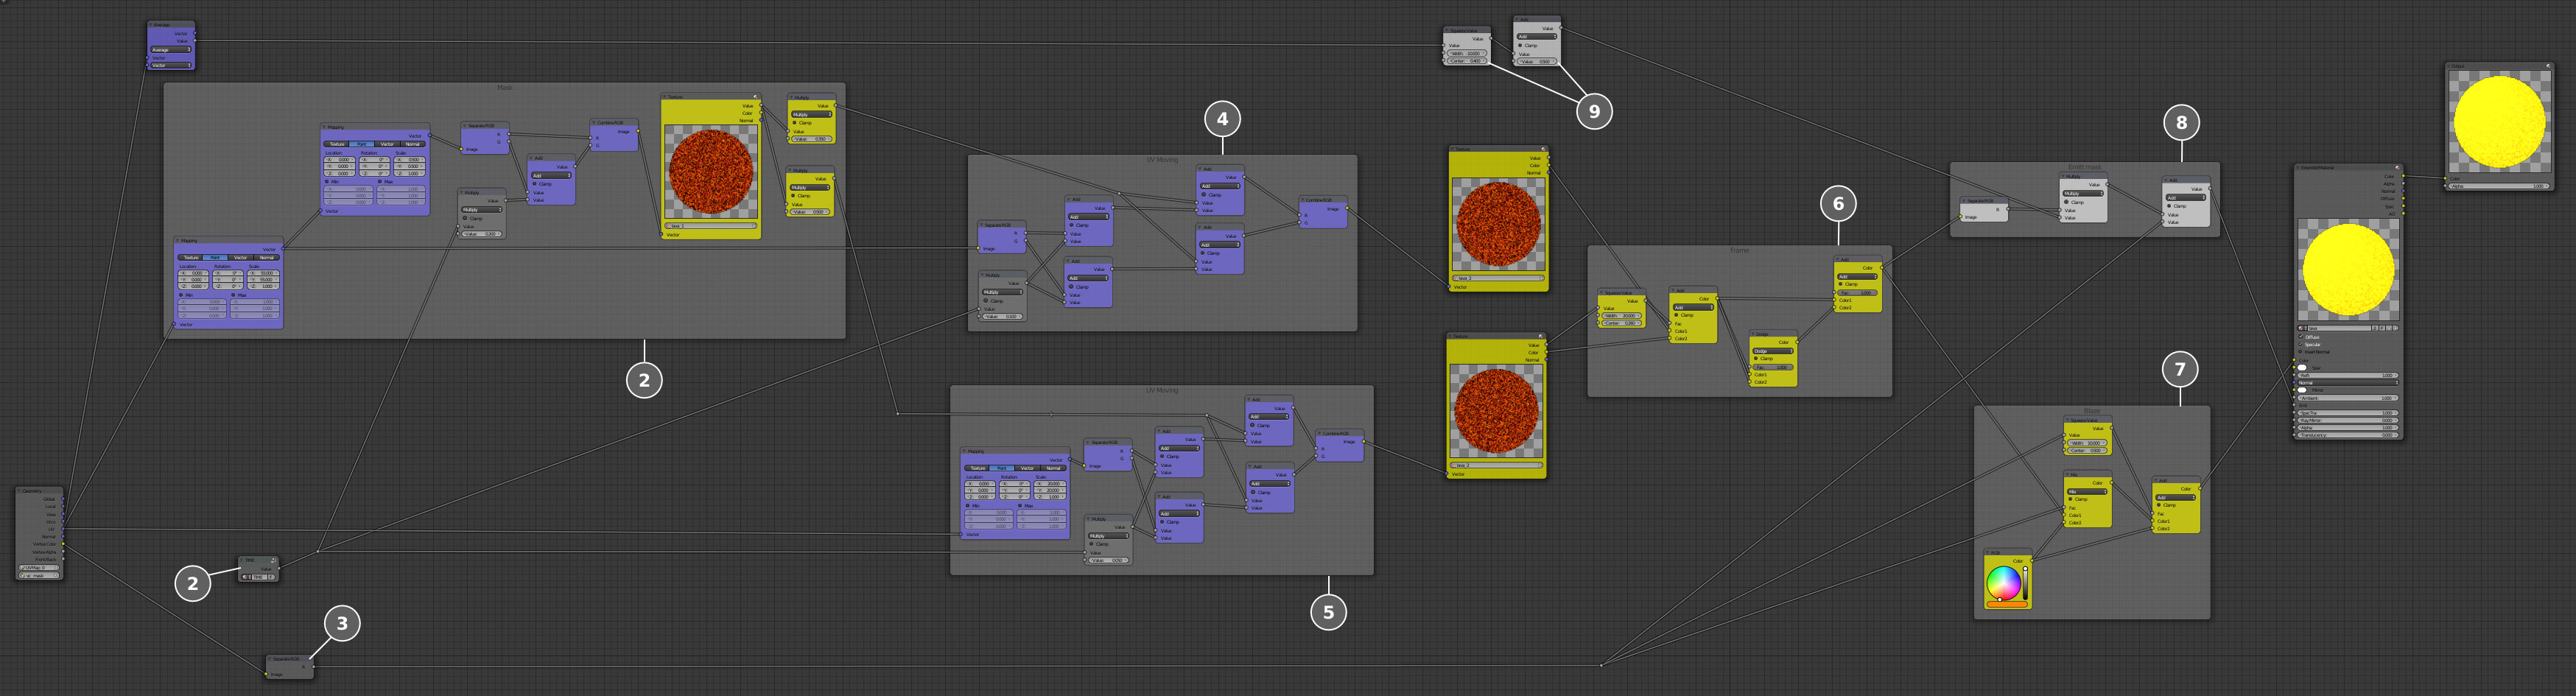
The material consists of several blocks. The first block (1) constantly shifts the UV coordinates for the black and white mask using the TIME (2) node in order to imitate the lava flow movement.
Information
The TIME node is basically a node group with a reserved name. This group is replaced by the time-generating algorithm in the Blend4Web engine. To add this node it's enough to create a node group named TIME which has an output of the Value type. It can be left empty or can have for example a Value node for convenient testing right in Blender's viewport.
In the other two blocks (4 and 5) the modified mask stretches and squeezes the UV in certain places, creating a swirling flow effect for the lava. The results are mixed together in block 6 to imitate the lava flow.
Furthermore, the lava geometry has a vertex mask (3), using which a clean color (7) is added in the end to visualize the lava's burning hot spots.

To simulate the lava glow the black and white mask (8) is passed to the Emit socket. The mask itself is derived from the modified lava texture and from a special procedural mask (9), which reduces the glow effect with distance.
Conclusion
This is where the assembling of the game scene is finished. The result can be exported and viewed in the engine. In one of the upcoming articles we'll show the process of modeling and texturing the visual content for the character and preparing it for the Blend4Web engine.

Link to the standalone application
The source files of the application and the scene are part of the free Blend4Web SDK distribution.
Changelog
[2014-06-17] Initial release.