Making a Game Part 6: Animation and FX
2014-07-18
This time we'll speak about the main stages of character modeling and animation, and also will create the effect of the deadly falling rocks.
Character model and textures
The character data was placed into two files. The character_model.blend file contains the geometry, the material and the armature, while the character_animation.blend file - the animation for this character.

The character model mesh is low-poly:
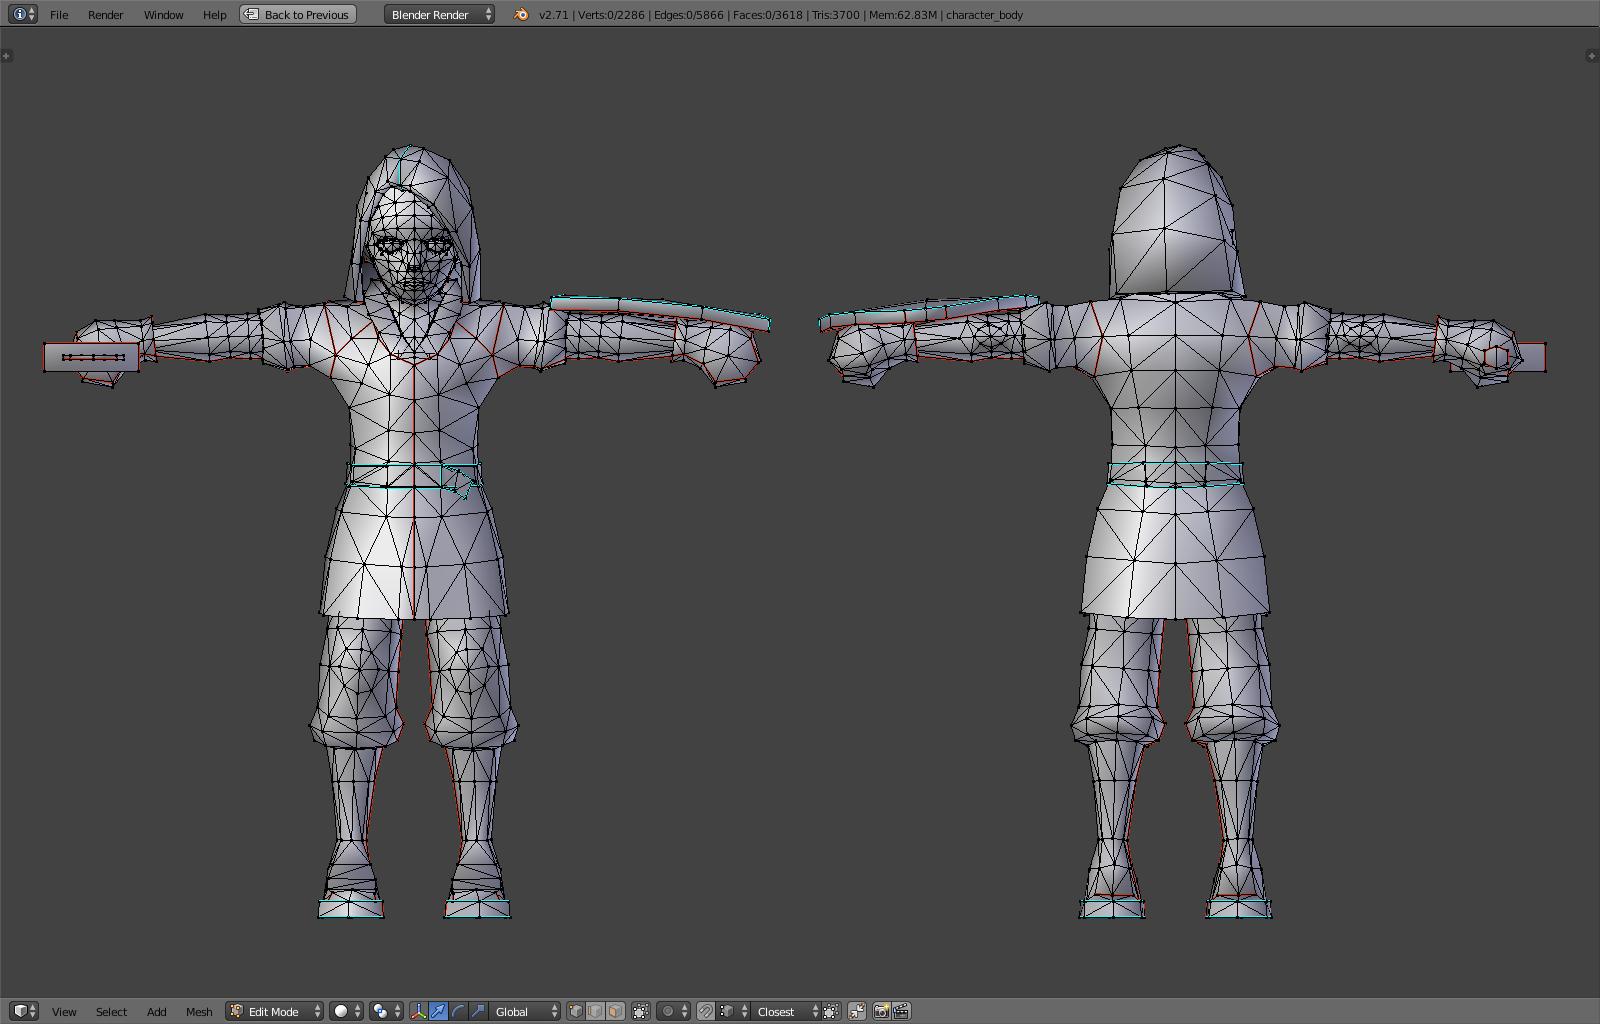
This model - just like all the others - lacks a normal map. The color texture was entirely painted on the model in Blender using the Texture Painting mode:

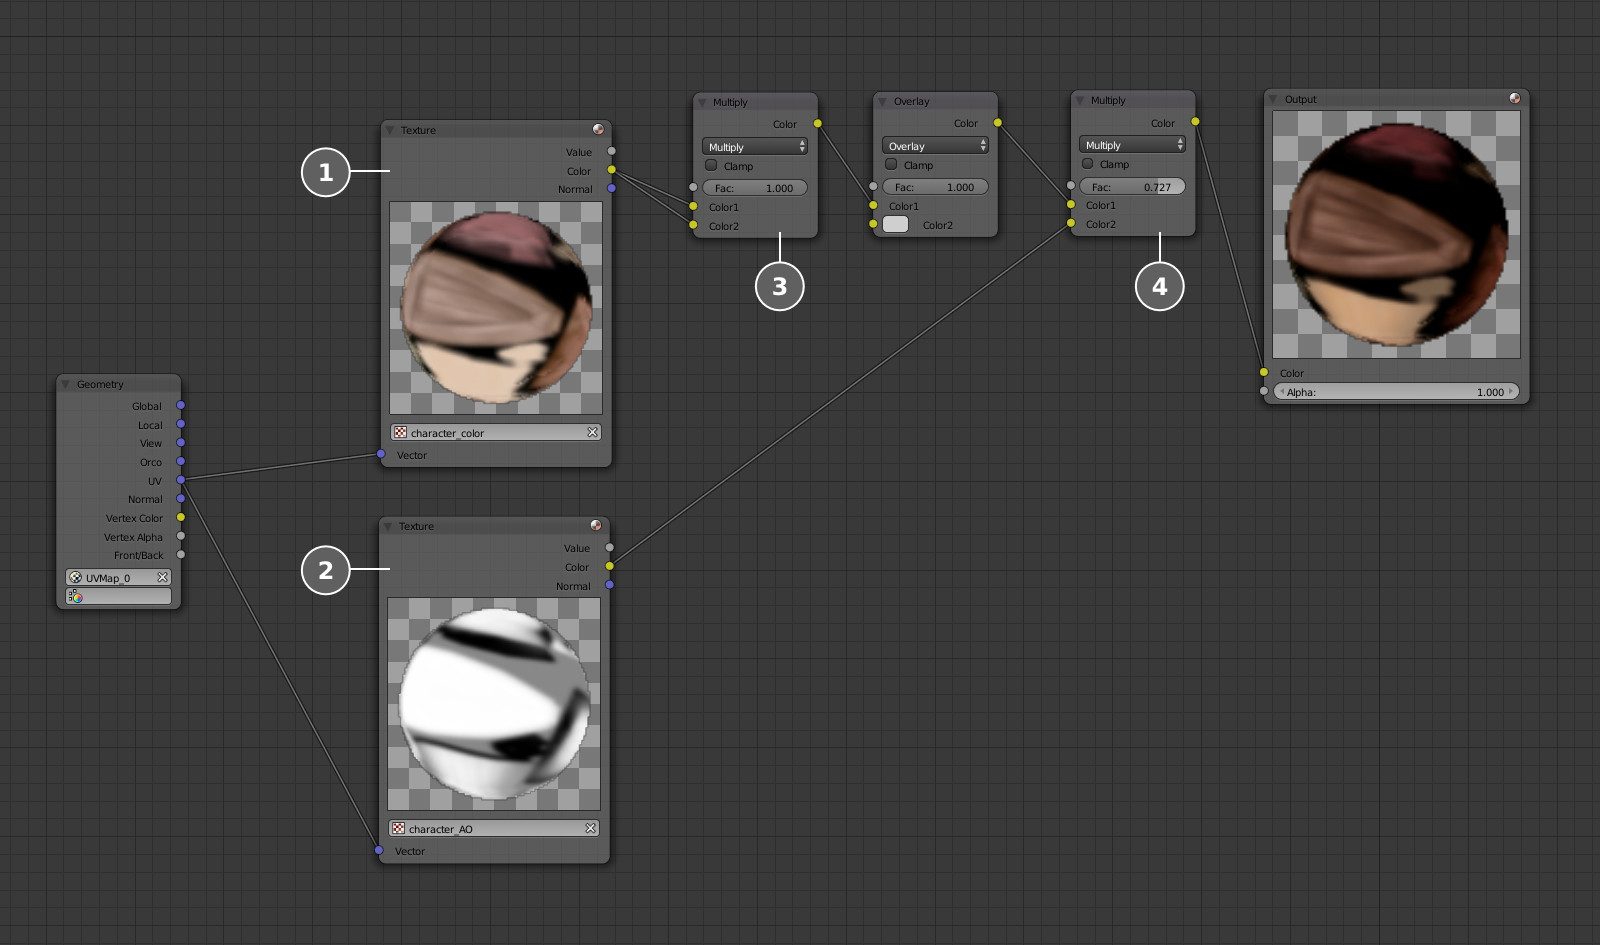
The texture then has been supplemented (4) with the baked ambient occlusion map (2). Its color (1) was much more pale initially than required, and has been enhanced (3) with the Multiply node in the material. This allowed to fine tune the saturation of the final texture.
After baking we received the resulting diffuse texture, from which we created the specular map. We brightened up this specular map in the spots corresponding to the blade, the metal clothing elements, the eyes and the hair. As usual, in order to save video memory, this texture was packed into the alpha channel of the diffuse texture.

Character material
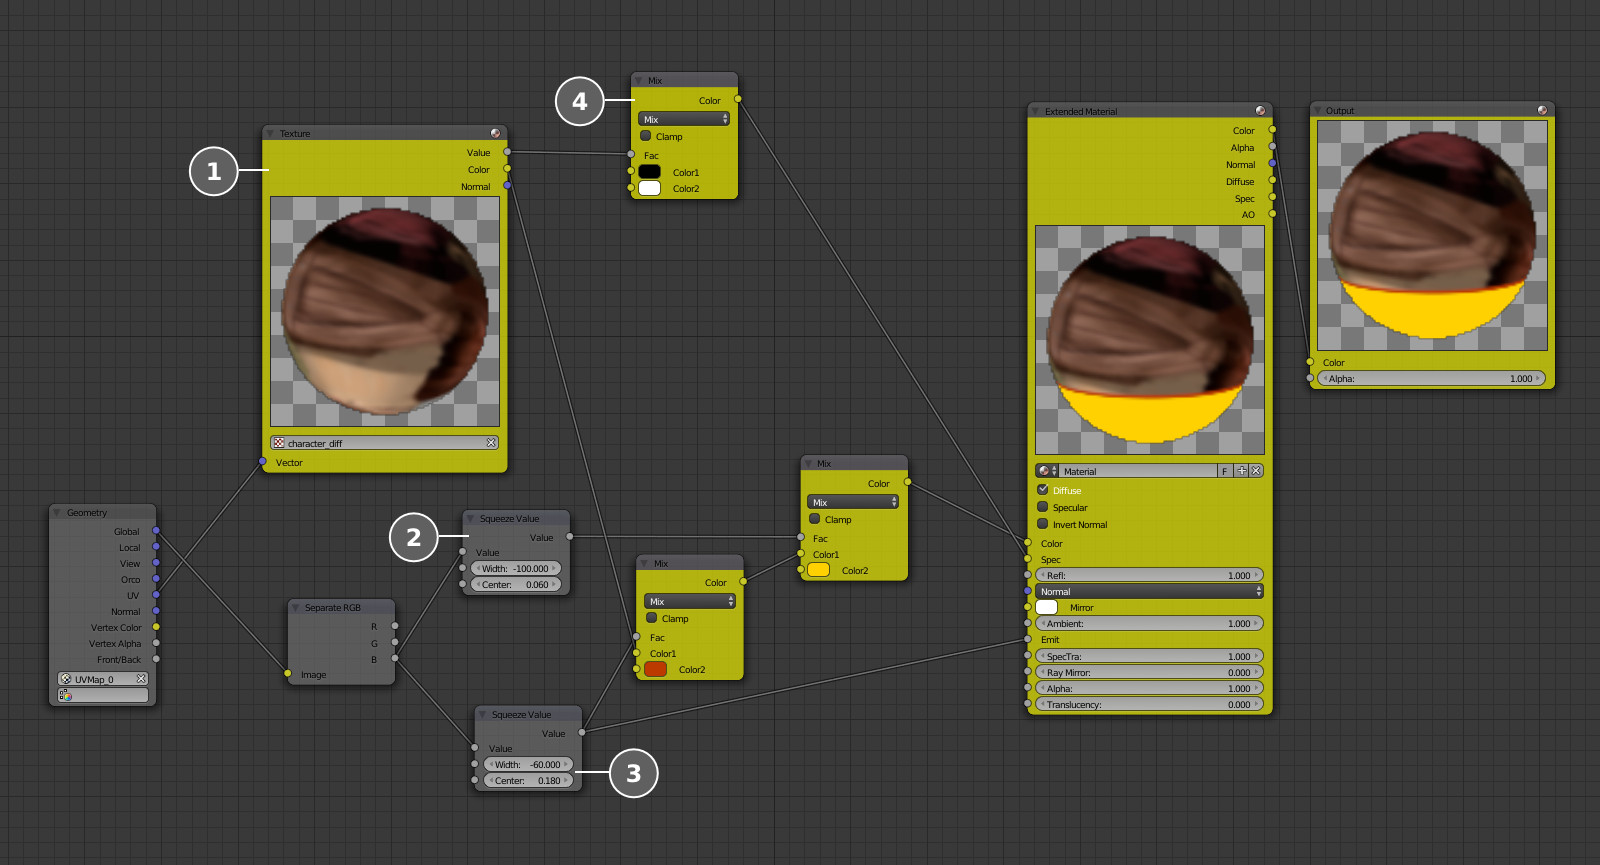
Lets add some nodes to the character material to create the highlighting effect when the character contacts the lava.

We need two height-dependent procedural masks (2 and 3) to implement this effect. One of these masks (2) will paint the feet in the lava-contacting spots (yellow), while the other (3) - the character legs just above the knees (orange). The material specular value is output (4) from the diffuse texture alpha channel (1).
Character animation
Because the character is seen mainly from afar and from behind, we created a simple armature with a limited number of inverse kinematics controlling bones.

A group of objects, including the character model and its armature, has been linked to the character_animation.blend file. After that we've created a proxy object for this armature (Object > Make Proxy...) to make its animation possible.
At this game development stage we need just three animation sequences: looping run, idle and death animation.

Using the specially developed tool - the Blend4Web Anim Baker -all three animations were baked and then linked to the main scene file (game_example.blend). After export from this file the animation becomes available to the programming part of the game.

Special effects
During the game the red-hot rocks will keep falling on the character. To visualize this a set of 5 elements is created for each rock:
- the geometry and the material of the rock itself,
- the halo around the rock,
- the explosion particle system,
- the particle system for the smoke trail of the falling rock,
- and the marker under the rock.
The above-listed elements are present in the lava_rock.blend file and are linked to the game_example.blend file. Each element from the rock set has a unique name for convenient access from the programming part of the application.
Falling rocks
For diversity, we made three rock geometry types:

The texture was created by hand in the Texture Painting mode:

The material is generic, without the use of nodes, with the Shadeless checkbox enabled:

For the effect of glowing red-hot rock, we created an egg-shaped object with the narrow part looking down, to imitate rapid movement.

The material of the shining is entirely procedural, without any textures. First of all we apply a Dot Product node to the geometry normals and vector (0, 0, -1) in order to obtain a view-dependent gradient (similar to the Fresnel effect). Then we squeeze and shift the gradient in two different ways and get two masks (2 and 3). One of them (the widest) we paint to the color gradient (5), while the other is subtracted from the first (4) to use the resulting ring as a transparency map.
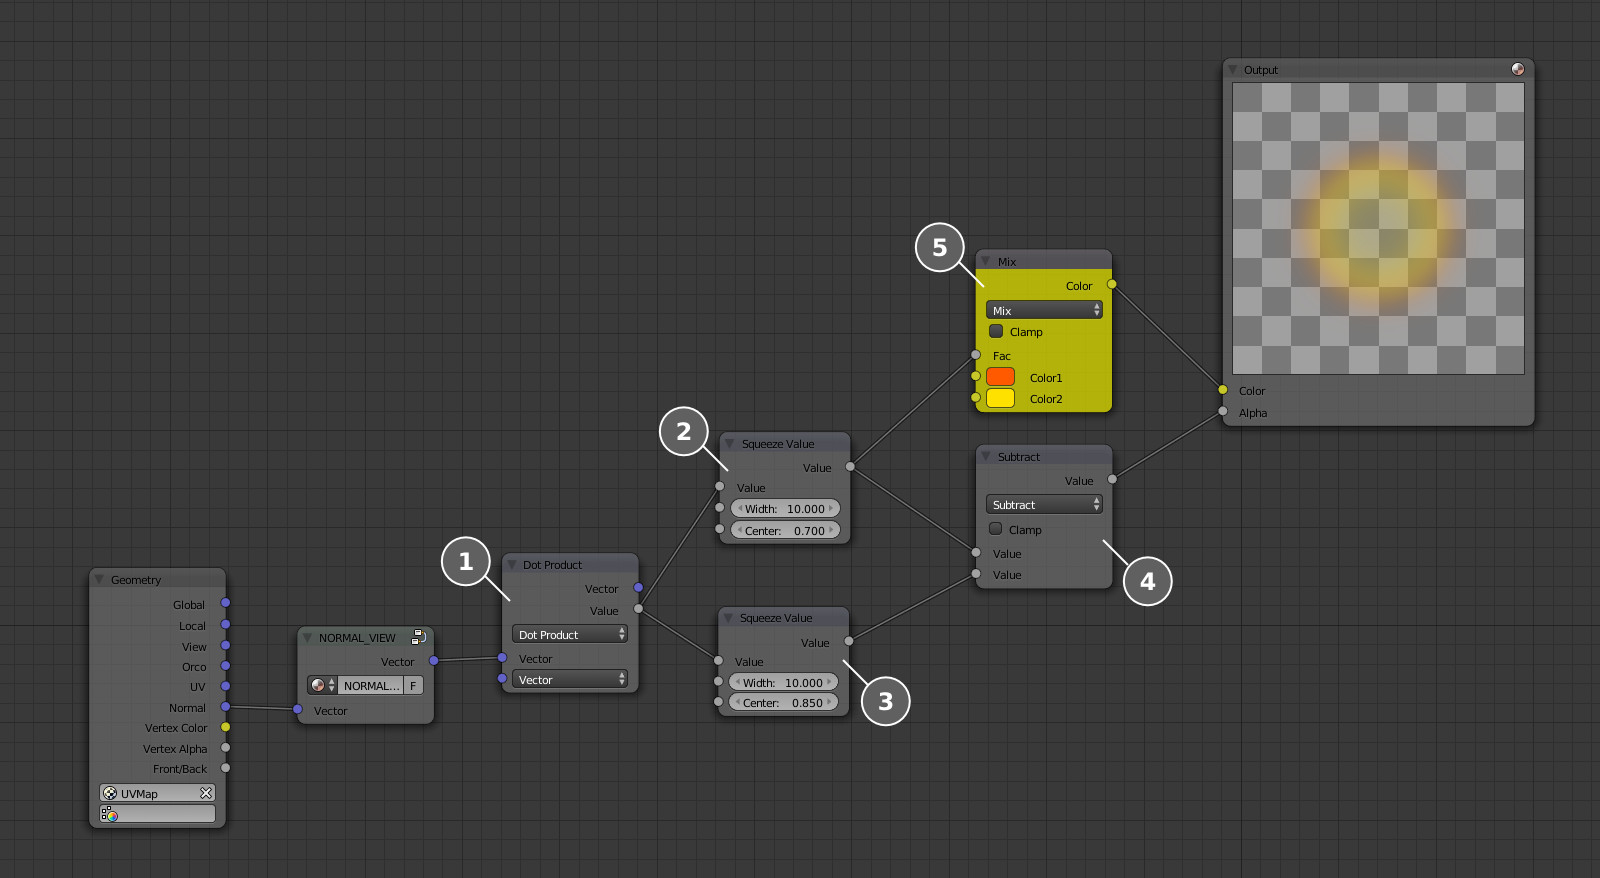
The empty node group named NORMAL_VIEW is used for compatibility: in the Geometry node the normals are in the camera space, but in Blend4Web - in the world space.
Explosions
The red-hot rocks will explode upon contact with the rigid surface.

To create the explosion effect we'll use a particle system with a pyramid-shaped emitter. For the particle system we'll create a texture with an alpha channel - this will imitate fire and smoke puffs:

Lets create a simple material and attach the texture to it:

Then we setup a particle system using the just created material:

Activate particle fade-out with the additional settings on the Blend4Web panel:

To increase the size of the particles during their life span we create a ramp for the particle system:

Now the explosion effect is up and running!

Smoke trail
When the rock is falling a smoke trail will follow it:

This effect can be set up quite easily. First of all lets create a smoke material using the same texture as for explosions. In contrast to the previous material this one uses a procedural blend texture for painting the particles during their life span - red in the beginning and gray in the end - to mimic the intense burning:

Now proceed to the particle system. A simple plane with its normal oriented down will serve as an emitter. For this time the emission is looping and more long-drawn:

As before this particle system has a ramp for reducing the particles size progressively:

Marker under the rock
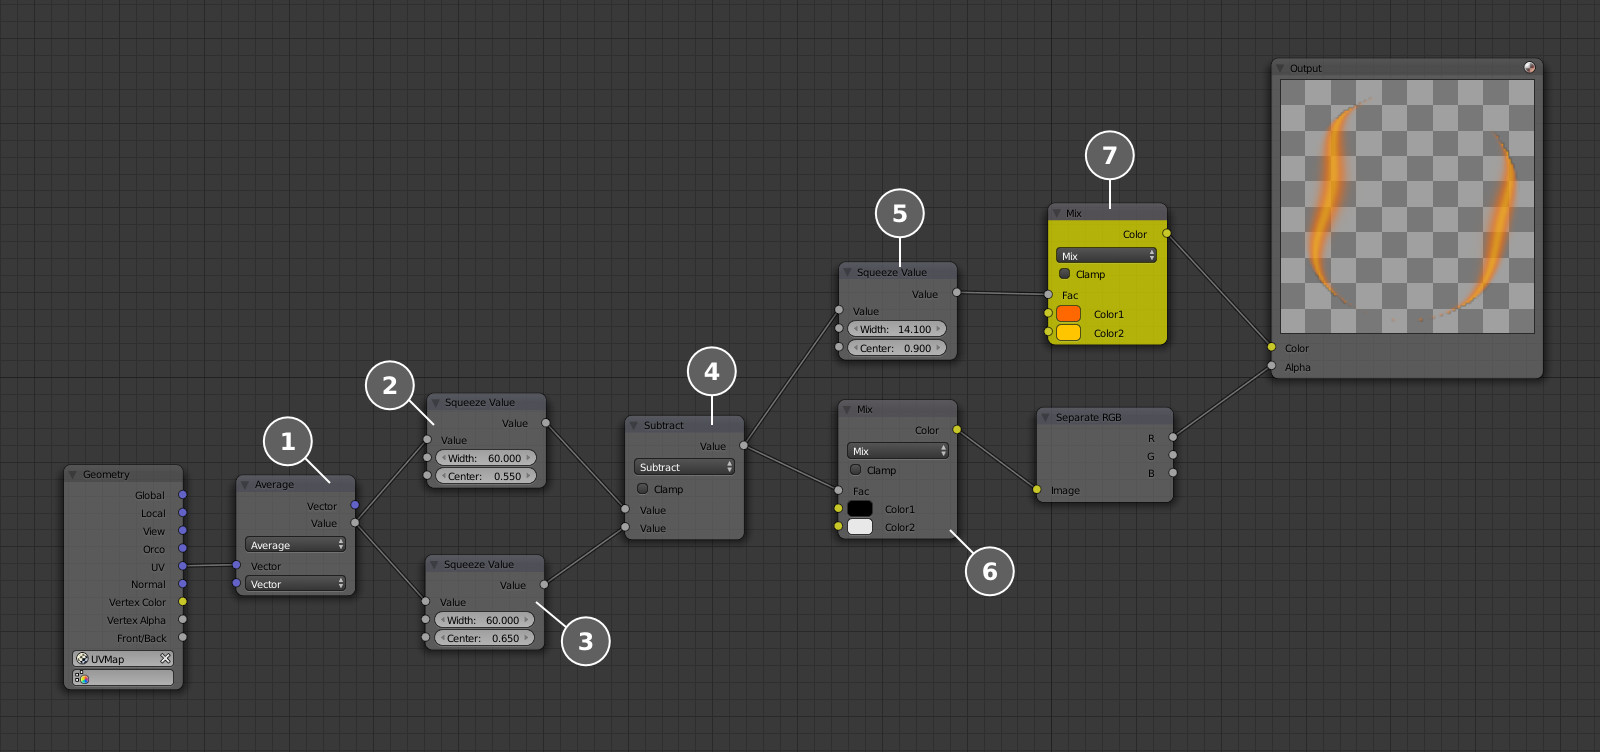
It remained only to add a minor detail - the marker indicating the spot to which the rock is falling, just to make the player's life easier. We need a simple unwrapped plane. Its material is fully procedural, no textures are used.

The Average node is applied to the UV data to obtain a radial gradient (1) with its center in the middle of the plane. We are already familiar with the further procedures. Two transformations result in two masks (2 and 3) of different sizes. Subtracting one from the other gives the visual ring (4). The transparency mask (6) is tweaked and passed to the material alpha channel. Another mask is derived after squeezing the ring a bit (5). It is painted in two colors (7) and passed to the Color socket.
Conclusion
At this stage the gameplay content is ready. After merging it with the programming part described in the previous article of this series we may enjoy the rich world packed with adventure!
Link to the standalone application
The source files of the models are part of the free Blend4Web SDK distribution.
Changelog
[2014-07-18] Initial release.
[2014-07-22] Path to the application changed.